Friday, December 29, 2006

Glove Final Release

James McKay has released the final (for now) release version of the awesome Glove game for the CoCo and Dragon machines. Glove is a Gauntlet-style game for the 32K CoCo 1/2/3/Dragon 32. Okay, he didn't quite hit the 4 or 16K targets, but who cares! The game rocks. Grab it (and read it's development history) here:


Minigame.


Angel's Luck,

Capt.


powered by performancing firefox

Monday, December 25, 2006

Holiday Survey Results

Completely forgot to post the results of this! :/ Before getting to the results, allow me to point out that future polls will be conducted on the CoCo Hut Message Board, not on the website itself. Hey, anything to make my life easier, right? :P


Okay, so this latest survey asked:


"What Color Computer related gift items would you like to see in the CoCo Hut gift shop?"


The results:


More T-Shirt Designs: 28.6%

A CoCo Journal: 28.6%

CoCo Buttons Stickers: 14.3%

A CoCo Mouse Pad: 14.3%

CoCo Underwear: 14.3%

CoCo Postage Stamps:0%

A CoCo Hat: 0%


More T-Shirt designs went up earlier, including the most requested, a large image of CoCo Man. I really want to do more, but so far ordering, while nice, hasn't been strong enough or regular enough to warrant paying the subscription fee to CafePress professional. Maybe I'll just break down and do it, do a bunch of different designs and see if sales pick up enough to justify the costs. Gotta spend money to make money, right?


(All the proceeds from sales of this stuff goes to paying the web site bill, by the way. If there's any extra, and so far there hasn't been, I'll probably just buy more CoCo stuff. heh!)


I also added a mouse pad, but it's the CoCo Hut logo. Eventually I'll do something more CoCoish. And underwear? Underwear??? Okay. I can do that. You want boxers or thongs?


A journal is actual in progress, but is a MAJOR pain to get right. You'll understand when you see it. Should be neat though, but don't expect it for awhile. I'm working on it in between things. I will plug the coffee mug here. Very cool. Enjoy mine tremendously. Only sold three so far, but it's well worth it. All the CafePress stuff has, thus far, been very nice.


The other thing I got several request for was a CoCo calendar. Unfortunately, couldn't compile enough CoCo images to get the job done. sigh. I'll keep taking picture this year and see if I can get enough together to do a 2008 calendar. i can do that, right? Right.


Second question was:


"If there was one thing that would have your CoCo grinning like an 8-bit fool this holiday season, what would it be?"


A Cool New Game 28.6%

More Memory 28.6%

The Superboard! :) 28.6%

Mass Storage 14.3%

A New OS 0%


More memory is easy. Go to Cloud-9 and get it while the getting's good (no telling how many are left, or when more will be made!). Do it. It's an easy upgrade, takes about 15 to 20 minutes, and you're way better off. A cool new game, well, hopefully in 2007 we'll see some of the many game projects going on at the moment finish up. In the meantime, pop over and snag the Sierra Games Mr. Major converted for the CoCo. Something to use that new memory on! And, of course, the Superboard would be nice, but it sure sounds like it's going to be worth the wait.


So there ya go. One more survey down! :)


Angel's Luck,

Capt.


powered by performancing firefox

CoCo TV DVD Slightly Delayed

Roger Taylor announced a few days ago that disk 1 of the new CoCo TV DVD, with all the CoCo goodies on DVD for your viewing enjoyment, has been slightly delayed. Mainly to do with adding stuff and quality issues. Hey, sounds great and what's a little delay between CoCoists. :) It should ship shortly after Christmas. The DVD set can be ordered at:


www.coco3.com


Angel's Luck,

Capt.


powered by performancing firefox

Merry Christmas and a Happy New Year!

A quick post, amidst the holiday hustle and bustle, to wish all my fellow CoCoists a joyous holidays, a Merry Christmas, and very Happy New Year! I hope your holidays were great and full of CoCo Goodness. And here's hoping that 2007 bring many more happy CoCo moments!

Angel's Luck & Electric Dreams,
Capt.

Tuesday, December 19, 2006

Why the CoCo Needs a USB Connection

Okay, not CoCo related and technically there are probably a lot better reasons, but I know this sure made my wishlist. :)


USB Missile Launcher, 782, Dream Cheeky at Cyberguys.com


heh.


Angel's Luck,

Capt


powered by performancing firefox

Roger Taylor posts site for Annual CoCo Fest

Roger Taylor, of coco3.com, has created a place holder site for future announcements for the "Last Annual CoCoFest" in Chicago. (Really need a new name for that.) The site is empty at the moment, but bookmark it now and stay tuned.

http://www.annualcocofest.com/


Angel's Luck,
Capt


powered by performancing firefox

Wednesday, December 13, 2006

News: Rogue stuff on Boyle's Games Site

L. Curtis Boyle has updated the Tandy (TRS-80) Color Computer Games web site several times recently, that I failed to report. The most recent update (on the 11th) included the shots and descriptions for OS-9 L2 Rogue from Epyx. He also added an alternate font for the game and a text file that describes how to hack the game to enable the cheat modes among other things.


Rogue


Angel's Luck,

Capt.


powered by performancing firefox

News: Cloud-9 Tech's Christmas Special!

Been trying to post this for a few days... sigh...

The super guys at Cloud-9 Tech are offering a special Christmas present to CoCoists everywhere in the form of a super sale!

Need a SCSI controller? The TC^3 with HBD-DOS, SuperDriver (for CD-ROM access), and NitrOS-9 combo is a steal! $150 with the clock, $135 without. :)

How about adding a Hitachi 6309? They got 'em for the rock bottom price of $25.00. As low as $18.00 if you buy 3!

They're also offering up their CompactFlash CE Apapter for IDE interfaces for a mere $15!

Serious goodness, but the sale only lasts until Dec. 20th. Get 'em while the gettin's good!


www.cloud9tech.com

Angel's Luck,
Capt.

Tuesday, December 05, 2006

News: OS-9 User's Forum

BrizaOS9 has a great new forum with a CoCo related board here:


Index :: The OS9USER'S


Covers a wide range of topics including "What's New In The CoCo." Jump on in and join the fun. :)


Also... (spoiler warning), Briza will be joining us shortly in The CoCo Collector to provide his take on vintage CoCo games and, of course, anything else that pops up worth commenting on! Stay tuned!


The CoCo Collector


Angel's Luck,

Capt.


powered by performancing firefox

Sunday, December 03, 2006

Comment: Happy Birthday!

December 6th will mark the official one year anniversary of the CoCo Hut blog! Woo hoo! (I don't count the first two posts in November. heh.) Many thanks to everyone who pops in here and reads. And a special thanks as well to all who have posted!

Don't forget to pop by the companion website, blog, and message boards at:


Capt's CoCo Hut http://coco.clubltdstudios.com
The CoCo Collector http://cococollect.blogspot.com
The CoCo Hut Message Board http://www.clubltdstudios.com/phbBB/index.php

2007 should be a great year at the Hut. There's a major revision of the site coming in the Spring (I hope... it's been tricky putting it together.) Maybe a preview here soon after the holidays. ;) I'll hopefully finish off the CoCo mod project and get another started.

And of course, I'm looking forward to seeing and hearing about everyone else's projects. I can't recommend enough the blogging thing if you're going to try it. It's a great way to share your experiences with all CoCoists. Sharing that stuff is important. If there's one thing the CoCo has a long tradition of, even more than any other machine, is helpful folks helping other helpful folks. That's a lot of help.

I think it's time to start up something specifically for the beginners and intermediate CoCoists who might be a little intimidated to jump on in sometimes. I get email about that frequently. So, that's another thing on the agenda for the next year... though I haven't quite gotten much of an idea on how to go about it. We'll keep at it and come up with something fun. :)

For the CoCo, 2007 should be an amazing year as well! We'll keep our fingers crossed that the Superboard from Cloud-9 will be done. However long it takes, I'm certain it'll be well worth the wait. Mark and Boisey of Cloud-9 make some of the most wicked CoCo stuff out there. Highly recommended.

We'll also, if all goes well, see the release of the Rainbow on Disk project. This project will collect every single issue of The Rainbow magazine from Falsoft into an easy to search DVD format. With all the ads, articles, one-liners, helpful tips and other goodies! The boon for researching alone will be enormous. And when you get stuck on something, the answer from the experts of yore will be a mere search box away. Yeah, I may be more excited about this than anything else!

Don't forget the Asimov awards over on YACCS. You could win a cash prize for your programing efforts! Just don't forget that the deadline is January 31st, 2007! Get to coding! (And yes, my entry is almost done... well, mostly almost... heh.)

Of course, there's also the CoCo DVD from Roger Taylor coming up, and don't forget the CoCo Nutz! newsletter over at coco3.com. Can't rave enough about the stuff you can order from Roger. I'm STILL plowing through the massive CoCo Collection CD I got from him. It's a bargain and twice the price (now go order it before he raises the price!). :)

There's plenty of exciting things going on for the CoCo. I'm hoping 2007 will welcome many more new and returning CoCoists to our midsts. Hey, the CoCo hut is one year old. There's no party, but raise a beer (a pint, a brew, a wine cooler, or what have ya) and give a cheer! Here's looking forward to many more years to come! :)

Angel's Luck,
Capt

Sunday, November 26, 2006

News: Cloud-9 Updated

Cloud-9 is now accepting orders for in-stock items only. They have been for awhile, but I got a couple of emails asking how I got stuff from Cloud-9. Well, there ya go. :) The front web page explains what's available, which at the time of this writing, is just about everything. Limited availability, of course. Get it while it's hot.

Angel's Luck,
Capt

powered by performancing firefox

Comment: Still Pimpin' the CoCo and other fun stuff

Posting became a pain over the last few weeks as work intensified. So CoCo time was spent actually with the CoCo instead of writing about the CoCo. :) Even then, there was precious little.

I also switched to Performancing blog add-on for Firefox for creating blog entries. This little tools has tracking metric, so that I can see how many people are visiting the blogs, what day they're visiting most and if they're looking at posts and/or posting. Much nicer. It's also open right there in the browser, so I can browse and type at the same time. Unfortunately, it also has a few foibles, like no safety saves and such. (Says it does, but if it does, there's no way to recover the save.)

There hasn't been a whole lot of news to post. At least, not news that's been emailed to me. I haven't made the rounds myself in a couple of weeks. I've also started using Thunderbird, the Mozilla email reader. It has adaptive email filters and spam catchers that I haven't fully trained yet, so if anyone has sent email and not gotten a response, please post here and let me know! I'll add your email address and make sure they'll get through.

On to the CoCo projects...

I really wanna do a holiday CoCo program, but can't come up with something I could do quick enough. Arg! I'll keep working on it, but would love to hear if anyone else is doing, or has done, something. Here's the ones I've considered:

A Christmas present version of "Bejeweled." Fun!
Something to do with putting ornaments on a tree. Not sure on that one.
A Christmas Wargame. No seriously. :)

I got a nice little order from Cloud-9 including a 512K memory upgrade and a Drivewire package. Can't wait to try 'em. But I'm going to be patient. I am. No, really. So, after the holidays I'll hook 'em up and give a full report. Until then I shall resist the urge...

The CoCo mod project has only made marginal progress. Every time I get one thing done, two other things pop up that require a different direction. Heh. That's the fun part of working without instructions, though. And the experience is providing loads of practical experience, from knowing the CoCo's board way more thoroughly to the constraints and considerations of modifying and adding to the case.

For example, inside the top of the CoCo's case are all these molded plastic supports and guides. Half of them don't really serve any purpose. I'll detail these in more detail some other time, but needless to say, whacking 'em out of there is quite entertaining. Had to make some room and, with the help of Mr. Dremel make room I did.

Another consideration... I decided to switch to SIMMs for the memory, using the Cloud-9 upgrade, instead of using the old PBJ upgrade I had. The latter makes the machine run incredibly hot. I figured the lower temp SIMMs with the 6309 would make it run cool enough to live without a fan, right?

Well, great in theory. However, the Cloud-9 512K upgrade is oriented vertically. The PBJ upgrade is oriented horizontally. The Cloud-9 product blocks where the light bar goes. Never occurred to me that such a thing would be an issue until I'd already installed the lights and THEN purchased the memory upgrade. So I would either have to go sans light bar, or sans memory. Since I'd already made the modifications to add the light bar (and it looks freakin' SWEEEET!), it's back to the flat PBJ upgrade and a fan.

In addition, the SIMMs stick up and basically cut the CoCo in half and restrict the airflow through the case, particularly if you wish to add the fan on the left side of the case (where the power transformer was). So at least two fans are required to cool the case properly, one on the left side and one vent fan on top or out the back (30-40mm fans fit great, by the way). Which was the original design, but I'd already started mod'ing sans fans.

Another misstep example: I bought an old 220W AT/XT supply because it a) had the voltage labels on it (the modern 350W one doesn't and let's face it, me guessing at which wire does what is a BAD idea) and b) had more of the types of molex connectors I could use. Also, the instructions I have were written for this type of PS. Well, great, but the fan I ordered has the PC motherboard power connector, not the older molex connector. So... I either needs to clip that off and add a molex connector (which I'll have to order), or use a fan plug conversion kit (which I would also have to order). I have to order some molex connector supplies anyhow. And the fun continues...

So now we've got a really hot CoCo and the older memory module that we're going to cool with a single intake fan and the original vents. On the plus side, the SIMM upgrade can pop into my current working CoCo (which is still at 128K) and I can start enjoying the benefits right away. Waa hoo!)

Now some folks reading this may think this is more of a pain is ass than is worth it. But honestly, this is the fun part. After it's built, painted, pimped up and running well with matching drives, MPI and flat panel... well... I'll probably stare at it a few days, take some pictures, and then sell it on eBay to get money for the next project. heh :)

Angel's Luck,
Capt.

powered by performancing firefox

Tuesday, November 14, 2006

Comment: Fun stuff and a test

I ordered up all sorts of stuff for the CoCo that I probably shouldn't have ordered, so hopefully the Pimp My CoCo project will get some progress here shortly. Waa Hoo! This post, though, is really just a test of PerFormancing blog add-on for Firefox. This might make doing CoCo Collector stuff easier as well. :) So far so cool! (Did I mention how much I love the new Firefox. Oh, well, I do.)


Angel's Luck,

Capt


powered by performancing firefox

Thursday, November 09, 2006

Comment: Late Night Bits

Nothing too much CoCoish to report, but felt the need to post something. Actually, I'm having so much fun with the Firefox 2.0 that I've been on the web all night playing with it. I've changed themes about 10 times. And my bookmarks file has doubled in size (have to trim that down... I hate big bookmark files). If you haven't yet (and most of you haven't... remember I can see your browser... bwahahaha!), pop over there and give it a try: www.mozilla.org. I didn't get into the browser wars back in the 90s, and I ain't doin' it now. I'm just saying that Firefox is a supremely sublime browsing experience. Two enthusiastic thumbs up! Fine holiday fun!

As mentioned previously, Mary has posted the newest CoCo Nutz! E-Zine over at coco3.com. If you haven't already, hop on over and get it. Loads of fun! There's also some chatter on the CoCoNutz! message board about doing a holiday issue. What's needed is stuff to put in it! I'm thinking the least everyone could do would be submit one of those old style CoCo screen greetings cards. You know, that displays a holiday scene/message or animation in BASIC with a little cheery tune, or something. Make it an informal (gentleman/lady's) contest to see who can come up with the best one. :)

Of course, there's plenty of time to whip up some mini-games, write review, or do a quick tech article on a particular CoCo subject. What a perfect gift to give to your fellow CoCoists! And it's cheap, too! :)

Speaking of perfect gifts... heh... I also updated the stuff in the CoCo Hut Gift Shop. After several requests, I've done a CoCo Man t-shirt design. It's available in the good cheap seat T-shirt, hooded sweat shirt, and several other apparel items. It's basic and the image is as big as CafePress will allow. Also, by request, I used the CoCo 3 red, green, blue "slashes" instead of the dashes from the CoCo 1/2. The other item is the "Official CoCo Hut Logo Wear" design. It's available on the organic T-shirt, the Women's Tank, and a mouse pad. Fun stuff. Additional items are coming. The proceeds (about a dollar or two per item) go to paying the website bill.

One of the items I'd like to do, but have yet to pull off, is a 2007 CoCo calendar. I'm just not much of a photographer. I've got a couple of nice shots, but the rest have been crap. I want it to be big, full bleed images of CoCo's (and CoCo stuff) in seasonal, or relevant, settings. Kind of a CoCo pin-up calendar. :) So, now I'm going to solicit images from folks. If you have, or can take, some cool CoCo pictures, send 'em along. I can't promise to use all of 'em, but I'll try to use the one's that fit best. (And we'll probably find a use for any others, as well.) Images should be as big as possible. The calendar page is 9x11.5 inches, or 1800x2300 pixels, at 200dpi. Upgrading images smaller than that is dicey, but I can always add a border if that's too big. That size, or larger, is ideal though. If you'd like to send something, email 'em this way (captcpu@clubltdstudios.com). Can't pay for 'em, but I'll stick a credit in there for ya and get you a calendar at the shopkeeper's price. :)

Let's see, what else... I added and activated the Atom feeds for readers capable of using that format. Firefox can read these easily by default and can subscribe via several readers. I've never had much luck with RSS or Atom feeds from Blogger. They never update frequently enough. But if you're inclined, there it is. :)

CoCo projects continue to plod along. Finished up a cute mini-game for Halloween and then realized I couldn't get it out of my CoCo and into the PC without retyping the whole damn thing in again. Sheesh! So, first, I popped open the PC, ready to install a 5 1/4" drive in it. Then realized I didn't have the right cable. Then realized I forgot to order the right plugs, so I couldn't make a cable. Dammit. So then I broke down and ordered a DriveWire from Cloud 9. That should fix it up. So, hopefully, I'll be able to port CoCo stuff over to the PC soon. Hooray for our side!

Anyhow, still trying to dream up a good mini-game for the holiday season. I'll sit down this weekend and start pounding away at it. I love, and encourage everyone, to do that. I know it's frowned upon in serious programing circles, but constructing a program (or one liner, or anything else) right out of your head is a blast. And ECB let's you do it, no questions asked, and as dirt simple as possible. No you're probably not going to write brilliant code. And yes, it could probably come out a lot better with thorough planing. But what fun would that be? :D

The CoCo mod project is coming along. Finally ordered up the lights. Also acquiring a different power supply, an older 200W AT/XT style that doesn't have a bunch of crap on it that I don't need. Should make that bit a little easier. I also ordered up a 512K SIM upgrade from Cloud-9. I figured since I was ordering anyway, might as well. Haven't heard back yet if they are in stock, so keep your fingers crossed. (If not, I'll stick with PBJ 512K I already have.) Ran out of paint while doing the keyboard, so I have to get some more, and a color print cartridge for the ol' inkjet for making decals. I can buy a new freakin' printer for the cost of the cartridges, though! Geez! Is that a great scam or what?

On the collector side of things, I've been pretty sedate lately. Several huge items I had to let go due to finances. But... then Tony put up that Microneye and, well, how am I suppose to resist something like that? eh? Well, I can't, that's how. Some people's children, eh? :) (By the way, Tony is still posting some of his super rare stuff in the TRS-80 listings... jump on there and get 'em. eBay id: sharkonwheels.) I'm hoping we'll see some really great stuff posted. Now that I can buy again, I plan to go in swinging! Hope y'all will join the fun!

Angel's Luck,
Capt.

Monday, November 06, 2006

News: New CoCo Nutz! E-Zine Available

Editor and super CoCoist Mary Kramer has released Volume 2, Issue 3 of the CoCo Nutz! E-Zine, now available at:

http://www.coco3.com/ind_coconutz.php


This issue includes interviews with Brian Palmer (none other than Briza!), and David Dubowski of Classic Computing fame. The interview with Brian is a great look at the Aussie CoCo scene and some insight into the miriad of projects he has going on. His archiving of CoCo software alone probably qualifies him as the hardest working man in CoCo-land. :) David's interview takes us back to the 80s and the beginning of the CoCo boom and the heyday of The Rainbow, and what it was like to produce software back then. And I promise I'll get his amazing voice sythesizer program, Speak Up!, up and available for download ASAP. ;)

Also included is a facinating article on floating point numbers and the madlebrot set by CoCo guru Robert Gault, a flashback report on the last CoCoFest by Richard Crislip, a neat tic-tac-toe program in BASIC by Dale Kramer (former editor of CoCo Friends Disk Magazine and Mary's father), another great BASIC09 tutorial by Bob Devries, another swipe at David Kelly's Wipeout technique by Mark McDougall, and topped off with a handy backup utility for the 512K CoCo 3 by Robert Gault and ... whew... it's a heck of an issue! Throw in some one liners, pictures (there's one of Briza kicking back on the porch... hey, save a spot for me amigo!), and screen shots and this E-Zine just keeps getting better and better!

Kudos to Mary and all the contributors for another great issue. And anyone reading this, get working on stuff for the holiday issue.... it's a short deadline, so hop to it! :)

Angel's Luck,
Capt

Saturday, November 04, 2006

Pimp My CoCo: Horray! A little progress...

Finally got an hour or so to work on the CoCo again. Hooray for our side. So, since it's been going slow, figured I'd post an update. Sorry, no blood, gore, or burned body parts this time. I'll try harder... :P

(Click 'em for the bigguns)

Okay, after a bit of clean up, here's what we've got so far. Top half of the case is about done. Just needs some sanding (see below) a good scrubbing and paint. The keyboard was pretty easy and looks downright wicked. Solid black. Real men don't need letters on their keys. Grunt, grunt, grunt. heh... Actually, at some point we'll do decals on them. Probably a dark, hard to see grey. Yeah.

Still studying on the power suppply. No idea how this is going to work. The one sitting there I got on sale at newegg.com and it doesn't have one of those little switches on the back. Not sure how that works. I'm assuming I'll have to locate the lines that hook up to the power button (via the mainboard) on a PC and wire a switch to it. I do have this cool retro metal SPST flip switch that would go nicely. Still, my track record with eletricity, particularly anything that plugs into the wall, is spotty... at best.

The mainboard will be different one than the one I'm working on. I figure I'll have another go at socketing it for upgrade at some point, but for now, I really want to get the machine up and running with all the goodies installed.

The fan is out, for the moment, but it IS going in. A single fan relocated to the left hand side and blowing across the board. Since I've run out of time for the top windows, I'll just leave the grill. I still have another case, so we'll do the big top fan on that one in the Spring. All ready dreaming the paint scheme for that one (two tone, this time) but... let's not get ahead of ourselves... any further ahead, that is.

There's a shot of "casebadge" window, by the way. I still haven't figured out how to put the plexiglass in there without making a mess with glue, but I've got a couple of ideas. Directly beneath that will be a wave light bar in green. Makes it look like some evil green liquid is running through the case (I've used the blue and red versions before on PCs and they're freakin' awesome). Plus a couple of other surprises to make up for dropping a few of the other original plans. ;)

This is the best shot I could get of the keyboard. Heavily edited, but that's pretty close to what it looks like. Though not quite as shiney under normal lighting. Have to note that when I take pictures of the finished machine. No flash. Use big lights.

I really like the way this one is shaping up. True it may be Spring before it's completely finished, though part of that is fundage. Something about buying gifts for the holiday, or something. Sheesh! What greater gift could there be than a hot new CoCo! Kids love 'em! Sorta....

Okay, so tips. One, as the thermometer shows, it's getting pretty darn close to the cutoff point for model work in the outside lab. Paint and glue start getting freaky at about 60F and worthless below 50F. That's the high today, though this week we're s'pose to stay right around there, so I'll be craming in as much as I can.

The Krylon Fusion paint, at this temp (and negligible humidity), took about an hour to set up. That's opposed to 15 minutes normally. Milliput is also acting much slower, though when filling those holes I gouged in the case, I did place it under a lamp to speed it up a bit. I know I go on about temperature and humidity a lot, but... well, I paint a lot. A clean spot and the right weather is pretty much essential for a perfect paint job.

Also, get some of those smaller, but really deep, C-clamps and a nice 12" metal straight edge. The clamp heads shouldn't be more than 3/8ths, with a jam opening at least 2" and about 2"-3" depth. I cut the hole a little bit bigger than the original case badge, at 5"x1/2". Some of the oversized sanding pads for the Dremel tool are handy, too, which makes it easier to get in there (without routing holes in the case by accident like I did). The case is 1/8th of an inch thick. The CoCo 3's front is curved and clamping a straightedge on to sand in a straight line is a bitch. The right clamps will make it much easier.

While I'm at it, thought I'd take a mini-tour of the lab. Well, not so much because it's a mess, but...

Every Spring I clean this thing out and it's spotless and beautifully organized. And by fall there's crap all over the place. Looks like day five of a geek convention (but not as smelly, thank God). So I tried to clean up a bit today, but didn't get too far.

Good power is essential, but household power is just so-so. Actually, where I live, it's been rock solid. No brownouts and only a couple of blackouts during really bad storms. And then only for a couple of minutes. This box is a deluxe industrial breaker that'll stop just about anything. I hate it when things catch on fire, so best to get the best. :D I find all sorts of crap when I'm out and about and it kind of accumulates on the walls. Hmmm... looking at the picture, I forgot to reset that one for the end of daylight savings. Doah. The plaque was given to me by my grandmother, I didn't buy that myself. Sheesh.

Ah, the Evil Lab Men's Room. (Side door to the garage.) Hey, when you gotta go...

The sign I picked up in New Orleans awhile back. Never hurts to warn visitors of the perils they may face.

Recent aquisitions include a giant pirate flag and a Pirates of the Carribean display from the store. Have to hang those soon.


Big pile o' CoCos. There's an Atari 800XL in there as well. Good machine. It's no CoCo, mind you, but some cool games for it. And no, none of the collectible stuff is in this pile. Collectible stuff goes in big rubber bins and is stored indoors. :)

Let's see, there's a busted grey multipak. That 26-3022 disk drive doesn't seem to want to spin up. Ah, and the Tano Dragon is in there. No power supply for it, though, so I've never even fired it up. Have to figure that out at some point.


Part of the model/miniature work shop. What a mess. The B-17 model (The Bit O' Lace) goes in the bottom of a PC case I'm working on. Seriously. A whole B-17 theme going on that one, including a round see-through panel on one side and a big nose art pin-up on the other. Should be fun looking when it's done.

All those paints have to go inside before winter. And I see a nice batch of Games Workshop Space Marines that need finishing off. That vice in the center, by the way, is the ingenius and can't-live-without Panavise. For working on just about anything fairly small. Holds miniatures, models and circuit boards, and you can twist and turn it to any position. Literally. Truely one of the most necessary tools I have.

I'll take a bigger shot of the lab and a better tour in the spring when it's actually presentable. :)

Angel's Luck,
Capt.

Monday, October 30, 2006

Comment: Halloween Vacation

Work. Work. Work.

All work and no CoCo makes Capt. a dull boy.

Ahhh. Vacation.


CoCo fun commences tomorrow. :) Until then...

HAPPY HALLOWEEN!

Saturday, October 21, 2006

Comment: CoCoing and Sleeping

Well, I said I was going to post the rest of that last post "next week" and still haven't gotten more than 20 minutes, in ten minute intervals, with that case. And all the while the temperature here in Okie-land is dropping daily, and the External Evil Lab (Bay 16-A-441) isn't heated. So may have to cut back the ambitions. The goal at this point is to

1. Mod the CoCo board (the other one) to the PC power supply. Not sure if I can pull this off, but I'm told it's fairly straight foward.

2. Get the light kit installed.

3. Finish the case, or at least what can be done in time.

That means I might have to drop immediate plans to upgrade the processor and install fans. Which is no real problem since that can be done in the Evil Lab Internal Division (Suite 44A). So we're good. The hold up at the moment is fundage to aquire the light kit and fans. Two more weeks... just two more weeks. :) The real challange comes from the timing on the case. If the temperature drops below 60F for the season, it's bye bye to the painting. (Acutally, you can paint down to 50F but it sucks, takes forever, and the colder it is, the dicer the results.) So, the top of the case must be painted, regardless of where the mods are, by that time.

I've got the first cut out just about done. I bit more light sanding and some filler bits and it'll be complete. Kind of a perfectionist on that sort of thing. Seriously, if I could get a whole afternoon on it, it'd be done. Anyone got one? :P

What else... Ah, been searching for one liners for the Mary's newsletter which inspired me to sit and try my hand at some of my own. Very BASIC stuff. Silly really, but it's an interesting mental excercise trying to get it to work right.

Also played with POKE 282, which will inverse the video, like hitting SHIFT-0. Okay, cool... but, um, why? Well, I sorta found a use for it, but what it really led to was an inverse video input routine for accepting program input when you want a black background. The default INPUT command, of course, makes a green background mess all over the place. Still some work and error catching to do on it, and it doesn't backspace yet, but it might come in handy at some point.

Which brings us back to POKE 282 (0 for regular video, 1 for inverse). There might not be any use for it. But screwing around with something long enough often leads to something else, which DOES turn out to be useful. I recommend sitting down and whacking away at something assinine on your CoCo as often as you can. It's good for you. :)

Now I've got to go get some of the sleep stuff. Someone needs to up the supply of that as well.

Angel's Luck,
Capt.

Wednesday, October 11, 2006

Pimp My CoCo: Let's Make A Mess!

I really hoped to finish up on this today, but I ended up having to work. Hell month. Sucks. If there are any booksellers out there that need a job, give me a hollar. ;) Anyhow, I'll post this part of it now, and the second part next week when I get a chance to finish up this phase.

First, that paint I mentioned before, Krylon Fusion, rocks. It rocks hard. Serious rockage. Here's a picture (forgot to take more of the finished job, but plenty coming soon enough) of one coat on the bottom of the case as a test. Note that I didn't put in a lot of effort to clean up the bottom of the case. Just peeled the stickers off, and scrubbed it down. Not gonna look at the bottom much anyway. heh... More care will be required for the top.

Anyhow, the paint coats quickly and really does bond with plastic. No primer requried! Very swooth and very sweet. If you enlarge this picture and look close, you can make out the RGB connector label, which is molded into the case, clear as day. After three coats and a little drying time, it really looks like it was molded in black plastic originally. Coolness. :) I'll go over painting techniques in a future post when we do the top, but if you've ever used spray paint, you're good. Really doesn't get any easier than this and it's WAY cheaper than auto body paint, but WAY nicer than standard spray on paints.

Making a mess is one of the fun parts of building something, and cutting and modifying plastic always makes a nice mess! :) The plastic in the CoCo's case isn't terribly thick, but it's too thick to cut with your average hobby knife. Actually, you can but it makes an even bigger mess and it'll take forever. And since we're all about More Power, let's see what happens when we attack it with a Demel Tool! Bwahahha!

We'll be using a standard cut off wheel, and I recommend the lowest speed setting on the tool. It jumps like a mother. As always, use all manufactuer recommended safetry procautions and equipment, particularly protective eyewear. Hot plastic in the eye is one injury even I won't hazard. ;)

Sure enough, makes a HELLUVA mess. That garbage shred on top is actually melted plastic. Apparently taking a cutting wheel spinning at 10,000 rpm to your CoCo case will do that. Go figure. :) Okay, seriously, this is a good thing. That the plastic melts when heated means it can easily be molded, cut and shaped. It would be a Bad Thing if it was more heat resistant.

You'll also notice the dimple I cut below the faceplate area. That's from the Dremel shaft where I tried to angle in to get more material. Stupid of me. So that'll have to be filled in. Drat. For the next cuts I'll be using the Flex shaft attachment, or might even try to clamp it down and use the router attachment and a router bit, which would increase accuracy quite a bit.

Should you try to do this, to save you a bit of experimenting, here's what I learned in about 4 seconds after starting. heh. Frist, you can't cut cross ways in a line. The melting plastic starts to cool and the wheel starts to bind, which causes the tool to skip and jump like Starbuck's junkie on free sample day. Just lay the wheel on the area to cut and let it go straight down (it'll go by itself, don't press!). Lift and repeat. Then, trim off the shredded bits with a hobby knife. To remove the rest of the material (the vertical cuts are too narrow in this case), use the Dremel tool to nibble it away bit by bit. Leave a small amount of material around the cut out area. Don't cut completely to where you want to go. Then use a micro file or sanding wheel to take it down to where you want. You'll get smoother results and will require less of what's next.

Of course, even the Dremel tool isn't going to be highly accurate. You can cut thicker plastics with special knives and tools, but not having any we'll use what we've got. So, next we have to use a filler on the edges of the cut and then sand it down to be nice, neat and straight. I chose Milliput (Standard grain) modeling putty from the U.K. This stuff is easy to mold and shape when wet, but sets up to the hardness of stone. Good strong stuff. More important, it sands easily with a simple flat microfile. It's also designed to use with plastic, so it sticks and you can glue stuff to it with model glues and apoxies.

This is the messy part. Milliput is pretty messy. Get's all over when wet. This picture shows where I've backfilled the cut out area. We want to use more than is necessary, a lot more. We're going to file off most of it, becuase the cut is not terribly smooth and all whacky off kilter. When we sand down the Mulliput, it will form a perfectly smooth and level edge. Promise. :)


Working with Milliput isn't tricky once you know how it's going to act. It dries in phases, and what you do during those phases is important. When you first mix it (it's a two part mix) it's pliable and sticky. This is great for getting it to stay put in places where some putties might fall out or drip. In this phase, you can also wet it with a little water and smooth it with your finger or sculpting tool. This second picture shows the mulliput smoothed a little bit. My sculpting set it just a set of dental tools. The standard dental set has all the miniature sculpting tools you'll need and is relatively inexpensive.

In the second phase, after about 30 minutes (depends on temprature, but you can tell by poking it with your finger) it turns soft and rubbery. Kind of like taffy. It can now be cut with a hobby knife or razor for trimming off excess. You can also use a pick or sculting tool to poke holes or etch grooves in it.

The third phase, after about a day, the stuff turns pretty hard. About like porcelin. This is the time to sand it down if there's any light sanding to do. If you're dealing with a large piece, it can also be scored and broken at this point. You can do low impact/speed micro drilling in this phase as well.

Finally, after about three to seven days (again, depends on humidity and temperture), Mulliput turns rock hard. Once it's set up this hard, you can cut it with a cut off wheel or saw, and do heavy duty sanding on it. After a week or so, it's like working with stone. You can accelerate to all of these phases by heating it with a lamp or other moderate heat source.

This final picture shows some of the tools used. In model making, this is what we call the "Ass Point." The point where the thing just looks like complete ass. This is where a lot of people give up because it's hard to see the finished project through the huge messy crap we've just spent a couple of hours making. No worries. Having been here many times before (some days I live in the ass point), I swere it'll work out. ;) When it's done, it'll look like it came from the factory that way. In the next step we'll attach a straght-edge to the case and position it as a fence to sand a nice straight and smooth edge around the cut out. We'll be using a micro file to sand down the edge by hand. More work, but a much nicer result.

When I cut the "big" windows, I'm going to try to get a finished cut right from the start. Haven't figured out how to do that yet, but I'm sure I'll come up with something. Also need an easier way to make smaller cuts in the case. I'm thinking the plunge router attachment on the Dremel tool and possibly a template is the best way, so we'll try that next. One of the points of this excercise it to experiment with techniques, and it certainly appears some experimentation is going to be required.

I did change the cut out design after I settled on a light kit. The light kit has a groovy green bar that'll fit under the CoCo 3 case badge that I've cut out. Since the power supply will be externalized, all the converters and other bits to power the lights (and anything else we can cram in there) will fit nicely in the power transformer's old spot. I can't promise I can afford it, but I'm going to see about getting the entire face plate copied to an etching for the plexiglass insert that will go in there. Would be very cool, but potentially cost prohibitive. We'll see.

Angel's Luck,
Capt.

Wednesday, October 04, 2006

Pimp My CoCo: Death of a 6809, A New Paint, and Look Design

October is a tough month in the book business (my regular line of work), mainly because there's a lot of holiday prep, no workers, and everyone has to scramble to take vacation at the last minute before the blackout cut off. Fun. So, working on the CoCo is tough, but at least I get a little vacation in November to finish everything off and get it up and running. :)

In the meantime, I did manage to get a little planning done. Digital cameras and photoshop have made building much easier. Sure you can still detail diagram out modifications and designs, and for intricate or complex stuff that's definately the way to go. On the other hand, if you just plan to slap on some paint and cut a few holes, crude overlays in Photoshop work great. This is the initial plan for cutting up the CoCo case.

Two small rectanglular windows on top will bookend an outtake fan in the center. This fan will blow straight up, pulling air out. The second fan will go on the left and be an intake. Cool air in, hot air out This is probably a lot more than is necessary, but I decided not to cut vent holes into the windows (for now), so an outtake fan is a good idea. Plus it'll look cool. :)

The CoCo 3's case is beveled at the top, limiting the window space. We should still get a decent look at the board, but not nearly as much as I'd like. While the flexible plexi I'll be using could be forced into a concave shape, it'd be a bitch to anchor. So for this first time out with the CoCo case, I'll be keeping it to simple flat, square windows. On Random Rodder's suggestion, I'll be gluing the windows into place, thus we won't have any edging eating up viewable room. The thin plastics we'll be working with here make that pretty easy. Haven't decided on the glue/epoxy mix yet.

More than likely, I'll use a single cold cathode light bar instead of an LED array to light the interior. Even with the small windows, it should "glow" nicely. The three slashes are a bit trickier. Cutting them into the CoCo's case may be difficult if I keep them the same size as they were originally on the case badge. Too thick to do accurately with a hobby knife, too small to take a dremel to. Burning them out with a heat knife would work, but would be messy and difficult to control. On the other hand, nothing says I can't make 'em bigger. Those will light up with red, green and blue LEDs on a small PCB and be sperated with dividers glued to the underside of the case. (By the way, blue LEDs are freakin' expensive!)

The decal is obviously just a place holder, but something like that. Easily done on an inkjet with Photoshop and some decal paper.

I've been looking forward to trying this new paint from Krylon called Fusion but haven't had an opportunity. Well, I'd planned to use autobody touch up paint, but for about $5.00 this is worth a try and considerably cheaper. I love experimenting with new materials and stuff. :) They also have a new H2O brand of acrylic spray on paint. My prefered medium by far. Acrylic is smooth and super tough when dry. For the CoCo's case, though, we'll try the Fusion because it is suppose to bond with the plastic, making it tough and smooth. We'll see, but can't wait to have a go. I chose black satin for the case. The key's will be the same, but will require several top coats after the decals are applied. Painting and putting itty-bitty decals on all the keys should be challenging. (Behind there you can see the plexi I'll be using for the windows and off to the left, nestled in the case is the PBJ 512K upgrade. If I switch boards I'll have to figure out how to do this upgrade to the new one. Yipes!)

Here's a picture of the 6809 socket. No chip to go in it yet, but soon we'll be able to wire it up and give it a try it. Should look pretty funky with all the wires coming out of it from where I burned the pads off the board. Assuming I get it to work, of course. If not, we'll swap in another board I have and go with the nice, reliable soldered 6809 instead.

Looking at this picture, I also need to get a mat to put down on the work bench. Nice piece of static free carpet or one of those fancy electronics mats or something. Hmmmm.... should have thought of that already.

And sadly, here's a close up of the mangled 68B09EP. Sigh. Poor guy. Tried to save him, but ended up having to cut it out of there. He's been sitting there quietly doing the job for probably close to 20 years and then some bungling dumbass comes along and rips his brains out. Sheesh. We'll save him for posterity, of course. :)

So, next week I'll try to get the templates done and then start chopping up and preping the case. Also need to locate and decide which fans I'll be using. Something already wired and ready to roll from a PC supply would be nice, but Radio Shack does sell these small fans that would work nicely and be much smaller. It'll be slow going over the next two weeks, but once it's preped up, the rest of the case work should be doable in an afternoon. Of course, with the way I hit SNAFUs, I wouldn't count on it. :)

Angel's Luck,
Cris

PS If anyone gets a chance, take a look at this drive and let me know if there's anything more I need to do to it (it's a 1024x768 picture). Briza mentioned a terminator chip, but I don't see anything here that indicates such a beast. This is the top drive, Drive 1 in a two drive system. Many thanks.

Saturday, September 30, 2006

Pimp My CoCo: Microprocessor Report :P

Okay, the HD63B09EP (or "right tricky bastard," as I like to call it) is nearly impossible to get hold of. So, until a source is found, thought I'd hunt for alternatives. Apparently Hitachi built 68B09EPs as well. If you're looking, you might try that part number as well.

Why is this so tricky? Well, Brian (Random_Rodder) could probably explain better, but the deal is that most of these chips are handled by chip dealers. These folks buy, sell, and trade microprocessors in a rather volitile up and down market. To order from these folks, you have to order in bulk. And buying 20 to 50 chips or so at $30.00 a pop, is probably out of most CoCoist's budgets. Even I'm not that crazy. Well, okay if I had the money... ahem...

Having some spare and backup MC68B09EP chips laying about, though, is handy. Particularly if you're going to be mod'ing your CoCo and intend to socket that chip. (I'll get into the other chips needed some other time.)

One problem in searching for these things is that not all suppliers list them the same way. And google is practically worthless for shopping for electronics parts. You'll see it listed as HD63B09EP, 6309, 63B09, 63B09EP, etc. And you have to try them all to get a hit. And most of the time, even if you punch it in precisely, well, it's not indexed, so no luck. I killed Yahoo Site search on the CoCo Hut for precisely this reason. It wouldn't update and it kept holding on to old crap. Anyhoo... try entering MC68B09E into Jameco's site. Doesn't work, even though they sell the chip. Sigh.

Okay, so...

First, hitting eBay works, and in general hit the whole and proper name for the chip. For exemple, searching for MC68B09EP, use the whole thing. EBay has a pretty good matching system, but it is on full words, not partials. So, 68B won't find anything useful most of the time. Common ones I hit are: MC68B09EP, MC68B09E, MC68B09, and then again without the MC in front. Same pattern for the HD68B09EP.

Oh, just in case and to be thorough: MC is Motorola, HD is Hitachi. I don't why. :)

Jameco has MC68B09Es on sale and in stock. The price is more than reasonable, although I have scored several recently on eBay for about $1.99 a piece. Still, can't go wrong with Jameco. Highly reliable in my book.

Radio Shack and Frys were no help at all. (So no link for you guys! ha!)

One seller on eBay has been selling MC and HD 68B09EP's for $9.50 each.

The "E" and "EP" parts, from what I've read so far (and I could be completely wrong), are identical, except that the "EP" has a lower power consumption. Thus I would expect it to run cooler. But from the looks of it, they take the same inputs and give the same outputs. TIFWIW, I'm mostly guessing. As soon as the Es I've ordered arrive, I'll pop one in the CoCo and see what happens. :)

So, is hunting the Hitachi 6309 worth it? Not having tried it yet, and somewhat perturbed about how difficult they are to get, my answer at this point is a definate yes and no. :) And I reserve the right to change my mind on this at any time.

Worth it: If you're like me, you like to tinker and adding "MORE POWER!" (grunt, grunt) is pretty much a compulsion if it's possible to do so. You'll do this even if there is no real reason, or sane reason for that matter, just because you can. If you also enjoy hunting obscure parts (or anything else), the thrill of an auction, the dealing to get what you want, then go for it. It a challanging excercise no matter how you approach it, from aquisition of the actual chip to installing it into the machine. Indeed, I'm not sure I can even do it. But it's fun trying. :)

Not Worth It: On the other hand... If you want to make you CoCo better and make it do more, this isn't it the way. There's VERY little that actually uses the 6309. NitrOS-9, couple of games, maybe a utility or two. Not really anything you can't get with the 6809. The installation process IS as hard as the experts say it is. It IS frought with peril. And if you're not a hardcore electronics hobbyist or professional, you WILL wreck the board. Seriously. Takes some heavy skills to get that 6809 out and socket it.

What we could probably use a bit more off the shelf availability is a memory upgrade. Or add a Speech/Sound Pak. Or pick up one of the RGB-to-VGA or S-Video adapters. Add a PC powersupply and run some fans. Add mass storage (again, more ready made off the shelf solutions would be nice). If you're hardware developing, sound and graphics are great ways to go. Some memory and storage options, a new disk controller, a multipak solution, would be great things to really ramp up the CoCo community. If you're upgrading, these are things that will make your CoCo experience that much more enjoyable.

So thus far, IMHO, FWIW and all those other four letters, upgrading your microprocessor is not a necessary upgrade, nor is it going to be worthwhile for most people. The good ol' MC68B09EP is tried, true and does the job nicely. If you're inclined, go for it. If you're looking for something new to do with your CoCo, you'll have better luck focusing elsewhere.

More on my "Excellent Detroy the Board Adventure" soon. I DID get that !@#$!%!@ing 6809 out. Ha! Got most of the solder pads, too. But I got the chip. Victory is mine! Sorta. :P

Angel's Luck,
Capt

Sunday, September 24, 2006

Comment: Game Survey Results

Okay, been promising to do a tally on the last survey about Color Computer games for a long time and never got around to it. So here goes... :)

This survey asked:

What type of games would you like to see for the Color Computer?

This was one of those mark all that apply questions. Most categories got at least a few votes except Classic Board, Text Adventures, and Sports - Racing. What? No one wants to play Monolopoly on their Coco? Sheesh! :)


This is a little different from the previous survey, where strategy games came out on top. This time, when we got more specific, arcade game won out. Different sample set? Too specific?

Arcade Shooters, like Galaga, Galaxian, Gyrus, Defender, etc., garnered the most votes. I thought about this and thought about this. I mean, it's not like there haven't been a bazillian (at least) clones of most of the main arcade classics done to death on the CoCo. So why do folks want more?

Two things come to mind. First, while they certainly were done aplenty, they aren't plentiful any more. Getting hold of originals is tough and expensive sometimes. Yeah, you can download most arcade games and play them on an emulator. And if you have the patience to go through all the trouble, you can even load 'em into your CoCo from your PC.

However, I really do think that most CoCoists want something easier. I wonder if a group of CoCoist got together, sorted through everything available on line, and started offering them for sale on a 5 1/4" collection disk or two or five, if anyone would care? As long as they weren't making gobs of money off it, even just doing it out of the goodness of their hearts, would it be a copyright violation if the software has already been released for free distribution? I'm not saying someone should load up some disks and start charging twenty bucks a pop for them. But $5.00 to cover materials and copy time plus shipping would certainly be reasonable. And it would get those old CoCo games playing again! Just a thought.

Second, these games are quick and easy. And given the more mature base of users the CoCo currently has, quick and easy is probably important. Most of us don't have the luxury of days and days in front of our CoCos like we did when we were younger. Work, kids, and life in general often trumps CoCo-time. Arcade shooters are quick and easy to load up, play for 10 minutes, have a little quality CoCo time, and then get back to fixing dinner. The appeal is obvious.

That said, though... Adventure/Role Playing games came in a respectable second. And those are usually not sit down and play for ten minute games. Here I think there's a certain nostalgia factor, though. These were often the games that captured player's attention for the longest periods of time. They were an investment in time and computer love. There's certainly no reason why a few clever developers could sit down and design an RPG that COULD be played in smaller increments and still get the larger experience over time, though. Some cool and original Role Playing games would definately be fun on the CoCo.

Pulling in at third were Graphic Adventures and 3D Action games. Graphical adventures would be fun, but require a huge amount of work (hell, text adventures require a huge amount of work). Thus, I'm a big believer that CoCoists are eventually going to have to team up to produce top notch game software. You need someone to direct it, someone to write the plot, someone to code it, someone to do pictures, someone to do animation, someone to do sound, a bunch of someone's to play test and so on. Two or three creative and technical types getting together and having at it could probably come up with something pretty good. As for 3D shooters and such, well, GLOOM showed that it could be done on a CoCo. Here's hoping someone (or someones) pick it up and create some cool games with it. That one example aside though, it amazes me that no one has taken the most successful and, perhaps only, CoCo classic and done it again with say, Nazis, or spacemen, or talking vegetables. Dungeons of Daggorath was a 3D action game long before anyone else did them and it was all done in 16K. Now that's some manly man programing my friends.

Here's how the voting broke down by the end:

17.4% Arcade Shooters - Galaga, Gyrus, Defender
13.0% Arcade Classics - Pac Man, Dig Dug, Rampage
13.0% Adventure - Role Playing Games
08.7% Adventure - Graphical
08.7% Action - 3D
04.3% Simulations - Air Craft
04.3% Simulations - Cars
04.3% Simulations - Miltary
04.3% Simulations - People (the Sims, SimCity)
04.3% Action - Side Scrolling
04.3% Strategy - Turn Based
04.3% Strategy - Real Time
04.3% Puzzle - Action (Tetris, Bejeweled)
04.3% Puzzle - Classic (Crosswords, Su Doku)
00.0% Arcade Sports - Racing
00.0% Adventure - Classic Text
00.0% Classics - Board Games (Chess, Monopoly)

What about the losers? Well, classic board games translate to the computer, but really they're not particularly better than their cardboard and plastic originals. Maybe a Risk-type game with head-to-head capability over a null modem cable would be cool, but that's not really a "classic board game" so much as a simplified war game. As for Arcade Racing, has that ever been done well on the CoCo? I think I've played just about all of them now. There's a couple of decent racers, but none are outstanding. Fun for a bit but that's about it. Car simulations did get a few votes, which would seem to indicate a preference for realism and modeling over high speed action, in this case. Truely for the developer that loves a challange. :) And classic text adventures? I know there are some hardcore fans out there, but honestly, have you actually sat down and played one lately? Fond memories, but I think the majority of the world moved on to bigger and better. Not saying it couldn't be done, just saying it wouldn't be easy to do well and be of widespread interest.

This is, of course, all highly unscientific. Seriously, unscientific. Last thing any of us would want to see is someone developing a game, look at something like this, and go "oh, man, no one would want my game." On the contrary! I'm doing all turn based strategy games, probably for the next few years. It's what I like, it's what I know, it's what I can do well. Also considering a couple of puzzle games and, yes, even a "board game" of my own design for kids. If a couple of people play them and enjoy them, so much the better. We need hundreds of people plugging away on their CoCos producing all the categories above. Who says CoCoists wouldn't go nuts for a well plotted, deeply involved text adventure? I'd buy it! Everything is worthwhile. Do it well, do it right, and get it out there. We'll play it. :)

Of course, that's just my take on it... What say thee?!?

Angel's Luck,
CaptCPU

Wednesday, September 20, 2006

Pimp My CoCo: 40 Track Drives, NitrOS-9, and Near Death Experiences

One of the goals of the current CoCo project is to add 40-track 5 1/4" drives. Actually, the end result should be dual 5 1/4", then switch to a 5 1/4" and 3 1/2", copy everything over to 3 1/2" and then run just 3 1/2" drives. Yeah, I'll add mass storage and back everything up to the PC as well, but 3 1/2" drives and disks are more plentiful and reliable. It'll be easier to maintain. I'll keep a 5 1/4" set up around for copying over old stuff. The other reason is I need something in the PCs to SneakerNet CoCo stuff back and forth until I can afford and have time to install a more elegant solution.


Anyhoo, the present goal is to switch from the 35-track, single sided FD-501s to 40-track duel sided drives. I've been monitoring 5 1/4" drives for months on eBay, and finally scored a nice fat lot of 'em for the bargain basement price of 1 whole dollar. Most excellent.

Most of them don't even have drive latches, but all of them fired up fine. With one problem: The top drive, regardless of which actual drive I stick on there, jumpered Drive 1, won't format a disk in NitrOS-9 and makes Drive Magic do the sit-n-spin. Everything else appears to work fine. I've got the jumpers set properly. Is there something else I need to do? Mod the cable or something? Any thoughts appreciated, of course.

The immediate reason for the switch was that I had ordered up NitrOS-9/6809 disks from Cloud-9 only to discover that they require 40-track drives. Now I'm happily going insane trying to learn NitrOS-9. Really it's making me batty and I don't get it. I'm told I will. And it IS fun to play with. But that fun factor will wear off eventually and I'll need to be able to actually do something with it (other than copy and sort files... ahem) to hold my interest.

But that's another post.

Putting together some drives for your CoCo is a lot easier than most people think. Well, a lot easier than I use to think, anyhow. The retro drives are great if you're only going to be retro-CoCoing. But if you plan to use your CoCo and bring it into the present, you'll need better drives. 5 1/4" drives are good place to start since you can run all that old CoCo software. Do note that to actually use the double sided, 40-track features of the drive, you'll need a new OS. NitrOS-9, ADOS, and HB-DOS are good choices.

Constructing the drive is dirt simple. You'll need:

1. Couple of 360K 5 1/4" disk drives. Doesn't matter what kind as long as they work. These pop up on eBay frequently, and I'm told you can score them at computer trade shows sometimes.

2. A power supply. I just used the one out of an old FD-501 I had, but a small PC power suppply should work as well. I'll be doing that myself soon enough, since the plan is to run a CoCo, MPI and drives all off of the same PC supply.

3. A drive cable. 5 1/4" drive cables are pretty much all the same. You'll need the wide connectors on both ends, and two connectors on one end if you plan to make a duel drive system. These also show up on eBay sometimes and should be available from some computer supply places.

4. A case is a good idea. Though you could probably construct a cage, or just lay them side by side as long as you can raise them off the table. Large project boxes are available from a variety of vendors that could easily be modified to hold the drives. This is what I'll probably do eventually, as well.

5. A drive controller. As far as I know, these aren't made any more, by anyone (it's one of those sorely needed things). You'll have to go retro on this one. The FD-501 and 502 paks should work fine.

The first thing I did was hook everything up and give it a whirl. Connect the power cables, connect the drive cables to the drive, and secure the drives to the case. Connect the other end of the cable to the FD501 controller and plug it into the multipak. Several tests in DECB show the drives firing up correctly and working fine. One drive I tested wouldn't spin up and made a horrible screaching noise. But after a few passes, it loosened up and spun properly.

Then I took them apart again because I couldn't get the top drive to format. So I decided to switch the drives. While pulling the drive cable out of the back of the drive, my knuckle brushed the power transformer right near fuse. I did this to demonstrate proper safety procedures, of course, and to demonstrate the dire consequences of ignoring or forgetting said safety procedures. In otherwords, the sucker lit me up like a Christmas tree.

So after my nuts fell back into place and numbness in my arm subsided a bit, I determined that a single demonstration would probably make the point, and I reached under the desk and unplugged the drive. After that, I figured I lay down for a bit. Being a crash test dummy is definately hard work.

So anyhow, NitrOS-9 is a lot of fun to poke at, but I'm really hoping I can find something useful to do with it as well. It's power is undeniable. It's also way beyond the average user. Of course, CoCoists aren't your average user, but the thing could be made simpler.

One thing I'd like to see is a public licence GUI for the system. A nice windowing system that had built in APIs for graphics and sound. A high level language compiler with tons of libraries for quick and easy software development. An easy way to run legacy apps from the same GUI. Click and go.

Some of that may be available or in development already, of course. Right now, to me, NitrOS-9 is like an annoying new guy who just started at the office. He's smart, capable and you want to like him, but there's not a real incentive to do so. And his personality could use some work. I've just begun my excellent NitrOS-9 journey, and looking forward to poking around my new frustrating friend some more. Just to see if something develops. But that, of course, is another post...


Angel's Luck,
Capt

News: Toolshed 0.9 for Windows Released

Boisy Petre has announced that Toolshed 0.9 for Windows is now available at nitrOS-9.org. Click on Toolshed at the top and then select the version you want. This is primarily a development tool for building software for NitrOS-9. Instructions for installing are here.

Angel's Luck,
Capt.

Please send your Color Computer news items to captcpu@clubltdstudios.com.

News: CoCo DVD Update

Roger Taylor recently posted on the malted media list that the new CoCo DVD will now be multiple disks. The preorder price is now $12.95, so get in there and grab it while the gettin's good! :)

Angel's Luck,
Capt.

Please send CoCo news items to captcpu@clubltdstudios.com.

Pimp My CoCo: Fried CoCo with a Side of Bacon

This week's adventure started with an enthusiastic shopping trip and ended with a white nuckle botch job. When the experts tell you that desoldering a chip from a double sided board, particularly one that's relatively ancient, is a pain in the tuckus, believe them. It sucks. It sucks bad. I'm talking top of the line, hard core suckage.

My daughter and I had an excellent adventure at the local Radio Shack. The two that I had dropped by in recent years were "mall" stores. They pretty much sold cell phones and remote controlled toys. The one down the road here, though, is a real Radio Shack with a good sized selection of electronics parts, tools and components. The two sales people actually knew what I was talking about, and didn't look at me like I was some perv, when I asked for flux. (True story, the last mall Shack I was in, the little sales girl seriously looked like she was about to call security when I asked where the flux was, and had no idea what a "Tandy" was. I felt guilty, and so freakin' old, so I bought a stereo. I don't know, either.) Even better, they're getting ready to move to a much bigger location, which means "SALE" at the old location coming up soon. Hooray for our side!

Now, this is no mega store. Pretty much just the basics. But that's cool cause that's what I needed. I went going to buy some flux, LEDs, and electronics cleaner. So I get in there and figure I might as well pick up one of those manual solder pumps, too, just to try it out, of course. Oh, and they have a duel wattage iron on sale. Well, wasn't going to, but hey, it's on sale right? I've virtually no components, and though they don't relate to the current project I might as well rifle the parts drawers, grab some switches, some commonly used resistors, a few regularly used ICs, transistors, some capacitors and other necessities. Add in some more solder, a new wire stripper (two actually, they both suck, never have had a wire stripper that worked worth a damn, so the search continues), and I absolutely NEED those little micro clamps for... something.

So I'm standing there with this big armload of stuff, and my daughter is bugging me for V-Smile carts (throw one of those in the pile), and get checked out, drive home and unload all the goodies. Of course, I forgot to get flux, eletronics cleaner, and LEDs. Sheesh!

Anyhow, with a 20W/40W iron in hand and the desolder pump, I could finally get some real work done on desoldering the 6809. Or so I thought!

First, I soldered up quite a few holes on a blank PCB I had laying around. I wanted to practice using the desolder pump, get a feel for it as it were, before applying to the CoCo's board. Always a good idea to try it out before doing something stupid. Worked pretty good, so with full confidence, I attacked the 6809 again.

Things start off well until I noticed the mess the pump was leaving (see picture). Sucker splatters solder all over the place. This thing works, for those that are interested, by depressing a spring loaded slider on the side of the pump. When you press the trigger button, the spring releases with a big "thunk!" and the plunger shoots back up, creating a mini-vacuum and drawing the hot solder into the barrel chamber. Of course, if you're like me, you immediately take the thing apart to find out where the solder goes. :)

(It's actual quite clever. The inside of the barrel is coated with patroleum jelly. When the solder gets sucked up into the chamber that hard, it breaks into little particles which get trapped and suspended in the jelly. To clean you just wipe it out, and apply a new coat. The tip is teflon, so it doesn't melt easily and nothing sticks too it long enough to matter. Neat system.)

So this is literally whacking away at it, though. The pump makes a really big thunk, and I'm thinking it's not real steady for this type of work. I've seen smaller ones in catalogs, so maybe they work better for this. Anyhow, I soon discovered the difficulty.

The CoCo's mainboard is soldered on both sides. According to my reading, the goal in this case is to heat the bottom side enough that it melts all the solder on both sides. When you whack it with the pump, it should draw all the solder up and leave a nice clean hole, sans solder on either side. Well, that's great in theory...

I started off with the iron set to 40W. This did a splendid job of heating the solder properly and the first four joints went perfectly. Just as described in the articles. I was quite pleased. Then I hit the 5th pin and "wham!" the pump went off, the solder didn't quite melt properly, and the whole f@#$^!ing pad came up with it.

Okay, shake it off. What probably happened is I had too much tip on the solder. You gotta get that iron at an angle and heat the solder with the tapered side of the tip. Otherwise, the solder can melt unevenly. So what happens is you see the solder melt on one side, but the tip is blocking the other side you can't see, you hit the pump button and the still cold side yanks the pad off the board as it comes up. Tricky little bastard. The other option is I overheated the pad and the bond between the pad and the board melted. Same result either way. Regardless, I've botched it, but it might be repairable, so I decide to stay focused and keep going. Get the chip out and worry about fixin' later. So a hit the next pin. Bam! Same thing.

At this point, I'm cussing up a storm and the dogs next door are barking.

I reset the iron to 25W and after a bit, tried it at that wattage. At this point, I just want the chip out, consequences be damned. I'm thinking this board is parts anyway at this point.

What a freakin' mess. As the picture above shows, the solder doesn't quite get hot enough (or rather I wasn't willing to let it get hot enough... gun shy) and it splatters and leaves plenty on both side. So you have to resolder the pin and try it again. And again. Putting more and more stress on the board, of course. The splattering may also be a result of the tip not being at the right angle, or the joints not being clean enough. (Ran out of flux. So we'll be double cleaning it on the next attempt.)

So, that try was wildly unsuccessful and potentially crippling. Sigh. Luckily, pins 5 and 6 on the 6809 aren't connected to anything. As Rodder pointed (after some consultation and thanks Brian, appreciate it!), I seriously dodged the proverbial bullet there. One pin earlier and the FIRQ line is whacked. Some seriously potential issues as I would have had to try and connect that one with a wire. And one pin later and the Vcc pin is toast. Not too bad, and could probably successfully hotwire that one. :)

The lesson here is be patient. I know the powered desolder pump is on the way. It's suppose to be much more gentle and works better on these types of board. I also learned some handy hand powered desoldering techniques. For example, if you turn the board up on it's edge and clamp it in place with some helping-hands and a prop, you'll put a lot less pressure on the board. Even the weight of the iron and pump may be too much in some instances. But trying it again is not on the menu at the moment. I decided at that point it was best to just leave it alone until the new pump arrives and work on... The Case!

In our next adventure, we'll take a look at some ideas for that side of the project. At least with this type of work, the worse that could happen is I end up with a crappy paint job and big holes in the case. I can live with that....

:)

Angel's Luck,
Capt.

The Safety Post

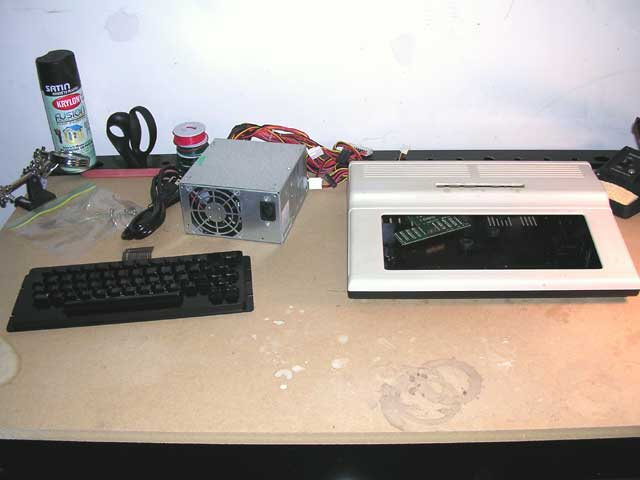
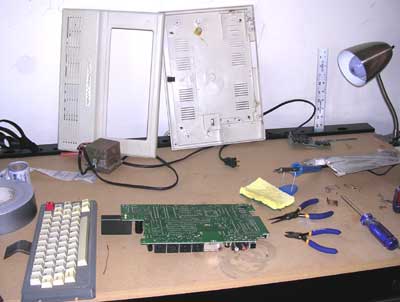
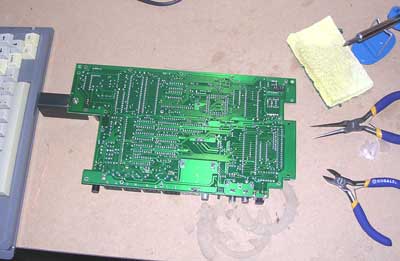
In a bit I'm going to post my latest CoCo adventures, but before doing so, it's probably best to review some safety guidelines. Just for the record. :) Might even need to sidebar this one...

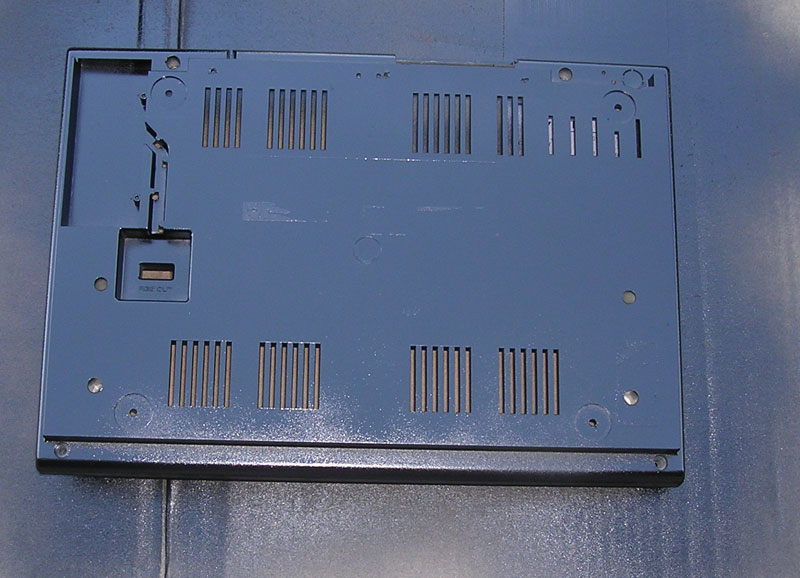
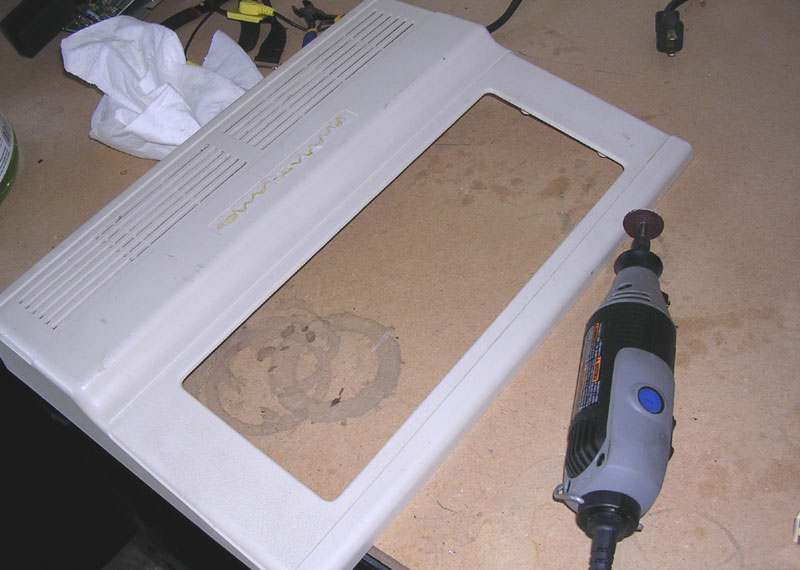
The reason behind this post (gory details forthcoming) is that I 1) almost probably wrecked a perfectly good CoCo this week, and 2) nearly killed myself putting together something as simple a disk drive for the CoCo 3. There aren't many deadly things that can go wrong when messing with your Color Computer, but there are a couple. Specific to the CoCo include electricity (household voltages can seriously hurt or kill a person), and if you're moding or repaking, and cutting and painting.

I do some pretty wacky stuff, and I'll admit patience is not one of my strongest virtues. But I have been building stuff (and dismantling stuff) my entire life. My father and his father before him were heavy-duty tinkerers and builders, so it kind of runs in the family. I try to be absolutely maticulous in my safety precautions, as I was taught. Even with years of practice, I've still been set on fire, electrocuted, nailed, stapled, stabbed, cut, bashed and suffered rapid decelleration trauma more times than I can count. For years, the Home Improvement TV show was my favorite, not because it was so funny, but because Tim Allen would do something crazy, blow something up or knock a big hole in something and I'd go "That's hysterical! What an idiot! Wait... I've done that. Huh." Call it empathy.

So, remember the golden rule of tinkering... if you can't afford it, have any doubts, or think there's even the slightest possibility of bodily injury, DON'T TRY IT! If that's the case and it must be done, hire a professional. I don't do a lot of work on my own car, not because I don't want to (yeah, I get the itch to take that sucker apart occasionally), but because if I botch it, it's too damn dangerous and the consequences to my family are too serious. I know my limits. Same goes for anything that can maime or kill you, or bystanders, if you fudge it.

With that in mind (and in preface to the upcoming adventures in the Evil Lab), here are some general safety guidelines to keep in mind when working on your Color Computer:

1. It sounds silly and repetitive, but there's a reason why it's repeated in bold print over and over: ALWAYS read the instructions and follow the recommended safety guidelines for the equipment and tools with which you'll be working. Memorize them. Stick to them. Step-by-step. Then review them again, just to be thorough.

2. Another one that sounds silly, but causes more accidents than probably any other oopsie: Unplug it before you touch it! I've absorbed enough current that it doesn't even really hurt any more, kinda tingles real hard, but numb limbs and an accellerated heart rate are not pleasent no matter how many times you take the punch. Unplug the sucker and then check to make sure it's unpluged. Twice.

On a similar note: When you're poking around inside the case, if you don't know what it is, don't touch it. If you discharge a capicator it will either smart like a bitch, or blow you across the room, or worse. If you don't know, no touchy.

3. When working with electricity, ground your ass. If you don't know what that means, or how to go about it, DON'T TOUCH ANYTHING! In my most recent brush with death, if I'd have taken the time to put on shoes, for example, it wouldn't have hurt as much. And it hurt like a mother.

4. Always wear eye protection. Those goggles are your best friend. I've literally had to pick metal shards out of my forehead after using a Dremel tool and having the bit splinter into a bazillion pieces at 10,000 rpm (re: see Right Tool for the Job, below). Painful, but better than being blind.

5. Keep a fire extinguisher handy. Always. Power tools and surfaces get hot, flames blow the wrong way, and electronic components can spark, overheat, and flame up. Get a good one and keep it charged.

6. Leather gloves are good. Rubber gloves are good. No, not kinky. They're specially handy if you'll be working with sharps or paint and chemicals. In the latter case, use a mask. They're cheap and you'll breath easier. Literally.

7. A shop apron, heavy duty cotton or leather, can save you a lot of trouble. Leather is fire retardant, shock resistant, and can slow down nasty chemical spills. Cotton is lighter and helps a bit with spills. Never wear cloths you want to keep when tinkering. :)

8. Speaking of cloths. Not too tight, restricts movement, but not baggy either. Too loose and power tools don't mix at all. Loose clothing tends to get caught on, well, everything. Cool and comfy, so spend an extra five minutes, try them on, tuck everything in and make sure they fit properly before wearing them to your workshop. I'm absolultely terrible about this, so don't be like me. Seriously.

9. Keep bystanders, particularly children, away and out of the workshop when doing anything even remotely dangerous that requires a degree of concentration. You definately don't want to hurt anyone. Other people are a distraction, as well, and that goes triple for children.

10. Speaking of which: STAY FOCUSED! Turn off the music and TV, zen out, say a prayer, or whatever you need to center yourself, but stay focused on the task at hand, right through to completion. EVERY single time I've been injured while screwing around with something, this is the reason why. I simple stopped paying attention to what I was suppose to be doing, or something else was going on that I was trying to divide my attention to. Every time. Let your brain wander off and bad things happen to the rest of you.

11. Keep a well stocked First Aid kit and learn to use it. Hopefully you'll never need it, but if you do, you'll be glad you did. In fact, do this before you do anything else. Make sure someone else knows where you are and what you're doing. If you're dealing with exceptionally dangerous materials or situations, such as volitile chemicals or high voltage electrical currents, have a buddy standing by. And make sure he knows what to do if things go FUBAR. Which brings us to...

12. Prepare and plan. Planning reduces the chance of something going wrong. Preperation helps you be ready to deal with it when your plan fails. If you're not already, become a devout believer in Murphey's Law. It rules the workshop. Anticipate that Dremel is going throw off shards, or that solder iron is going to get too hot and slip, or that power saw is going to jump. If you're wearing eye protection and long sleeves, you'll be okay. If you're wearing gloves and are using your clamps, you'll be okay. If you've got both hands on the sucker and are ready for it, you'll be okay. Most importantly, anticipate mistakes. Anticipate that you WILL forgot (unless you're one of those annoying people that never does, in which case, the rest of us hate you). Anticipate that other people will appear at the wrong moment. Anticipate that equipment fails. If you make your safety precautions habit and prepare thoroughly, you'll be ready for it. And have a much better chance of coming out of it with all your 2,000 parts.

Continuing that line of thought: Prepare your tools and use the right tool for the job. It's fun and satisfying to devise or improvise a way of doing something you haven't done before. But when it comes to potentially dangerous situations, stick with what works. Use the tools that are designed to keep you safe. There's a reason why eletrician's tools are rubberized. There's a reason why construction workers wear hardhats. Maintain your tools and keep them clean and in good working order, as well. A bad tool can hurt you just as quickly and thoroughly as the wrong tool. This is one I'm a real stickler for and I tend to go to great lengths (and nearly endless research) to obtain and use the best tool I can get (or afford). The right tool, well maintained, doesn't just make the job easier, it makes it safer.

Luck 13. Swollow your pride and don't wallow in ignorance. I tend to use self-depreciating humor to get around my ego, but do whatever works. ASK FOR HELP. Consult with experts before trying anything that might get you or anyone else hurt. In the CoCo community, we're lucky to have a bountiful resource of very smart, very generous people who are always more than happy to lend an ear. Heed thier advice and you'll save yourself some heartache... and maybe a nasty shock or two, as well.

Be safe.

Angel's Luck,
Capt.

PS If ya have any other safety tips, advice, techniques or experiences, feel free to add 'em on. Couldn't hurt. :)

Wednesday, September 13, 2006

Comment: Pimp My CoCo! Part 2

Inspired by Brian (Random Rodder) thought I'd start posting occasionally on my own CoCo mod. This isn't a repak (well, not yet, we'll see how it goes), but more of a mod. The pictures below are mainly to demostrate what NOT to do. :P


Here's the CoCo completely taken apart. This is a 512K Color Computer 3 with the PBJ RAM upgrade. If you look close you can make out the PCB over there at the back near the ruler and lamp. I bought this CoCo because of this upgrade. It was so beat up, no one else even bid on it, if I remember correctly. heh! The case and keyboard are in pretty bad shape and will require some gnarly restoration. I'm thinking solid black case and keys except the break key.


The underside of the CoCo 3 mainboard. The longest vertical row of solder dots off on the bottom right there is the MC68B09EP and the target of my affections at the moment. The bastard. The $2.99 solder iron/solder wick attempt just ain't gonna work. I know, there's a bunch of very smart folks out there shaking their heads and muttering "told ya so." It was worth a shot.

On order from Jameco Electronics is a shiny new eletric solder pump, some of the curly solder cleaner stuff and a stand for the irons. Nothing wrong with the iron, actually. 25W and works great. Sure, if I do this often enough I'll get something nicer, but for one chip, it'll do.

Google has been no help at all. Sigh. I need a source for a Hitachi 6309, if anyone knows a place to snag 'em, drop me a note. :)

Any good project should start with a to do list, so here what I've got so far:

Mods to the Mainboard:

Desolder and socket the 6809.
Identify power needs.
Board (5V), Fans (5V), Light Kit (5V?), Drives (?), MPI (?)
Locate a proper power source.
Install power source.
Built and install power on LEDs under case badge.

Case Mods:

Template the window modification.
Locate appropriate fans for right side and top (something small)
Template the fan modifications.
Modify the case for window and fan mods.
Make a new case badge with clear color dashes for power on LEDs.
Modify case for power on LEDs.
Primer and paint case.
Primer and paint keyboard keys and faceplate.
(Is it possible to remove and change the keyboard faceplate?)
Install window and fans.
Install power on LEDs (make three LED board and hook into PS where?)
Identify light kit.
Install light kit.
Paint the MPI and Drive casings.

All of that should keep me busy for a good long while. Next step is to gather up the stuff I need. I'm thinking a trip to the Shack is in order tomorrow, on account I have almost nothing for eletronics work. Gonna need some cleaner, some flux, some rosin core solder, LEDs, spare common components (I think I have some old resistors and some timer ICs laying about somewhere), a 40-pin IC socket, and anything else I can pick up while I'm there.

While waiting for the desolder pump to arrive, we might as well get started on the case mods. Which means a trip to Lowes this weekend for Dremel tool supplies (I'll be needing some etching and routing bits and standard cutoff wheels... the heavy duty ones I have now aren't proper for the CoCo's plastic case. Think melting. heh!) Also pick up some sort of plexiglass and some window fitting if they have it.

Before then I'll need to locate and decide on which fans to use, on account I'll need the demensions to cut holes for them. Have to remember to get something with mouting brackets and figure away to mount them without unsightly screws sticking out all over. And we'll be needing auto body paint and primer and lint free polishing cloths. We'll get into that later, but the CoCo's case, with it's ridges and bumps, is gonna be a bitch to paint properly. I'm thinking, with the right light kit: solid black. Black case, black cables, black lights, black keys, black drives, black MPI, everything. A CoCo 3 truely suitable for an evil lab. :D

Angel's Luck,
Capt.