(Click 'em for the bigguns)
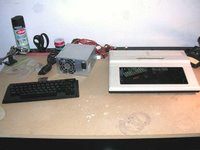 Okay, after a bit of clean up, here's what we've got so far. Top half of the case is about done. Just needs some sanding (see below) a good scrubbing and paint. The keyboard was pretty easy and looks downright wicked. Solid black. Real men don't need letters on their keys. Grunt, grunt, grunt. heh... Actually, at some point we'll do decals on them. Probably a dark, hard to see grey. Yeah.
Still studying on the power suppply. No idea how this is going to work. The one sitting there I got on sale at newegg.com and it doesn't have one of those little switches on the back. Not sure how that works. I'm assuming I'll have to locate the lines that hook up to the power button (via the mainboard) on a PC and wire a switch to it. I do have this cool retro metal SPST flip switch that would go nicely. Still, my track record with eletricity, particularly anything that plugs into the wall, is spotty... at best.
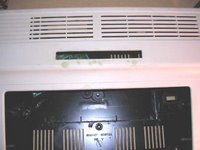 The mainboard will be different one than the one I'm working on. I figure I'll have another go at socketing it for upgrade at some point, but for now, I really want to get the machine up and running with all the goodies installed.
The fan is out, for the moment, but it IS going in. A single fan relocated to the left hand side and blowing across the board. Since I've run out of time for the top windows, I'll just leave the grill. I still have another case, so we'll do the big top fan on that one in the Spring. All ready dreaming the paint scheme for that one (two tone, this time) but... let's not get ahead of ourselves... any further ahead, that is.
There's a shot of "casebadge" window, by the way. I still haven't figured out how to put the plexiglass in there without making a mess with glue, but I've got a couple of ideas. Directly beneath that will be a wave light bar in green. Makes it look like some evil green liquid is running through the case (I've used the blue and red versions before on PCs and they're freakin' awesome). Plus a couple of other surprises to make up for dropping a few of the other original plans. ;)
 This is the best shot I could get of the keyboard. Heavily edited, but that's pretty close to what it looks like. Though not quite as shiney under normal lighting. Have to note that when I take pictures of the finished machine. No flash. Use big lights.
I really like the way this one is shaping up. True it may be Spring before it's completely finished, though part of that is fundage. Something about buying gifts for the holiday, or something. Sheesh! What greater gift could there be than a hot new CoCo! Kids love 'em! Sorta....
 Okay, so tips. One, as the thermometer shows, it's getting pretty darn close to the cutoff point for model work in the outside lab. Paint and glue start getting freaky at about 60F and worthless below 50F. That's the high today, though this week we're s'pose to stay right around there, so I'll be craming in as much as I can.
The Krylon Fusion paint, at this temp (and negligible humidity), took about an hour to set up. That's opposed to 15 minutes normally. Milliput is also acting much slower, though when filling those holes I gouged in the case, I did place it under a lamp to speed it up a bit. I know I go on about temperature and humidity a lot, but... well, I paint a lot. A clean spot and the right weather is pretty much essential for a perfect paint job.
Also, get some of those smaller, but really deep, C-clamps and a nice 12" metal straight edge. The clamp heads shouldn't be more than 3/8ths, with a jam opening at least 2" and about 2"-3" depth. I cut the hole a little bit bigger than the original case badge, at 5"x1/2". Some of the oversized sanding pads for the Dremel tool are handy, too, which makes it easier to get in there (without routing holes in the case by accident like I did). The case is 1/8th of an inch thick. The CoCo 3's front is curved and clamping a straightedge on to sand in a straight line is a bitch. The right clamps will make it much easier.
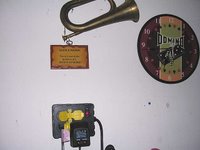 While I'm at it, thought I'd take a mini-tour of the lab. Well, not so much because it's a mess, but...
Every Spring I clean this thing out and it's spotless and beautifully organized. And by fall there's crap all over the place. Looks like day five of a geek convention (but not as smelly, thank God). So I tried to clean up a bit today, but didn't get too far.
Good power is essential, but household power is just so-so. Actually, where I live, it's been rock solid. No brownouts and only a couple of blackouts during really bad storms. And then only for a couple of minutes. This box is a deluxe industrial breaker that'll stop just about anything. I hate it when things catch on fire, so best to get the best. :D I find all sorts of crap when I'm out and about and it kind of accumulates on the walls. Hmmm... looking at the picture, I forgot to reset that one for the end of daylight savings. Doah. The plaque was given to me by my grandmother, I didn't buy that myself. Sheesh.
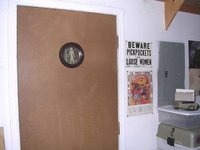 Ah, the Evil Lab Men's Room. (Side door to the garage.) Hey, when you gotta go...
The sign I picked up in New Orleans awhile back. Never hurts to warn visitors of the perils they may face.
Recent aquisitions include a giant pirate flag and a Pirates of the Carribean display from the store. Have to hang those soon.
 Big pile o' CoCos. There's an Atari 800XL in there as well. Good machine. It's no CoCo, mind you, but some cool games for it. And no, none of the collectible stuff is in this pile. Collectible stuff goes in big rubber bins and is stored indoors. :)
Let's see, there's a busted grey multipak. That 26-3022 disk drive doesn't seem to want to spin up. Ah, and the Tano Dragon is in there. No power supply for it, though, so I've never even fired it up. Have to figure that out at some point.
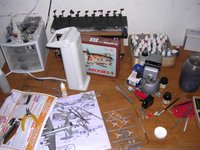 Part of the model/miniature work shop. What a mess. The B-17 model (The Bit O' Lace) goes in the bottom of a PC case I'm working on. Seriously. A whole B-17 theme going on that one, including a round see-through panel on one side and a big nose art pin-up on the other. Should be fun looking when it's done.
All those paints have to go inside before winter. And I see a nice batch of Games Workshop Space Marines that need finishing off. That vice in the center, by the way, is the ingenius and can't-live-without Panavise. For working on just about anything fairly small. Holds miniatures, models and circuit boards, and you can twist and turn it to any position. Literally. Truely one of the most necessary tools I have.
I'll take a bigger shot of the lab and a better tour in the spring when it's actually presentable. :)
Angel's Luck,
Capt.




No comments:
Post a Comment