
Modifying the case turned into some serious experimenting with a material I hadn't worked with much. I'd done small plastic on models and miniatures plenty of times, of course. Most of that work, however, can be done with a standard Exacto knife, a micro file set and a small pin vise. I learned quite a bit about making holes in plastic at high speed (see previous post). heh! :)
The painting and detailing part, however, is the part where I can have a little more of a free hand for fun. I'm on more familiar ground here. Solid black isn't my favorite case color, but there's a good reason why it's so popular. When done right, it looks great. The only downside is, black tends to show dust more than some other colors do. Black works well with two-tone applications as well. For example, I strongly considered (but discarded for this project) doing black and silver on this case.
The solid black look, though, isn't as easy to pull off as it first seems. I've seen a LOT of spray and hand painted cases. Getting any color to look right takes a ton of work. Black is no less tricky. Traditionally, for a professional look, you would use a finishing system like that used to do auto-body work. You sand/prep, primer, paint, buff, paint, buff, paint, buff, finish, buff, finish, buff, and then final finish. Seriously. In that order. It's a HUGE amount of work and the slightest mishap, dust being the biggest culprit, can force a do over.
I was all prepared to do that, though to slightly lesser extent. Molded plastic is a bit more forgiving than metal, as far as paint jobs go. But then I stumbled upon Krylon Fusion spray paint. I've written about this stuff before and I really can't rave enough about it. Stuff bonds with plastic. One or two coats and it really does look like it was molded in that color. Pictures just don't do it justice. Very cool stuff. Working with it is the same as using any other spray paint, but the results are nicer.
 Step one is to clean the crap out of the case. All paint jobs start with this. Do it not and you'll see how mucked up it looks. A proper paint job should be as thin as possible. As such, any tiny defect, specks of dust, crud, or anything else will show up. Smooth and clean is what you want. NEVER try to cover a defect with paint. Tis a serious sin when painting. The rule: Use as little paint as possible to get the desired finish. Most of the work is done long before you apply a brush or press the trigger.
For painting plastic, an ammonia based cleaned is generally considered best. The ammonia cleans well and then evaporates leaving no residue. Non-ammonia based cleaners are better than they were 20 years ago, but most painters still recommend using one with. Another option I'm fond of a is Simple Green spray cleaner. Does a great job at cleaning about anything, it's non-toxic, biodegradable, and concentrated so you can mix the amount of cleaner you actually need. I was out, unfortunately, so I went with my second favorite cleaner, Clorox Cleanup spray cleaner. This bleach based cleaner works great on things that can take a little bleach. Don't use this on the old gray CoCos! Works fine on the CoCo 2 and 3 cases.
When spray painting, always be aware of your environment and potential for hazard. Wear a mask (this crap always gives me a head ache). Drop a cloth or newspaper down to keep it from marking your work area. Keep away from children and pets. Always paint outdoors or in a well ventilated area.
 I went over using the Krylon paint last time. To sum up: light coats, broad strokes, let it dry. Drying time is 15 minutes to touch (give or take, depending on temp and humidity), 24 hours to set, and about 72 hours to finish. Once it's set in there, it's fantastic.
This is the satin finish. I like it, but it's still a bit shiny. After I apply the decals it'll need a dusting of Testor's Dull Coat anyhow, which will take out some of the shine. The keyboard, alas, will have to be "bullet proofed." That involves multiple finish coats of Dull Coat and Clear Coat to make a nice thick layer for pounding on to protect the decals. I'll cover that when we get there. The paint, however, doesn't need a finish. Pretty tough stuff once it sets.
Ideally, I would have built a paint box to put this in before spraying it. That helps protect it from dust and dirt when painting it outside. This can be as simple as a properly sized cardboard box. It was a nice, clear day with moderate wind (for Oklahoma), and it had just rained, so there wasn't a lot of dust blowing about. Every little scratch and defect shows up. Next time I'll use a nice, pristine CoCo case. This one had been through the ringer. I sanded it a bit and filled some of the bigger gashes, but it still shows a ding or two if you hold to the light the right way.
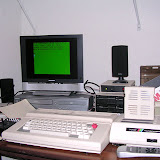
In the workshop it's hard to get proper shots of this case without catching a glare or a brown tint caused by the lighting. In person, neither is apparent. Still, here's some shots of the painted case. Just loving the all black look.


It's not as perfect as I would like, but it's close enough for this go around. :)
Here's a few of the pinup art images I'm considering for the logo that will adorn the left side of the case. Let me know which you like best. (NOTE: Some of these are "risque." Don't peek if you don't want to see 'em.)
.
.
.
.
.
.


The first is perfect nose art style, which is what I'm really going for. I'm concerned about having to use white decal paper. It's a pain on black. The second is perfect for the planned name of the machine, but no pink, please. Would have to change it to red in Photoshop. The third fits nicely for the "CoCo" image (she could be drinking cocoa!) but is a bit TOO risque perhaps. And yes, all computers a red heads. Seriously...
Next, decals, the keyboard, and some electronics bits... :)
Angel's Luck,
Capt.


No comments:
Post a Comment