
My daughter and I had an excellent adventure at the local Radio Shack. The two that I had dropped by in recent years were "mall" stores. They pretty much sold cell phones and remote controlled toys. The one down the road here, though, is a real Radio Shack with a good sized selection of electronics parts, tools and components. The two sales people actually knew what I was talking about, and didn't look at me like I was some perv, when I asked for flux. (True story, the last mall Shack I was in, the little sales girl seriously looked like she was about to call security when I asked where the flux was, and had no idea what a "Tandy" was. I felt guilty, and so freakin' old, so I bought a stereo. I don't know, either.) Even better, they're getting ready to move to a much bigger location, which means "SALE" at the old location coming up soon. Hooray for our side!
 Now, this is no mega store. Pretty much just the basics. But that's cool cause that's what I needed. I went going to buy some flux, LEDs, and electronics cleaner. So I get in there and figure I might as well pick up one of those manual solder pumps, too, just to try it out, of course. Oh, and they have a duel wattage iron on sale. Well, wasn't going to, but hey, it's on sale right? I've virtually no components, and though they don't relate to the current project I might as well rifle the parts drawers, grab some switches, some commonly used resistors, a few regularly used ICs, transistors, some capacitors and other necessities. Add in some more solder, a new wire stripper (two actually, they both suck, never have had a wire stripper that worked worth a damn, so the search continues), and I absolutely NEED those little micro clamps for... something.
So I'm standing there with this big armload of stuff, and my daughter is bugging me for V-Smile carts (throw one of those in the pile), and get checked out, drive home and unload all the goodies. Of course, I forgot to get flux, eletronics cleaner, and LEDs. Sheesh!
Anyhow, with a 20W/40W iron in hand and the desolder pump, I could finally get some real work done on desoldering the 6809. Or so I thought!
First, I soldered up quite a few holes on a blank PCB I had laying around. I wanted to practice using the desolder pump, get a feel for it as it were, before applying to the CoCo's board. Always a good idea to try it out before doing something stupid. Worked pretty good, so with full confidence, I attacked the 6809 again.
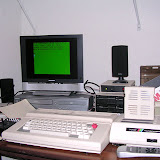
Things start off well until I noticed the mess the pump was leaving (see picture). Sucker splatters
 solder all over the place. This thing works, for those that are interested, by depressing a spring loaded slider on the side of the pump. When you press the trigger button, the spring releases with a big "thunk!" and the plunger shoots back up, creating a mini-vacuum and drawing the hot solder into the barrel chamber. Of course, if you're like me, you immediately take the thing apart to find out where the solder goes. :)
(It's actual quite clever. The inside of the barrel is coated with patroleum jelly. When the solder gets sucked up into the chamber that hard, it breaks into little particles which get trapped and suspended in the jelly. To clean you just wipe it out, and apply a new coat. The tip is teflon, so it doesn't melt easily and nothing sticks too it long enough to matter. Neat system.)
So this is literally whacking away at it, though. The pump makes a really big thunk, and I'm thinking it's not real steady for this type of work. I've seen smaller ones in catalogs, so maybe they work better for this. Anyhow, I soon discovered the difficulty.
The CoCo's mainboard is soldered on both sides. According to my reading, the goal in this case is to heat the bottom side enough that it melts all the solder on both sides. When you whack it with the pump, it should draw all the solder up and leave a nice clean hole, sans solder on either side. Well, that's great in theory...
I started off with the iron set to 40W. This did a splendid job of heating the solder properly and the first four joints went perfectly. Just as described in the articles. I was quite pleased. Then I hit the 5th pin and "wham!" the pump went off, the solder didn't quite melt properly, and the whole f@#$^!ing pad came up with it.
Okay, shake it off. What probably happened is I had too much tip on the solder. You gotta get that iron at an angle and heat the solder with the tapered side of the tip. Otherwise, the solder can melt unevenly. So what happens is you see the solder melt on one side, but the tip is blocking the other side you can't see, you hit the pump button and the still cold side yanks the pad off the board as it comes up. Tricky little bastard. The other option is I overheated the pad and the bond between the pad and the board melted. Same result either way. Regardless, I've botched it, but it might be repairable, so I decide to stay focused and keep going. Get the chip out and worry about fixin' later. So a hit the next pin. Bam! Same thing.
At this point, I'm cussing up a storm and the dogs next door are barking.
I reset the iron to 25W and after a bit, tried it at that wattage. At this point, I just want the chip out, consequences be damned. I'm thinking this board is parts anyway at this point.
What a freakin' mess. As the picture above shows, the solder doesn't quite get hot enough (or rather I wasn't willing to let it get hot enough... gun shy) and it splatters and leaves plenty on both side. So you have to resolder the pin and try it again. And again. Putting more and more stress on the board, of course. The splattering may also be a result of the tip not being at the right angle, or the joints not being clean enough. (Ran out of flux. So we'll be double cleaning it on the next attempt.)
So, that try was wildly unsuccessful and potentially crippling. Sigh. Luckily, pins 5 and 6 on the 6809 aren't connected to anything. As Rodder pointed (after some consultation and thanks Brian, appreciate it!), I seriously dodged the proverbial bullet there. One pin earlier and the FIRQ line is whacked. Some seriously potential issues as I would have had to try and connect that one with a wire. And one pin later and the Vcc pin is toast. Not too bad, and could probably successfully hotwire that one. :)
The lesson here is be patient. I know the powered desolder pump is on the way. It's suppose to be much more gentle and works better on these types of board. I also learned some handy hand powered desoldering techniques. For example, if you turn the board up on it's edge and clamp it in place with some helping-hands and a prop, you'll put a lot less pressure on the board. Even the weight of the iron and pump may be too much in some instances. But trying it again is not on the menu at the moment. I decided at that point it was best to just leave it alone until the new pump arrives and work on... The Case!
In our next adventure, we'll take a look at some ideas for that side of the project. At least with this type of work, the worse that could happen is I end up with a crappy paint job and big holes in the case. I can live with that....
:)
Angel's Luck,
Capt.


3 comments:
I thru my spring operated solder sucker away. I got one of those sqeeze ball desoldering tools at the shack to day for $10. Works like a champ. Desoldered a 28 pin socket from a video card (Velocity 128, no loss) in about 5 minutes.
Shoulda done this a long time ago...
Okay, now see, there ya go. :P There's one group that swears by bulb suckers and one that likes the spring loaded kind. Gak! I'll probably try it. This sort of tricky opperation often comes down to what tool works best for the individual.
I did get the powered desolder tool from Jameco and gave it a whirl. It's a combo hollow point solder iron with a built in pump. WAY easier than trying to use a seperate iron and desolder pump. Works beautiful and smooth. I'd burned those pads too much though, most came off slicker than cat crap on a lanoleum floor, and I now have a grarly wiring job ahead of me. heh! And even with the better desolder tool I can't get the damn chip to come loose. So I'll be bypassing that, listening to the experts, and cutting the damn thing out. I'll order another 68B09EP and see I can get the board working (though I'm pretty sure it's parts at this point). Live and learn... On the upside, if the board is fried, I'll get tons of desolder practice taking it apart for spares!
o/` always look on the bright side of life o/` -Monty Python, Life of Brian
Angel's Luck,
Capt.
The prop I have with the springloaded kind is you have to take the iron away from the work to get the sucker in close enough to remove the solder. During that time, the solder begind to cool.
With the bulb type (and your vacuum pump) the suction is right on top of the heated solder. Jobs done...
Hey, if you did fry that mobo, don't throw away that keyboard connector. If nothing else, I'l buy it from you. I think I may need another... (just not sure yet...)
I spent yeaterday and part of today re-wiring a Model IV keyboard that had a hole punched in the bottom of it (center support in the case went thru the PCB when a MIV Tech Ref manual fell on it).
I'm looking at the possability of rewiring a Model IV k/b in my repack. They both use 16 pins for the k/b and pins 18, 19 & 20 on the header are used for the reset switch. The matrices are identical thru the alpha keys. Where things change at is the numbers, etc... I forsee a whole bunch of soldering of jumpers and trace cutting coming up...
Post a Comment