Okay, for awhile now I've mostly been posting news items to the blog. Important, of course, but this IS suppose to be a CoCoist blog about a "personal CoCo experience" as well, and I've have been negligent in that area. heh. I've also been slacking off on the CoCo Hut site as well. Guilty. So since I really want to CoCo tonight, but the brain isn't willing to engage properly for programing and everyone is asleep so gaming is out, I thought I'd share. Skip down a post if you just want the news. :P
I started disassembling the CoCo 3 on Sunday. I mean right down to the rivets on the underside RF shield. I even got the CoCo 3 center case badge off that sucker. Watch out, it bends easily. Luckily it's made of metal, so a little mini-plier action straightened it right out. So, then I got the bright idea that I'd go ahead and desolder the 6809 off the main board. I scrounged up an old 25W soldering pencil and, after digging about in the workbench drawer, produced a 2" bit of solder wick. Time to go to work! Bwahahaha!
Okay, before anyone gets the idea that this is a "good idea," just forget it. Attacking your CoCo's board with a $2.99 iron and an old piece of wick is, well, stupid. Luckily I am stupid, ignorance is bliss and all that, so I had a go anyway. (Seriously, you can completely muck up your board doing this, so don't unless you're willing to... seriously muck up your board. ahem.)
After hunching over the board for about 45 minutes with a magnifier in a gawd awful position suitable only for a truely mentally defective contortionist, I managed to get two... count 'em, 1, 2... joints off. Sheesh! At this rate, it'll be this time next year before I get that thing unassed. :/
See, the trick is to heat the solder just right, so that it starts to flow again, preferrably into the wick. You do this by placing the wick on the joint, then placing the iron tip on top of the wick over the joint. The wick heats up, the heat melts the joint and, hopefully, draws the molten solder into it. Works, but there's a small caveat, a proviso, a minor catch... or two or three... If you overheat it, you'll rip the adjoining trace right off the board. If you lift the iron before you lift the wick, you'll rip the trace off. If you nudge the tip too far off the heat point and it cools with the wick still in contact with the joint, you'll... well, you get the idea. So you have to go real slow and hold real still, don't breath, don't sneeze, and for God sake, don't flinch when a F#$&@ing moth flys smack into your face after you've been staring bug eyed at a tiny silver dot for 15 minutes. Oh and don't forget to grasp the wick with a pair of pliers on account it gets hot as sumbitch and will burn the little swirls right off your freakin' finger tips. Fun stuff. Really.
The goal of all this "fun" is to socket the 6809 for later replacement with a 6309, superboard upgrade and what have ya. Several kind gentleman who have been offering a ton of splendid advice on this project over at coco3.com pointed out that it'd be a hell of a lot easier to just clip the chip out and then clean up the pins and solder after it's already out of the way. That would, unforunately, destroy the 6809, though, and not having a replacement at the moment, I have to save it. Which means doing it the hard way. Just like I like it! Hahaha! Other items on the to do list for the CoCo 3 are replace the power supply, add some lighting for fun, a couple of fans for cooling, 3 1/2" drives, and paint it. Yes, paint it. This can be done nicely, it just takes a whole lot of work. :)
I'll take some pictures as all this progresses and post 'em up here for people to laugh at... er... puruse.
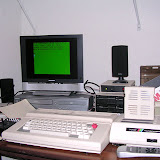
In the real more fun department, I'm enjoy the heck out of playing the old cassette based games from the U.K. on the CoCo 2. I unhooked the gray for awhile, just because I needed a change. You know how it is. :P If you get the chance to pick up some of these games, do so. Haven't had a bad one yet. I'm also building new drives for both CoCos (the drives are in transit as I write this) so I'll report on that project as soon as I manage it. Also got it Hawksoft's S-Video converter awhile back and STILL haven't had a chance to hook it up. Can't wait to see how it compares to Roy's VGA adapter. Also been messing a bit with OS-9/NitrOS-9. Don't get me started. Grrrr....
On the programing side, I'm still messing with some mini-games (including the enhanced version of Light Psycles and some edu-tainment games for my daughters) and a big "Galactic Trader" game that's coming along nicely. The latter has been a blast to program so far. The code is a can of worms and is horrible. But it plays and it's kind of neat. I figure I can clean it out later. ;) Still a ways off from being done, though.
All of my programing projects currently, however, are in the low-res (SG 4) screen. What?!? you say! Well, it's easy. Seriously. I can focus on learning to program again instead of having to figure out how to move graphics around the screen quickly. This is a neat mode for the CoCo, and more imporant, any CoCo can run these programs (with memory and ROM limitations taken into consideration, of course). Sure I'll move to hi-res eventually. I even picked up Sundog's GrafExpress 2.0 from Glen on eBay. That system has some seriously wicked potential. But for now, this is happy programing. Programing the way I remember it as a kid. Not for any particular purpose, just for the pure stinkin' joy of it!
On the CoCo Hut, well, there's so much to do it's shameful. I've got buttloads of pics to edit and articles to write up for the Museum section. I need to do up the next t-shirt for the giftshop. And I need to put up a new survey. Maybe I'll tie the latter two together somehow. I also need to flesh out the rest of the articles for the CoCo collector guide book that's due out in January of '07. So there is much to do. I'll get to it. Just having too much fun. :)
I'm also going to start linking in CoCo blogs to this page. If you've got one, or want to start one, drop a note this way and I'll add it to the list! :)
Angel's Luck,
Captain Computer 9/13/06

Subscribe to:
Post Comments (Atom)


7 comments:
Get a vacuum operated desoldering tool. MUCH quicker and less chance of damaging the board...
Yeah. :) Ordered up a nice electric desolder pump from Jameco today. That'll make life a bit easier. It's just near impossible to desolder a double sided board with desolder wick. heh! I was in the mood, though, so I had to try it.
Angel's Luck,
Capt
Hi Captcpu,
Have fun Mate, Been thinking of doing it for a while myself now, desolder the CPU, and install a socket, But I'm weary of doing anything like that again.
Last Time I did a Major Soldering job, was when I tried to install a Tandy Smartwatch in my MPI, Be Honest, don't try it, unless you have some top of the range soldering gear, Not worth the hassle of stuffing up bigtime, I should know, I ended up soldering the tracers together on the main MPI chip, And fried it.
When you finish your Hack Capt, upload some pics in the Gallery on Rogers website, be worth a look or 2, same goes for Rodders project.
laters
Briza
I'd worry about heat damage to the 6809. Actually, that's all I've got right now. Really, though, I've heard two trains of thought:
1. The higher wattage units will heat up the solder quicker, and the heat will not get to the inside of the chip as fast.
2. Lower wattage units don't get as hot so the less chance of damage. However, the longer the soldering iron is on the joint to melt the solder, the longer time the heat has to travel.
I just have not tried to keep anything usable since I have no intention of going back...
As for the 6309, happy hunting. I've contacted several places over the last few onths and those that did have them accepted orders of only $500 or more and from a company only. I don't need that many 6309's, besides, I don't have $500 to spare unless I decide I no longer need to be married.
That's good stuff to ponder. hmmm... I'll probably stick with the 25W iron for now, though I really do need to break down and buy a variable temp kind. I was probably hoping too much that 6809 would be tough enough to take it, but just to be careful, I'll go ahead use a heatsink. Specs say it can take a storage temperature of about 325 deg F (operating temp of about 150). Still, can't be too careful.
I know Cloud 9 had 6309s at one point, but I don't know if he has any left. After I get the socket in and the thing is actually running, I might drop 'em a note and ask. Jameco has 68B09Es for sale, which might work in the CoCo as well. The EP was a lower power consumption version of that chip, but looking at the tech specs, it appears to have the same input and supply voltages. At about $4.00 a shot, not too bad if I need to give it a try. :)
Hi Captcpu,
Mate, Find out if Cloud-9 still does have 6309 chips, as I want a couple to put in my Coco 3's, If they do, leave a post in here, Then I'll give it ago, at installing sockets.
BTW, Rodder, what is the best way to removing the 68BO9 chips in the coco 3, What Solder Iron(Wattage wise), and other things that would be handy to have at hand.
laters
Briza
No problem, amigo! I'll ask and see. They still aren't taking orders, but Boisy was nice enough to me a disk copy of NitrOS-9 L2 (6809 version).
FWIW, I couldn't wait. Ended up at the Shack today. Spend way too much. Ahem. But, I did get a duel wattage iron (20/40) and one of those spring loaded solder suckers. Only had a chance this evening to try a couple of shots at it, but seem to work pretty well. Course, won't know if I fry the chip until we plug it back in, but still... 20W was too slow. It'll be great for those really fine solders. 40W melted the solder quick and easy. The chip didn't get hot to the touch at all. Assuming I'd feel anything over 200 deg F. Yes, I use my finger to test potentially hot components. Works every time! (Not recommended unless you've been burned a lot. I have. heh.)
Angel's Luck,
Capt.
Post a Comment