Tuesday, March 06, 2007

Flat Screen Bliss

My New Year's resolution was to try to post something to one of the CoCo blogs daily. So far... not so much. So, I'm giving the big fat finger to New Year's resolutions and making a St. Pat's resolution not to make any more of the silly things. So there...

As far as CoCoing goes, I've been mostly spending my CoCo time on the actual CoCo. My "learning" is bouncing all over the place at the moment, so nothing productive per se. But you've gotta have that play time to learn, right? Right. :)

Since Brian is over on his blog showing off his shiny flat panel running Roy's VGA adapter, I figured I should do the same, specially since he managed to get the 6309 installed and I fumbled mine. Dammit. :P (Actually, if you haven't looked at Brian's blog, stop reading here and go over there to see something REALLY cool. You can come back and read this nonsense later. Seriously. Go!) I finally broke down and dropped the cash on a flat panel. I opted for a cheap, but nice, Magnavox 15MF400T/37 LCD television. On sale a Wally-World, it's a pretty good deal with all the inputs it accepts. Not the best screen ever, but perfectly acceptable for casual TV watching, retro system hook-ups and, of course, CoCoing!

The biggest selling point of this TV is that it has a 1024x768 resolution and a SVGA hook up. Makes a handy, quick and dirty PC screen (the thing is light and easy to move around) and works brilliantly with Roy's CoCo VGA adapter.

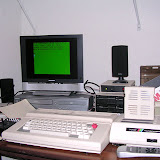
Here's the current CoCo setup:


As you can see, the picture is nice and sharp. No lines or artifacts on the green and black background screens, though I did pick out the vertical lines on reds and grays. Not particularly noticeable and, to be honest, the image is so damn sharp you won't care! Truly the way to CoCo these days. Games play beautifully. Sinistaar (yeah, still playing that freaking game) looks amazing. Sound is mediocre at best. If I'm going to do some serious TV watching, or play music with the CoCo, I'll need to upgrade the sound for certain.

Quick run through the picture: Ramona, the 512K CoCo 3. The Magnovox (obviously) sitting atop a giant DVD/VCR combo unit (also a Maganovox). Gradma has a VHS, so I have to make tapes of the little ones by hooking the camcorder up to this beast. The CoCo can go straight out to A/V, so I'm gonna use the CoCo to make title screens, credits and that sort of thing. Pretty cool, eh? :) Roy's adapter is the beige box sitting on top of the disk drives with the little green light on it.

I also hooked up Hawksoft's S-Video adapter. I know, I'm not done fully testing it yet, so a review is still forthcoming. It works great with this setup. The TV in S-Video mode has trouble locking on, so the screen is all wonky when it first fires up. Hitting reset on the CoCo causes the TV to reset as well and it usually can lock with a beautiful and centered picture right away, though a couple of times I needed to reset twice. On this particularly screen, the S-Video adapter is WAY better than RF, much better than A/V, and better than an RGB monitor. It's not quite as crisp as the VGA adapter. (Again, as tested on this particular TV... your mileage may vary.) I've found the S-Video adapter to be most handy on the big screen TV for game playing. It would make a great solution for regular use as well if you have a TV with S-Video but no VGA.

The downside to the VGA adapter is no sound. There's a plug on the back of the box to add a speaker. All I have handy at the moment are some craptacular PC speakers I picked up at a show for 5 bucks. I laughed, I cried, I kissed my five bucks goodbye. Serious suckage. If anyone has any suggestions for a small, self powered mono speaker with good (and loud) sound that works with Roy's VGA adaptor, let me know. And where to get it. :)

Ahem... okay, I've rambled on more than intended. Here's a shot of the current CoCo mess, er, desk. Look at all those damn wires. I tend to ignore them when I'm actually in there, but the camera doesn't lie. Now I see what my wife sees. I see CoCos. She see's wires and boxes all over the place. heh! That's my Sega Genesis 32X sitting there next to the CoCo. Kick ass game system. Highly recommended if you like retro games. Alas, it feeds into the TV with the RF coax and the set won't lock to center the image. The *overly descriptive expletive deleted* that didn't put tuning and vert/horz controls on TVs these days needs to be ass punched. Automatic centering my left buttocks. Geez. So, I'm awaiting new cables for the Sega. Haven't tried the Atari's yet, but they're next. They both hook up via the RF as well... so I'm not hopeful. More damn cables to buy. But the CoCo rocks. And that's all that really matters. Thank you Roy! :D


Angel's Luck,
Capt.

Sunday, February 11, 2007

Lomont, Mandelbrot and the CoCo 3

Chris Lomont is a computer scientist for Cybernet who, like many of us, has a wide range of interests. His personal page is fantastic example of what a real personal page should be, with sections on everything from Sudoku to Philosophy. He's also got an amazing LED cube kit, called the Hypnocube you can buy and build yourself (you can buy it complete, but where's the fun in that). Oh, and he also does CoCos.

Mr. Lomont's CoCo page is currently on a single subject, a Mandelbrot renderer for the Color Comptuer 3. Written in assembler, the program generates those wild and hypnotic images from the Mandelbrot set right on your own CoCo, or emulator as the case may be. One of the reasons I haven't been active much is, thanks to Mr. Lomont, I've been letting my CoCo run this program pretty much non-stop for about two weeks.

The CoCo 3 rendering the Mandelbrot set using Chris Lomont's generator.
This is the first pass that gets more detailed in each successive pass.

When I was a wee lad I never turned my CoCo off. Seriously, for about ten years, and through three CoCos (1,2 and 3) I doubt the thing was off more than a few hours. Maybe longer if we went on vacation, my memory isn't that good, but mainly it was on 24/7. Since I got back into the CoCo two years ago, it's been mostly off. I turn it on to play games, mess with it, and test vintage stuff, but when I'm done I shut it off. Not lately, though.

With Mr. Lomont's program running, Ramona (the CoCo 3) runs pretty much all the time. Why?


I honestly don't know. Mandelbrot generators fascinate me for some reason. It's one of those weird psycho things, because I really have no idea how they work, why they work, what it's suppose to represent, or anything else for that matter. Did I mention I suck at math and numbers? Yeah? Good. Okay, I did wiki it and actually learned something. But that's not why Chris Lomont's program is so cool. It's just that it makes really cool fractals. More, it makes really cool fractals on a CoCo. Double whammy!
The full set after the final pass on the CoCo 3. Sweet, eh?


First things first. If you just want to see what the program does, or study the source code, fire it up on a PC using an emulator. I ran it in MESS with the throttle off and it renders at a pretty good clip (for an 8-bit computer emulator that is). Very nice. The various assembler routines Mr. Lomont has developed, including a low level keyboard routine and the fixed point mathematics routines for the CoCo are worth looking into for programmers. Mr. Lomont did all the hardware interfacing routines direct, so there's no ROM calls at all. For those looking to go to the CoCo hardware directly, here's a good example of how to go about it.

He's also compiled a couple of outstanding resource files on the CoCo hardware and the 6809. While not complete at the moment, the amount of information included, and the excellent format, make these two compilations pretty essential. Of planning on programming the CoCo seriously, snag these right away.

Of course, if you want a Mandelbrot generator on the PC, just google it and you'll get a ton of them. Good ones, too. But it isn't a CoCo, ya know?

About five zooms in and after three (I think) passes. You can select
how deep you want to go at any point in the program by pressing
a key, which brings up a bounding box to select the area of interest.
The colors were washed out by the camera. The colors are nice
and sharp on a real CoCo.

So how is it on a real CoCo? Fabulous! The images, even in 16-colors, are gorgeous. The caveat, of course, is that it takes a long time to render a selection. As in hours. Mr. Lomont anticipated this and has the CoCo do a quick pass first, so you can start doing deep zooms much faster, looking for interesting fractals. The CoCo then continues to get more detailed with each successive pass. A full render takes several hours, but the result are wonderful. This is truly the CoCo as art. :)

The program does it's job well. You probably do want to download the second version listed on the site. That's the one that includes the zoom feature and progressive rendering. Mr. Lomont also mentions on the site that he may possibily revisit the program. Personally, I'm thinking the save to disk feature would be great. (I have to use the digital camera to capture the nice ones, but it's not really ideal. Also, with a save feature in a standard file format, you could, say import the images into CoCo Max or another editor and play with them.) It would be fun to have several zooms saved to disk and a simple slide show viewer that could show them progressively, or even give a guided tour of some of the more popular and wicked cool sites in the Mandelbrot set (some even have names). A 256 color version is mentioned as a possibility, as are a timer, finished sounds and animated palettes. All would be very cool. I'd also like to see a way to force the program to skip ahead to the "final pass" after finding an agreeable location. As it is now, it goes through each progressive set non stop.

The camera keeps washing out the colors, but I liked the
shape of this one. Drill in much deeper around the point
there and it goes into some neat spiral patterns.

This is a perfect example of CoCo love resulting in some really cool development. Chris Lomont has created a really neat Mandelbrot program for the CoCo. But more importantly, he's done some serious scrounging of technical details on the machine and graciously compiled them for all to use. And to top it off, all the source code is posted for perusal.

Oh, and he also mentioned the possibility of porting Lemmings to the CoCo. Ohhh! Don't tease... :P

Stop by Chris Lomont's site and get your CoCo exploring the infinite possibilities of the Mandelbrot set, dig the technical docs, and enjoy the code. While you're there, poke around the site. I guarantee it'll be an interesting stop. Now I just need to start saving my pennies to snag one of those wicked hypnocubes... hmmm....

Angel's Luck,
Capt.

Drop by Capt's CoCo Hut to discuss this article, talk about CoCo collectibles, and chat abuot NitrOS-9 with the one and only briza!

Tuesday, February 06, 2007

Sinistaar 512K Joy


Every bit you add to your CoCo, every upgrade you slip in, and every countless hour you spend punching away on the cramped keyboard adds up. The payoff is always worth the effort with this little guy. :) I haven't been posting much because I'm STILL playing with my CoCo! The move to 512K is part of it, of course. The games are wicked.

I've got tons of stuff ready to post, but one at a time here. First off is Sinistaar. Pretty good game, with excellent "16-bit" like graphics. These two screens are just samples. I couldn't get a shot of the game in action. I was playing it too much and letting those little miner-dudes get through to the evil head guy is just not permissible. The game itself is pretty shocking the first time you fire it up and see it play. You won't believe it's a CoCo. And then you will. :) This is the sort of stuff the CoCo can REALLY do. This isn't the best thing you can do with a 512K CoCo, but it certainly shows it off nicely.

The Faults

The bad stuff isn't too bad. The game stutters a bit when there's several objects on screen, all swirling and running about at the same time. Including the big Sinistaar guy. After a few times through, you anticipate it and actually use it to your advantage. But it shouldn't do that. And it loads from three floppies. So when you're ready to play, bring a lunch.

The Good Stuff

The game play is a lot like what I remember the original arcade being like. But I never got into the arcade game that much. The sound effects are serviceable in game for shooting and such, then get freaky when the giant head-thing starts talking. Which quickly degenerates into a Rocky Horror audience participation event. "I LIVE!" (for Spam!) "I HUNGER" (for your mom) "RUN COWARD RUN!" (Who's Howard?) It's nice and creepy.

The graphics are great. The asteroids alone are worth the load time. The game play is challenging, but more freedom of movement would be nice. The ship only moves and fires at set angles. Of course, that's part of the design, otherwise you'd end up with an asteroids shooter and it wouldn't be quite as challenging.

Overall, Sinistaar isn't a reason to upgrade to 512K in itself, but it sure is a nice bonus.

Angel's Luck,
Capt.
Monday, January 29, 2007

CoCo TV Ships

Just received email from Roger Taylor announcing that the CoCo TV DVD, Disk 1 has shipped! :)


The CoCo TV DVD is a three disk package. It collects all sorts of great stuff including game captures, video from CoCo Fests, schematics, and music. All done up in a professional DVD package. Should be quite entertaining. The three DVDs are currently priced at $19.95 and available from


CoCo3.com


Disk 1 is available now with the other two forthcoming. Get your snacks and beverage of choice ready. It's show time in CoCoville! Who needs the Superbowl. Okay, I do, but I'll be cutting to CoCo TV during the halftime show. :)


I'll give it the full Ebert treatment as soon as it arrives, of course.


Angel's Luck,

Capt.


powered by performancing firefox

Time is full but there's always room for CoCo

Here's a nice change. Well, mostly nice. I just haven't had much time to get on the PC lately. :) The bad thing is I haven't had much time to answer email, update the website and blogs, or post in the message boards. The upside is that the free time I have had has been spent in front of my CoCo! :)


It started out wanting to play Pegasus and the Phantom Riders on the CoCo 3. Still fun, even in black and white, but, well, it's in black and white. The game uses artifact colors on the CoCo 1/2 composite output in PMODE 2 and 4. (These are "faked" colors in a two color mode, achieved by alternating pixels in specific patterns. The effect, on a TV set, is color from a black and white picture.) So that's no good on a CoCo's RGB output.


Thanks to the guys on the coco3.com message board, that problem is fixed. Robert Gault, jmk, NavyDave and Retro Rick all had suggestions on how to fix it. That got me into writing up a quick program to scan for the correct addresses with the game loaded in memory. Meanwhile, super CoCoists Robert Gault whipped up a disk patch that switched the game down to PMODE 3 and poof, 4 colors. Playing with the PALETTE command prior to starting the game, and using Robert's patch, the game plays AND looks great again. You can read the full thread here:


The CoCo Forums - CoCo 3 Patch for Pegasus


After a night of research, I decided to finish my little scanner program, just to see if I could locate the correct addresses. Using the information from the above gentleman, the CoCo 3 manual, and articles from the The Rainbow, it worked. While messing with it though, I got sidetracked into playing with the PALETTE command. I hadn't used this feature in, oh, 18 years or so? So I started writing up little programs that would display boxes in the various graphics modes and let me switch the PALETTE colors by loading the slots and trying different combinations. Which took another few days, of course.


Then... :) I started messing about with using the CoCo 3's PALETTE to animate the little boxes and a stick figure. Cool. So that ate up a few days as well. Now, I've got to get back to finishing up the memory scanner/PMODE locater thingie, but it's slow going thanks to lack of sleep.


So basically, a lot of fun, but nothing particularly useful out of almost two weeks of playing. But that's kind of the point...


It's great to play with the CoCo again. I recommend it to anyone. Turn off the PC, the TV, the books... and just start messing with your CoCo. One thing leads to another, and just out of this little playtime I've got about a bazillion ideas for games, programs, and other exploration I want to try. The accessibility of the CoCo makes it so easy to create. That might be the single most important draw of this machine. Whether you're a rank amateur, like me, or an electronics/programming wunderkind, have a day or two, or week or two, with your CoCo, uninterrupted, and see what happens!


Okay, not I'm late on my assignments for Mary's CoCo Nutz! E-Zine, so I best get going... :) (That's a plug, by the way. After you spend all that time on your CoCo, sent your creations in to Mary!)


Angel's Luck,

Capt.


powered by performancing firefox

Sunday, January 14, 2007

Pimp My CoCo: Cloud-9 512K SIMM Upgrade

If you're not running at least 512K on your CoCo 3, then just do it. Now. :)

As I've mentioned before, I'm a bit of an idiot-savant when it comes to technical things. Sans the savant part. While I can grasp technical aspects and theory of a device quickly, I have two very big problems that interfere with my ability to execute technical solutions. First, I can't hold numbers in my head. I don't know why. Never have. Can't even remember my own phone number until I've dialed frequently for over a year. Seriously. And second, sitting still for more than 15 minutes is pretty much beyond me. That might have something to do with the copious amounts of coffee I drink. hmmm...

Regardless, I absolutely love technology, mucking about with stuff, knowing how something works, and building things. Sometimes my two big faults are actually pluses. I can't remember numbers well, so I write everything down. So I always have a trail and a plan to follow if I need to go back over something. (I carry a rather packed full and royally messy Dell Pocket PC for a second brain.) I also tend to throw myself into active tasks with abandon and I never ever quit. Might take months, or years, to learn something or complete a project, but it will get done.

So what's this have to do with a memory upgrade for the CoCo? A lot. Making a couple hundred solder connections is something that would take me a long time to do. I'd be up and running around more often than sitting still and getting it done. But installing a memory upgrade on the CoCo is dirt simple. Even someone like me, with little patience at all, can get it done. It's a 15-minute job. 20 minutes if you're slow about it. Perfect for jacked up Starbucks junkies like me. And if I can do it, it's a given that anyone can.

The benefits of performing this upgrade are huge. NitrOS-9 runs better, CoCo Max 3 is easier to use, and the games are WAY cooler. So, even if you're just running your CoCo as a retro game console, upgrading to at least 512K opens up a whole new world of stuff to do with it. If you're building a modern CoCo, it's a bare minimum!

I was going to write an article for the Hut describing how to perform the upgrade, with pictures and everything, but there's no need. I selected the Cloud-9 Tech 512K SIMM upgrade and the included instructions are simple and complete. Follow them step by step and you're done. Easy peasy. So instead of a lengthy article on the web site, here's a run down to demonstrate how easy it is and what to expect, and hopefully to encourage more CoCoists out there to do the deed.

Here's a shot (click 'em to enlarge) of the Cloud-9 512K SIMM Upgrade package. It's a single satellite board with two 120ns SIMMs plugged into the sockets (also available without SIMMs if you prefer to install your own). It is oriented vertically and plugs into the CoCo 3's white memory connectors located to the left and below the installed memory. Other 512K packages I've seen are oriented horizontally, so if you've got mods inside your CoCo case, make sure everything will fit properly. The package also includes a manual (2 pages) and a CoCo 5 1/4" floppy disk with the memory test program on it.

Prep and Tools: You'll need a Phillips head screw driver for opening the CoCo case and a pair of micro-clippers. Highly recommended is a IC extractor tool (see below) for pulling the old memory out. You'll also want an anti-static wrist strap. Memory modules tend to be exceedinly sensitive to static. The cheapo one shown here I picked up from Jameco. Make sure it's clipped to something metal and grounded.

UNPLUG EVERYTHING FROM THE COCO AND THE COCO FROM THE ELECTRICITY. :) Unass the CoCo 3's case by removing the screws from the bottom, flip it over, take the top off and pull the keyboard up and down slightly. You don't need to unhook it, but the Cloud-9 memory board's lip has to sit right next to it and it's hard to get to it with the keyboard on the its posts. Just nudge the keyboard down and out of the way a bit.

Extract the original memory chips carefully. There's a better than average chance that, since they've been in there for over 20 years, they are a bit tight. Very gently pry them out of there. The chip extractor I'm using there is a professional model I pick up at Cyberguys. You can get the kind that clamp onto the chip and pull it up all at once. I like this one because I get more control. My experience with the other kind has been mixed. This is probably the most difficult part of the operation, but only because you need to go slow and careful. Just be gentle so you don't break a socket or bend something.

Here's I've gotten one of the memory chips out. These should be stored in an anti-static bag, tube or foam to use later, should the need arise. Like I said, this takes the most time. Maybe five minutes being nice and careful. There's not a lot of danger of damaging the CoCo here, but it could be done if you scratch something or pop a solder joint. Gently....

Once the old memory is out, you snip out two capacitors, C66 and C65 as labeled on the CoCo's motherboard. Some doofus soldered C65 on my CoCo right flush against the board (they're suppose to be raised slightly), so the clippers couldn't get hold of the leads to snip. If this happens, VERY gently wiggle the capacitor back and forth until it breaks off.

Next, line up the pins on the Cloud-9 board with the sockets on the CoCo's mother board. They're hard to miss, the nice bright white one's to the left and below the original memory. This is a VERY tight fit, so don't force it. Keep pressing firmly until they slide in, constantly checking the pin alignment. If you bend a pin, back off, pull the assembly out and use a pair of micro-pliers to gently bend it back into position. Try again.

Here's a shot of the upgrade installed and ready to roll. The keyboard fits right back on. This is the Korean built model, so it just sits up on the posts nice and snug. Put the CoCo back together and we're good to go!

After everything is back together and plugged in, run the memory test utility on the included floppy. I let it run about 50 times. I also let the CoCo run a graphic demo for about an hour and half. No problems at all and no noticeable increase in heat. Looks good and good to go! :)

That's it. Seriously, 15 to 20 minutes and basic mechanical skills are all you need to do this upgrade. It's cheap and it'll complete change and expand the functionality of your CoCo. The extra memory opens up a whole new world to explore on your CoCo and when it's this easy to do it, there's not a lot of excuse. Do it! :)

Angel's Luck,
Capt.

Pimp My CoCo: DriveWire!

Awhile back I ordered up a DriveWire kit and a 512K SIMM upgrade from Cloud-9. Unfortunately, I flat ran out of time to install them before the holidays. Well, couple of days ago I got the time. And the truth is, I did have the time before the holidays, I just thought I didn't. Why? Because both are so freakin' easy that even a technological doob like me can do it. :)

Walking the DriveWire!

DriveWire was the more challenging of the two products. It's super easy to install. Just install the server software on the PC that come on 3 1/2" disk (be sure to hook up your 3 1/2" floppy if you don't have one on the PC... heh). Shut everything off. Then plug the rectangular serial end of the cable into the PC and the round CoCo serial end of the cable into the CoCo's bitbanger. After turning everything on, you run a wizard program on your CoCo (disk included) that builds a custom copy of HDB-DOS to use with the DriveWire.

Once HDB-DOS is up and running, your PC is now your CoCo's beeotch! You can use the PC like a hard drive, save and load programs, and copy and backup anything on the CoCo. The CoCo giving commands to the PC is the way it should be anyhow. Bwahahaha!

This all works as advertised with a few caveats, provisos, fine prints, et al. Ahem. The manual for the DriveWire system is well written, but misses a few bits that might useful for beginners (or idiots, like me, that haven't messed with a serial port and Windows hardware profiles in years). You WILL want to download the PDF for HDB-DOS. The DriveWire manual doesn't give a lot of examples on how to actually accomplish some tasks, but the HDB-DOS manual is quite complete.

The first snafu I hit was that I kept getting I/O errors when accessing the PC from the CoCo. Pissed me off tremendously because I was following the directions precisely. Well, not exactly precisely. I forgot that the PC sets its serial interface to 9600 bps by default. So, you need to reset the port to 57600 bps for the CoCo 3 hookup. Everything else should be fine (8-N-1).

That worked well and I was able to save and load programs from the PC. But BACKUP, DSKINI and COPY wouldn't work. They continued to give I/O errors and/or lock up the server completely. After much gnashing of the teeth, I broke down and emailed Cloud-9 for help.

Boisy of Cloud-9 wrote back and suggested I download the newer version of the server. This new version has a nicer interface and is more stable. After installing it (just copy the .exe file over the old one, leave everything else the same), everything started working just right. It wasn't long ago I recommended always checking for a new version before writing for support. Do as I say, not as I do. :P Thanks to Boisy, of course, for the help and the patient understanding. :)

So, how does it work?

Fantastic, that's how! If you want to add a hard drive to your CoCo, and your PC is next to your CoCo, this may be one of the best and cheapest ways to go about it. This isn't drag and drop, mind you, but it is pretty simple.

The server gives four virtual drive slots to play with. You access these by typing DRIVE#n, where n is 0-3. Each slot is filled with a .dsk image on your PC. Insert a blank .dsk image in one of the slots and you can save to, load from, and format up to 255 floppy disks per drive. You can also turn selected disks on or off, but only from 0 to n, where n is the last disk you want off. So:

DRIVE OFF 2 turns off disks 0,1, and 2, or DRIVE OFF 0 turns of disk 1, etc. DRIVE OFF with no number designation just complete turns off access to the hard drives. DRIVE ON turns them back on, of course.

When a selected disk is off, the corresponding floppy is on. So if you type DRIVE OFF 0 the hard drive disk 0 (DRIVE 0 DISK 0) is off and the real floppy disk 0 hooked up to your CoCo is on. This is useful for copying files back and forth with the BACKUP or COPY commands.

Just remember that the DRIVE command a) switches which .dsk image is being access (0-3) from the server (ie. DRIVE#0) and b) when issued with the OFF/ON switch, selects which virtual floppy is on or off (DRIVE#0, DRIVE OFF 0, would turn off access to the virstual disk 0 on virtual drive 0 and turn on the real floppy drive 0).

As an example, to copy a disk from the CoCo to the PC:

Step 1. Mount a blank .dsk image in Drive 0 of the server on your PC (you can make one with MESS).
Step 2. Type DRIVE#0 to switch to the virtual drive 0 (this is the default).
Step 3. Type DRIVE OFF 0 to turn off virtual disk 0 on drive 0 and turn on floppy drive 0 connected to your CoCo.
Step 4. Insert your floppy into the CoCo's floppy disk drive 0 and type BACKUP 0 TO 1

The DriveWire and HDB-DOS will then transfer the contents of the real floppy to the virtual disk 1 in the drive 0 slot. It is then helpful (if you want to share around the .dsk image) to type:

Step 5. DRIVE ON to turn off the real floppy drive and activate all the disks in Drive 0 of the virtual drive.
Step 6. BACKUP 1 TO 0 to copy the contents of (virtual) disk 1 to disk 0. That just makes sure what you're copying is, by default, on the disk 0, which is where most people would look for it first and make sure it'll work in an emulator, for example.

Reverse the BACKUP command procedure to copy from the PC to a blank CoCo floppy disk. Took some getting my head around the conceptual thing that's working here when copying from hard drive to floppy drive, but once I got it, I was copying stuff back and forth with ease.

Of course, the main use for the DriveWire is to load and save programs and data on your PC directly to and from the CoCo. For this task, DriveWire is brilliant. No real special commands are needed. Virtual Drive 0, Disk 0 is your default drive. Switching is as easy as addressing the right disk when you need it. All of which is clearly laid out in the HDB-DOS manual.

Like I said, if all you want to do is add mass storage to your CoCo, DriveWire is ideal. The price can't be beat and it's a slick, easy solution.

Angel's Luck,
Capt

Wednesday, January 10, 2007

Speak Up! Posted

Speak Up!, an early software synthesizer by David Dubowski of Classical Computing, has been posted. Find the program here:


Index of /files/coco/speakup

Works great in MESS (tested on CoCo 2B and CoCo3 NTSC ROMs), but might want to look at the docs on how to increase the pitch a bit. I found it was a little clearer that way.

Angel's Luck,
Capt.

powered by performancing firefox

SockMaster's HICOLOR Source posted

There's been a bit of chatter in the CoCo mailing list about more than 16-colors on a CoCo lately. So, John Kowalski, The Sock Master, posted the assembler source code for his HICOLOR viewer which can display over 6000 (that's six thousand) color simultaneously! Woo hoo! Check it here:


HiColor - BMP viewer

Angel's Luck,
Capt.

powered by performancing firefox

News: Joel Ewy's Amazing CoCo 3 Images

This is so neat I just had to post it. :)

Joel Ewy has posted some old images he made with a CoCo 3 and a DS-69B digitizer. 4096 colors and all! Very cool stuff. See the in the coco3.com gallery at


CoCo3.com - TRS-80/Tandy Color Computer Photo Gallery, Forums, and Live Chat! :: Joel Ewy

Angel's Luck,
Capt

powered by performancing firefox