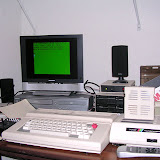
My first attempt to get the PC to CoCo connection running via DriveWire on a Windows Vista PC didn't quite work out. For those contemplating the move, here what I've got so far...
You would think I'd know better, but when I ordered up the Serial to USB adapter I went ultra cheap. I purchased a unit made by Prolific out of Taiwan. After hot plugging it, Vista immediately located the correct driver online and loaded it up, without the need to install from CD. Unfortunately, the driver is for XP, not Vista. Still, the ports showed up properly and everything tested out okay.
Next I hooked up the cable that comes with DriveWire to the CoCo. I installed DriveWire onto the PC from a thumbdrive. When run, DriveWire popped up with an error message stating it could not locate the COM ports and quit. Running the server in compatibility modes (I tried Win 95, ME and XP) and with administrator privileges didn't help, alas. Prolific will not be providing Vista drivers, dammit, and is relying on third party vendors to supply them. Serious suckage. The two I was able to locate just crashed the device, and had me spending an hour or so uninstalling and reinstalling shit, so we won't go there.
Then I tried it with the old install I had on my ME machine, copied directly to the thumb drive and then into Vista. That forced DriveWire to fire up (with the old settings) and I was able to manually set it to the COM port selected (I did all tests on COM3 and 4, Vista has hidden COM 1 and 2 somewhere and I can't find 'em... or the Prolific Driver just isn't installing them to begin with... hard to say). This almost worked.
The CoCo, under HDB-DOS, would COPY, BACKUP and load BASIC programs from the server just fine. Unfortunately, it reported an I/O ERROR every time I tried to load a machine language file. Once again back to the compatibility settings, but again to no avail. I did not test it on NitrOS-9, yet.
[Side Note: The compatibility mode in Vista is actually workable and super easy to use and tweak. Other than this, I haven't found anything it won't fix that was built for Win 95 through XP. All my old stuff is working fine on Vista, awaiting it's turn for the full 32-bit Vista treatment. Of course, old DOS stuff won't work at all without an alternate DOS installed, such as DOSBox. For us Tandy fans, DOSBox even emulated Tandy graphics/sound like the old 1000 series!]
I emailed Boisy at Cloud-9 and he was kind enough to make a couple of suggestions and answer questions. (Seriously, Boisy and Mark rock at customer service. Stand behind their products 100%, so buy from these guys without pause.) First, there's no plans for a Vista version of the server, which granted, is asking a bit much. heh. Second, he recommended trying a USB to Serial adapter with the FTDI chipset. He runs DriveWire with such a converter on a Mac and says he's found them to be way more reliable than the Prolific brand.
So that's where I'm at so far. Next week, when there's money in the CoCo-fund again, I'll order up an FTDI chipset serial to USB converter and give that whirl. FTDI just released brand new shiny drivers for Vista, so I'm hopeful. At the very least, I can reasonable eliminate the hardware as the problem. I'll report more when I get it up and running.
Anyone else had success or failure running DriveWire in this manner under Vista? How about on an older machine with serial ports installed? Any thoughts? More to come....
Angel's Luck,
Capt.
Discuss this entry and its comments in The CoCo Hut Message Board!

Showing posts with label Pimp My CoCo. Show all posts
Showing posts with label Pimp My CoCo. Show all posts
Friday, July 27, 2007


Wednesday, July 18, 2007
No CoCo news or updates, but I got a new PC! :)
I surfed around CoCo-land a few days ago, and actually for the last few weeks, and just haven't really found anything interesting to write about. And alas, that damn Harry Potter has been eating up all my time of late. Being a bookseller by trade, I suppose I do have to prepare for the biggest fargin' book release in history. But it really cuts into my CoCo time.
On the pimping front, I did manage to get the 6309 socketed in the GlowCo, but it wouldn't fire. Pretty sure I botched a connection, so I'll have to go back through all 40 and figure out which one(s) a goofed. I suck at soldering almost, but not quite as, bad as I do at desoldering. heh. On the other hand, I'm learning loads about the guts of the CoCo and electronics in general. Fun stuff. And handy, too. I wired up a cool LED wand for my HP costume. (Yes, I have to hold a giant party at the store, and yes, I have to go in costume. If you're in Tulsa, stop by! It's going to be a blast). CoCo stuff can lead and lend itself to all sorts of interesting things.
Mostly, though, I've been playing CoCo games. Pretty much anything and everything, which will be great for website updates, if I ever get around to doing that again.
I did buy a new PC, as well. Just a Dell out of the cheapseats, but considering it's the first new PC I've had in many, many moons, it seems pretty sweet to me. Nice big fat widescreen monitor, gobs of hard drive space. I actually like Vista, though I need to spend some time gutting out all the crap MS and Dell loaded on it. I know it has nay sayers, and saying you like an MS product is tantamount to heresy in the CoCo world... heh... but I'm enjoying the hell out of it. The CoCo is partially an MS product, after all.
Alas, it has no floppies (nor anyplace to hook one up) and no serial ports. So that means no DriveWire! Arg! From a modern standpoint, it simplifies the crap out of the thing. The machine is small, quick, and easy to use. From a retro-point of view, it's a nightmare. I suppose it's a good thing, though. I'll get an opportunity to try out how DriveWire works when run through a Serial-to-USB adapter. I'll letcha know how it works out.
Anyhoo... If you have any CoCo News, send it this way. There's not whole lot of action out there at the moment, but there's plenty of stuff in progress from what I can tell. If you'd like me to post an update on your projects, or any other CoCo announcement for that matter, drop a note to coco@clubltdstudios.com
Angel's Luck,
Capt.
On the pimping front, I did manage to get the 6309 socketed in the GlowCo, but it wouldn't fire. Pretty sure I botched a connection, so I'll have to go back through all 40 and figure out which one(s) a goofed. I suck at soldering almost, but not quite as, bad as I do at desoldering. heh. On the other hand, I'm learning loads about the guts of the CoCo and electronics in general. Fun stuff. And handy, too. I wired up a cool LED wand for my HP costume. (Yes, I have to hold a giant party at the store, and yes, I have to go in costume. If you're in Tulsa, stop by! It's going to be a blast). CoCo stuff can lead and lend itself to all sorts of interesting things.
Mostly, though, I've been playing CoCo games. Pretty much anything and everything, which will be great for website updates, if I ever get around to doing that again.
I did buy a new PC, as well. Just a Dell out of the cheapseats, but considering it's the first new PC I've had in many, many moons, it seems pretty sweet to me. Nice big fat widescreen monitor, gobs of hard drive space. I actually like Vista, though I need to spend some time gutting out all the crap MS and Dell loaded on it. I know it has nay sayers, and saying you like an MS product is tantamount to heresy in the CoCo world... heh... but I'm enjoying the hell out of it. The CoCo is partially an MS product, after all.
Alas, it has no floppies (nor anyplace to hook one up) and no serial ports. So that means no DriveWire! Arg! From a modern standpoint, it simplifies the crap out of the thing. The machine is small, quick, and easy to use. From a retro-point of view, it's a nightmare. I suppose it's a good thing, though. I'll get an opportunity to try out how DriveWire works when run through a Serial-to-USB adapter. I'll letcha know how it works out.
Anyhoo... If you have any CoCo News, send it this way. There's not whole lot of action out there at the moment, but there's plenty of stuff in progress from what I can tell. If you'd like me to post an update on your projects, or any other CoCo announcement for that matter, drop a note to coco@clubltdstudios.com
Angel's Luck,
Capt.
Powered by ScribeFire.
Tuesday, May 01, 2007
A little GloCo action
Okay, I wasn't going to post any more on the GloCo for awhile, but figured what the heck. Nothin' else going on at the moment. The reason for no Pimp My CoCo posts for awhile is pretty simple, by the way. I need the time and guts to attempt the 6309 upgrade again. heh. However, I would like to have some fun with the machine before I attempt to wreck it, so I went ahead and did the 512K thang on it.
This time, the upgrade took a whole three and half minutes. Seriously. If you haven't yet, do this. No excuses.
I thought this was interesting though, because for the GloCo's memory boost, I had to go retro. Really retro. A SIM based upgrade won't fit correctly. So I needed a flat, horizontally oriented board.
This is the PBJ 512K upgrade, one of the first third party boards available in 1986. Yeah, it's pretty much ancient. It's nice, though because it's flat and it fits nice and snug against the RF box there. Doesn't get in the way of the keyboard. Most important for this project, it's low. It does however, run as hot as a firecracker. The fan was definitely a good idea. As it is, with the power transformer out, the fan will blow straight across the memory board. Perfect.
Of course, we have to test the board and make sure all those ancient chips are still good. The proper way to do that would be to run a cyclic memory test on it, such as the one that comes with Cloud-9s 512K SIMM upgrade. But naw, that's the old way. The new way to test a 512K upgrade is...
DONKEY KONG! :D
 I made sure to test this for a good half hour, just to be sure. And that monkey just really pisses me off sometimes. He must be destroyed! heh.
This is probably a pretty good test of the memory, though. Sock Master's Donkey Kong conversion/emulator really gives the system a workout.
By the time I was done playing, you could have cooked an egg on that memory board. And that was with the top off.
The CoCo never glitched, though. Not once. Go GloCo, go GloCo, go GloCo!
I did, of course, let the proper memory test run for awhile. A-OK. And fired up NitrOS-9 again, which was more a test to make sure I put the 40-track drives back together (the NitrOS disks are 40-track) properly. Another A-OK.


More soon (er or later). :)
Angel's Luck,
Capt.
Discuss this entry and its comments in The CoCo Hut Message Board!
This time, the upgrade took a whole three and half minutes. Seriously. If you haven't yet, do this. No excuses.
I thought this was interesting though, because for the GloCo's memory boost, I had to go retro. Really retro. A SIM based upgrade won't fit correctly. So I needed a flat, horizontally oriented board.
This is the PBJ 512K upgrade, one of the first third party boards available in 1986. Yeah, it's pretty much ancient. It's nice, though because it's flat and it fits nice
 and snug against the RF box there. Doesn't get in the way of the keyboard. Most important for this project, it's low. It does however, run as hot as a firecracker. The fan was definitely a good idea. As it is, with the power transformer out, the fan will blow straight across the memory board. Perfect.
Of course, we have to test the board and make sure all those ancient chips are still good. The proper way to do that would be to run a cyclic memory test on it, such as the one that comes with Cloud-9s 512K SIMM upgrade. But naw, that's the old way. The new way to test a 512K upgrade is...
DONKEY KONG! :D
 I made sure to test this for a good half hour, just to be sure. And that monkey just really pisses me off sometimes. He must be destroyed! heh.
This is probably a pretty good test of the memory, though. Sock Master's Donkey Kong conversion/emulator really gives the system a workout.
By the time I was done playing, you could have cooked an egg on that memory board. And that was with the top off.
The CoCo never glitched, though. Not once. Go GloCo, go GloCo, go GloCo!
I did, of course, let the proper memory test run for awhile. A-OK. And fired up NitrOS-9 again, which was more a test to make sure I put the 40-track drives back together (the NitrOS disks are 40-track) properly. Another A-OK.


More soon (er or later). :)
Angel's Luck,
Capt.
Discuss this entry and its comments in The CoCo Hut Message Board!
Sunday, April 22, 2007
Very Little Pimpin' But Some Progress
I haven't had a ton of time to work on the CoCo mod, on account I apparently have to do yard work, repair fences, clean the garage and such. Geez. Oh, and I finally got around to putting up some peg board in the workshop to hang some of the growing collection of tools. Ever notice how something little makes a world of difference? That's what peg board is like. It's not hard to hang. Just a pain in the ass doing it by yourself (hold the peg board up with one hand, screw it to the frame with the other... gah!), so it's a put it off thing. I should have done it a year ago. Anyhow, score one for the life is easier, dept.
Here's some more shots of things in progress. I did finally land a CoCo 3 to use the board out of for the GloCo, since I trashed the original one trying to unass the 6809. True, I'll probably trash this one too, but I got it cheap, so... Okay, let's keep our fingers crossed I can get the job done. While we're at it we'll do a quick CoCo 3 break down. And fire it up to make sure everything works.
 For those that already know all this stuff, skip it. Just haven't done a break down article in a long time, so figured since I had the pics, I'd run one. Not a lot of detail here, but the point is to encourage more folks to take the plunge.
First step is to remove all the screws from the bottom of the case. One of them is located under the warranty seal. Punch right through and pop that sucker's cherry.
 It helps to turn the case on it's side like this while you're unscrewing the screws. Do one screw at a time and dump it into your hand. A magnetic screwdriver will also work, if you prefer. (You can do it with a regular screwdriver. Just give a sharp smack on the edge of your work bench. It'll magnetize the crap out of it. Consider that you'll need an electro-magnetic coil or demagnetizer to return it to normal.)
 After dumping the screws out, save them in a safe place. Dixie cups work nice, those little electronics tubes are handy, or put 'em in an envelope. You'll also want to note that the front screws are shorter than the back screws. But sure to use the right ones in the right place when reassembling.
That screw driver, by the way, is probably the best powered one I've ever owned. It's a Kobalt Lithium-Ion little guy I picked up at Lowe's. It's light, comfy and has just the right amount of torque. Not enough to strip the threads, but just enough to loosen most normal screws. And runs for a long time on a single charge so, unlike many cordless tools that are only good for short projects, you can use this screwdriver a lot. Very nice, highly recommended.
 This board was pretty clean, but dusty. A little canned air takes care of that nicely. This is Velocity brand from Radio Shack. You can get canned air cheaper if you shop around a bit, but hey, I was there. Thing about canned air is, if the outside says it won't cause condensation or leak water, it's a) full of shit and b) full of shit. Use it in short bursts and don't tip it more than 30 or 40 degrees, or it'll wet itself.
 Here's another one of those easy but do it slow and steady operations. Remove the flat keyboard cable by lifting the keyboard up, off it's posts, and down a little. Then gently pull the cable out of the socket. They stick a bit sometimes, so use two hands and wiggle it just a smidgen, if needed. The plastic cable is fairly tough, but it will rip if mishandled.
 Then unplug the power transformer from the board. You might need to use a flathead screwdriver to very gently pull back on the clip that holds the plug in.
The rest is pretty straight forward. Remove all the screws holding the main board down. There's two over by the pak slot that have to come out and two little brackets you'll want to save. Also note that there are two copper clips at the bottom of the board. These being the keyboard grounds. You'll want to keep those as well. The transformer has two screws holding it down. Just be sure to grab and lift it low cause the top cage will come off when you lift. I didn't take pictures of all this on account I figure we've already got enough pictures of me unscrewing things.
 For now, I've installed the original CoCo power transformer in the GloCo. This will do until I get up the guts to convert it to the PC power supply. Still not entirely clear on how that works, but we'll throw the whole thing off that bridge when we get to it. There's actually nothing wrong with the CoCo's transformer, it just won't power anything else (easily).
 Here it is all put together. Step the next is easy. Install the 512K upgrade board. The step after that is not too easy. Upgrade the microprocessor. Looking forward to giving it another try, though. I learned a lot in the last attempt, and have since gotten a few more pointers from some clever folks that actually know what they're doing, so I'm cautiously optimistic. :)
 Here it is up and running. This was actually an important test, because I needed to know if the fan, power boxes, and lights would cause any interference. They don't. If they had that would have seriously sucked.
The drives are up and running too, which was the other major accomplishment. They're 5 1/4" 40-track, double sided 360K drives hooked up to a 26-3129 controller. Currently, they're crammed into an old FD-501 case. I'll need to find a Disk BASIC compatible DOS to run them to their full potential temporarily. NitrOS-9 works nicely with them, though. Still can't get the top drive to format or DSKINI, but they do everything else including load, save, copy, backup, etc. That's good enough for now. The goal is to replace the top drive with a 3 1/2" eventually, anyhow.
So, this will probably be the last Pimp My CoCo update on this project for a little while. I'll do another post when the upgrades are in place and running. Though, if anything interesting comes up, I'll post before then. At this point, the goal is to get the thing running so I can start using it. Then we'll house the drives, power supply, VGA adapter and all that other stuff in a nice, painted case. Also need to upgrade an MPI and paint it black for use with this guy as well. Plenty to do, but at least there's some light peeking out at the end of the tunnel. :)
Angel's Luck,
Capt.
Here's some more shots of things in progress. I did finally land a CoCo 3 to use the board out of for the GloCo, since I trashed the original one trying to unass the 6809. True, I'll probably trash this one too, but I got it cheap, so... Okay, let's keep our fingers crossed I can get the job done. While we're at it we'll do a quick CoCo 3 break down. And fire it up to make sure everything works.
 For those that already know all this stuff, skip it. Just haven't done a break down article in a long time, so figured since I had the pics, I'd run one. Not a lot of detail here, but the point is to encourage more folks to take the plunge.
First step is to remove all the screws from the bottom of the case. One of them is located under the warranty seal. Punch right through and pop that sucker's cherry.
 It helps to turn the case on it's side like this while you're unscrewing the screws. Do one screw at a time and dump it into your hand. A magnetic screwdriver will also work, if you prefer. (You can do it with a regular screwdriver. Just give a sharp smack on the edge of your work bench. It'll magnetize the crap out of it. Consider that you'll need an electro-magnetic coil or demagnetizer to return it to normal.)
 After dumping the screws out, save them in a safe place. Dixie cups work nice, those little electronics tubes are handy, or put 'em in an envelope. You'll also want to note that the front screws are shorter than the back screws. But sure to use the right ones in the right place when reassembling.
That screw driver, by the way, is probably the best powered one I've ever owned. It's a Kobalt Lithium-Ion little guy I picked up at Lowe's. It's light, comfy and has just the right amount of torque. Not enough to strip the threads, but just enough to loosen most normal screws. And runs for a long time on a single charge so, unlike many cordless tools that are only good for short projects, you can use this screwdriver a lot. Very nice, highly recommended.
 This board was pretty clean, but dusty. A little canned air takes care of that nicely. This is Velocity brand from Radio Shack. You can get canned air cheaper if you shop around a bit, but hey, I was there. Thing about canned air is, if the outside says it won't cause condensation or leak water, it's a) full of shit and b) full of shit. Use it in short bursts and don't tip it more than 30 or 40 degrees, or it'll wet itself.
 Here's another one of those easy but do it slow and steady operations. Remove the flat keyboard cable by lifting the keyboard up, off it's posts, and down a little. Then gently pull the cable out of the socket. They stick a bit sometimes, so use two hands and wiggle it just a smidgen, if needed. The plastic cable is fairly tough, but it will rip if mishandled.
 Then unplug the power transformer from the board. You might need to use a flathead screwdriver to very gently pull back on the clip that holds the plug in.
The rest is pretty straight forward. Remove all the screws holding the main board down. There's two over by the pak slot that have to come out and two little brackets you'll want to save. Also note that there are two copper clips at the bottom of the board. These being the keyboard grounds. You'll want to keep those as well. The transformer has two screws holding it down. Just be sure to grab and lift it low cause the top cage will come off when you lift. I didn't take pictures of all this on account I figure we've already got enough pictures of me unscrewing things.
 For now, I've installed the original CoCo power transformer in the GloCo. This will do until I get up the guts to convert it to the PC power supply. Still not entirely clear on how that works, but we'll throw the whole thing off that bridge when we get to it. There's actually nothing wrong with the CoCo's transformer, it just won't power anything else (easily).
 Here it is all put together. Step the next is easy. Install the 512K upgrade board. The step after that is not too easy. Upgrade the microprocessor. Looking forward to giving it another try, though. I learned a lot in the last attempt, and have since gotten a few more pointers from some clever folks that actually know what they're doing, so I'm cautiously optimistic. :)
 Here it is up and running. This was actually an important test, because I needed to know if the fan, power boxes, and lights would cause any interference. They don't. If they had that would have seriously sucked.
The drives are up and running too, which was the other major accomplishment. They're 5 1/4" 40-track, double sided 360K drives hooked up to a 26-3129 controller. Currently, they're crammed into an old FD-501 case. I'll need to find a Disk BASIC compatible DOS to run them to their full potential temporarily. NitrOS-9 works nicely with them, though. Still can't get the top drive to format or DSKINI, but they do everything else including load, save, copy, backup, etc. That's good enough for now. The goal is to replace the top drive with a 3 1/2" eventually, anyhow.
So, this will probably be the last Pimp My CoCo update on this project for a little while. I'll do another post when the upgrades are in place and running. Though, if anything interesting comes up, I'll post before then. At this point, the goal is to get the thing running so I can start using it. Then we'll house the drives, power supply, VGA adapter and all that other stuff in a nice, painted case. Also need to upgrade an MPI and paint it black for use with this guy as well. Plenty to do, but at least there's some light peeking out at the end of the tunnel. :)
Angel's Luck,
Capt.
Sunday, April 01, 2007
The GloCo :)
Brian dubbed this the "GloCo" which I thought was pretty cool. Here's the lit pictures with the black paint. Decals are vexing me at the moment, but it's mostly getting them to print right, which is easy enough to work out. Just gotta have time to do it. In the meantime, a few new pics of the GloCo.


Thursday, March 29, 2007
Solid Black: The New CoCo Color
Okay, back on track with the original intent of this project. The main purpose was two fold. First, to paint the case in a nice professional manner and jazz it up a little bit, including adding a light kit. Second, to do some basic electronic modifications to update the system a tad. I'll post on the latter as it continues to develop. Talk about a learning curve!
Modifying the case turned into some serious experimenting with a material I hadn't worked with much. I'd done small plastic on models and miniatures plenty of times, of course. Most of that work, however, can be done with a standard Exacto knife, a micro file set and a small pin vise. I learned quite a bit about making holes in plastic at high speed (see previous post). heh! :)
The painting and detailing part, however, is the part where I can have a little more of a free hand for fun. I'm on more familiar ground here. Solid black isn't my favorite case color, but there's a good reason why it's so popular. When done right, it looks great. The only downside is, black tends to show dust more than some other colors do. Black works well with two-tone applications as well. For example, I strongly considered (but discarded for this project) doing black and silver on this case.
The solid black look, though, isn't as easy to pull off as it first seems. I've seen a LOT of spray and hand painted cases. Getting any color to look right takes a ton of work. Black is no less tricky. Traditionally, for a professional look, you would use a finishing system like that used to do auto-body work. You sand/prep, primer, paint, buff, paint, buff, paint, buff, finish, buff, finish, buff, and then final finish. Seriously. In that order. It's a HUGE amount of work and the slightest mishap, dust being the biggest culprit, can force a do over.
I was all prepared to do that, though to slightly lesser extent. Molded plastic is a bit more forgiving than metal, as far as paint jobs go. But then I stumbled upon Krylon Fusion spray paint. I've written about this stuff before and I really can't rave enough about it. Stuff bonds with plastic. One or two coats and it really does look like it was molded in that color. Pictures just don't do it justice. Very cool stuff. Working with it is the same as using any other spray paint, but the results are nicer.
 Step one is to clean the crap out of the case. All paint jobs start with this. Do it not and you'll see how mucked up it looks. A proper paint job should be as thin as possible. As such, any tiny defect, specks of dust, crud, or anything else will show up. Smooth and clean is what you want. NEVER try to cover a defect with paint. Tis a serious sin when painting. The rule: Use as little paint as possible to get the desired finish. Most of the work is done long before you apply a brush or press the trigger.
For painting plastic, an ammonia based cleaned is generally considered best. The ammonia cleans well and then evaporates leaving no residue. Non-ammonia based cleaners are better than they were 20 years ago, but most painters still recommend using one with. Another option I'm fond of a is Simple Green spray cleaner. Does a great job at cleaning about anything, it's non-toxic, biodegradable, and concentrated so you can mix the amount of cleaner you actually need. I was out, unfortunately, so I went with my second favorite cleaner, Clorox Cleanup spray cleaner. This bleach based cleaner works great on things that can take a little bleach. Don't use this on the old gray CoCos! Works fine on the CoCo 2 and 3 cases.
When spray painting, always be aware of your environment and potential for hazard. Wear a mask (this crap always gives me a head ache). Drop a cloth or newspaper down to keep it from marking your work area. Keep away from children and pets. Always paint outdoors or in a well ventilated area.
 I went over using the Krylon paint last time. To sum up: light coats, broad strokes, let it dry. Drying time is 15 minutes to touch (give or take, depending on temp and humidity), 24 hours to set, and about 72 hours to finish. Once it's set in there, it's fantastic.
This is the satin finish. I like it, but it's still a bit shiny. After I apply the decals it'll need a dusting of Testor's Dull Coat anyhow, which will take out some of the shine. The keyboard, alas, will have to be "bullet proofed." That involves multiple finish coats of Dull Coat and Clear Coat to make a nice thick layer for pounding on to protect the decals. I'll cover that when we get there. The paint, however, doesn't need a finish. Pretty tough stuff once it sets.
Ideally, I would have built a paint box to put this in before spraying it. That helps protect it from dust and dirt when painting it outside. This can be as simple as a properly sized cardboard box. It was a nice, clear day with moderate wind (for Oklahoma), and it had just rained, so there wasn't a lot of dust blowing about. Every little scratch and defect shows up. Next time I'll use a nice, pristine CoCo case. This one had been through the ringer. I sanded it a bit and filled some of the bigger gashes, but it still shows a ding or two if you hold to the light the right way.
In the workshop it's hard to get proper shots of this case without catching a glare or a brown tint caused by the lighting. In person, neither is apparent. Still, here's some shots of the painted case. Just loving the all black look.


It's not as perfect as I would like, but it's close enough for this go around. :)
Here's a few of the pinup art images I'm considering for the logo that will adorn the left side of the case. Let me know which you like best. (NOTE: Some of these are "risque." Don't peek if you don't want to see 'em.)
.
.
.
.
.
.


The first is perfect nose art style, which is what I'm really going for. I'm concerned about having to use white decal paper. It's a pain on black. The second is perfect for the planned name of the machine, but no pink, please. Would have to change it to red in Photoshop. The third fits nicely for the "CoCo" image (she could be drinking cocoa!) but is a bit TOO risque perhaps. And yes, all computers a red heads. Seriously...
Next, decals, the keyboard, and some electronics bits... :)
Angel's Luck,
Capt.
Modifying the case turned into some serious experimenting with a material I hadn't worked with much. I'd done small plastic on models and miniatures plenty of times, of course. Most of that work, however, can be done with a standard Exacto knife, a micro file set and a small pin vise. I learned quite a bit about making holes in plastic at high speed (see previous post). heh! :)
The painting and detailing part, however, is the part where I can have a little more of a free hand for fun. I'm on more familiar ground here. Solid black isn't my favorite case color, but there's a good reason why it's so popular. When done right, it looks great. The only downside is, black tends to show dust more than some other colors do. Black works well with two-tone applications as well. For example, I strongly considered (but discarded for this project) doing black and silver on this case.
The solid black look, though, isn't as easy to pull off as it first seems. I've seen a LOT of spray and hand painted cases. Getting any color to look right takes a ton of work. Black is no less tricky. Traditionally, for a professional look, you would use a finishing system like that used to do auto-body work. You sand/prep, primer, paint, buff, paint, buff, paint, buff, finish, buff, finish, buff, and then final finish. Seriously. In that order. It's a HUGE amount of work and the slightest mishap, dust being the biggest culprit, can force a do over.
I was all prepared to do that, though to slightly lesser extent. Molded plastic is a bit more forgiving than metal, as far as paint jobs go. But then I stumbled upon Krylon Fusion spray paint. I've written about this stuff before and I really can't rave enough about it. Stuff bonds with plastic. One or two coats and it really does look like it was molded in that color. Pictures just don't do it justice. Very cool stuff. Working with it is the same as using any other spray paint, but the results are nicer.
 Step one is to clean the crap out of the case. All paint jobs start with this. Do it not and you'll see how mucked up it looks. A proper paint job should be as thin as possible. As such, any tiny defect, specks of dust, crud, or anything else will show up. Smooth and clean is what you want. NEVER try to cover a defect with paint. Tis a serious sin when painting. The rule: Use as little paint as possible to get the desired finish. Most of the work is done long before you apply a brush or press the trigger.
For painting plastic, an ammonia based cleaned is generally considered best. The ammonia cleans well and then evaporates leaving no residue. Non-ammonia based cleaners are better than they were 20 years ago, but most painters still recommend using one with. Another option I'm fond of a is Simple Green spray cleaner. Does a great job at cleaning about anything, it's non-toxic, biodegradable, and concentrated so you can mix the amount of cleaner you actually need. I was out, unfortunately, so I went with my second favorite cleaner, Clorox Cleanup spray cleaner. This bleach based cleaner works great on things that can take a little bleach. Don't use this on the old gray CoCos! Works fine on the CoCo 2 and 3 cases.
When spray painting, always be aware of your environment and potential for hazard. Wear a mask (this crap always gives me a head ache). Drop a cloth or newspaper down to keep it from marking your work area. Keep away from children and pets. Always paint outdoors or in a well ventilated area.
 I went over using the Krylon paint last time. To sum up: light coats, broad strokes, let it dry. Drying time is 15 minutes to touch (give or take, depending on temp and humidity), 24 hours to set, and about 72 hours to finish. Once it's set in there, it's fantastic.
This is the satin finish. I like it, but it's still a bit shiny. After I apply the decals it'll need a dusting of Testor's Dull Coat anyhow, which will take out some of the shine. The keyboard, alas, will have to be "bullet proofed." That involves multiple finish coats of Dull Coat and Clear Coat to make a nice thick layer for pounding on to protect the decals. I'll cover that when we get there. The paint, however, doesn't need a finish. Pretty tough stuff once it sets.
Ideally, I would have built a paint box to put this in before spraying it. That helps protect it from dust and dirt when painting it outside. This can be as simple as a properly sized cardboard box. It was a nice, clear day with moderate wind (for Oklahoma), and it had just rained, so there wasn't a lot of dust blowing about. Every little scratch and defect shows up. Next time I'll use a nice, pristine CoCo case. This one had been through the ringer. I sanded it a bit and filled some of the bigger gashes, but it still shows a ding or two if you hold to the light the right way.
In the workshop it's hard to get proper shots of this case without catching a glare or a brown tint caused by the lighting. In person, neither is apparent. Still, here's some shots of the painted case. Just loving the all black look.


It's not as perfect as I would like, but it's close enough for this go around. :)
Here's a few of the pinup art images I'm considering for the logo that will adorn the left side of the case. Let me know which you like best. (NOTE: Some of these are "risque." Don't peek if you don't want to see 'em.)
.
.
.
.
.
.


The first is perfect nose art style, which is what I'm really going for. I'm concerned about having to use white decal paper. It's a pain on black. The second is perfect for the planned name of the machine, but no pink, please. Would have to change it to red in Photoshop. The third fits nicely for the "CoCo" image (she could be drinking cocoa!) but is a bit TOO risque perhaps. And yes, all computers a red heads. Seriously...
Next, decals, the keyboard, and some electronics bits... :)
Angel's Luck,
Capt.
Wednesday, March 28, 2007
Let's make some holes!
Holey Moley, Batman! Today we're going to talk about cutting holes in my CoCo's case. Why? Because I can. Bwahahaha! Ahem...
There's several methods to go about this:
Option 1. Go at it with a hobby knife. See also, Brian's post on the Model III/CoCo Repak blog. (Yeah, like I'm one to talk.) This will work, but it's slow going sometimes. If you try it, use a straight edge, wear nice leather gloves, and use a a VERY sharp knife. One of those thicker, heavier styles works best. Make shallow cuts, over and over and over, ad naseum.
Option 2. Use a hot knife. Never tried this, but should work pretty good on the CoCo's case. It melts real easy. :)
Option 3. Dremel!!!!
Being an unabashed fan, of course I went with option 3. Here's some shots (click 'em for the big 'uns) and thoughts on my various successes and failures with this method.
Setting Up
Standard safety disclaimer/notice. :)
 I love this freakin' thing! This is the Black & Decker Workmate portable work bench and clampy thingie. (Don't quote me on the exact wording there. I threw away the box.) It is exceptionally light, so you can lug it anywhere, yet surprisingly sturdy and stable and it can hold up to 350 lbs. I've used it about a bajillion times since I picked it up at ACE hardware a month ago. The front board there moves on screw rods that shift it forward and back by use of the crank handles. Each end moves independently so that the whole thing can clamp strange angles (like the CoCo's molded case). Four movable blocks add additional blocking, fencing and jigging options. I'd love to have one about twice this size for even bigger projects (Take a look at the different models here. I'm thinking the 425 is definitely making the Christmas wish list.) This size, however, is perfect for hobby projects like this. Here I've got the CoCo clamped between the two clamping plates with a fence set against the blocks. The arse-end of the CoCo snuggles up against the fence, which gives the router a nice smooth edge to run against.
 Here's a closer shot, sans router, after making the horizontal (to the bottom edge of the case) cuts. Note the nice straight cuts versus the rough vertical cuts. There's several ways to go about this task. I started with a free hand routing to clear the material away and then followed that with several passes using the edge guide. What I recommend, should you want to cut holes in your case, is to make a template. To do so would require a band or scroll saw, which alas I am without. (Never needed one before.) Make it out of 1/8" plywood. As we'll see below, a template would give much more control and prevent massive doofus moves like the several I managed, even with the edge guide attached. Grrr... ahem. In this shot you can see the angle of the back of the case, thus the necessity of the fence (see below).
 The Dremel Router accessories is a lovely tool. The Dremel tool goes in the middle and screws down. A router bit is mounted in the chuck and you're pretty much good to go. The rail system underneath is for the edge and circle guides. This a plunge router and the right handle tightens it at depth. It won't replace a proper fixed or plunge router for, say, building a dresser or kitchen cabinets, but for small intricate work it does the job brilliantly.
The fence is there is to give the edge guide something to run against. The CoCo's arse is angled a couple of degrees, so you can't just run the edge guide along the back of the case, unless you want to recreate that angle, of course. You can, however, run it along the bottom for horizontal cuts. A small 1/4"X1/4" strip of wood would work better, but that random piece shown is all I had handy.
The Cutting Part (or, The Part with all the Cussing)

Wear safety goggles. Little bits of super heated plastic swirlies tend to go flying all over the place while routing the material out. I use a giant pair of goggles from a bad 50s sci-fi movie called Attack of the Fuzzy Headed Goggle Guy From Alpha Prime. You can get those fancy "Cheaters" that look like regular sunglasses and are probably more fashionable. Unfortunately, they aren't designed for us poor schmucks that haven't upgraded to contacts or laser eye surgery. You really have to get in close to see where you're cutting. As always with a rotary tool, a light tough is the best way to go. Routing with it is the same as any other application: Let the tool do most of the work. It's the speed not the pressure.
 Here's a close up of the tool in action. Thoughts? Go slow and light. Keep light pressure against fence to hold the guide against it. Several times I caught myself pulling the tool off the fence. A second block clamped behind the tool might help, if possible. Run the tool in the direction of rotation. Doing so produces a smoother finish and a lot less chance the thing will jump on you. Take out material a little at a time. I found it best to take out about a 1/16" at time. An 1/8" worked as well, but the result required several passes. The fewer passes the better.
The round bit will produce round corners, of course. I like that look. Pretty neato. To get squared off corners, use a smaller bit or one designed to produce that effect. There are about 9.8 billion (roughly) Dremel routing bits available from various suppliers, like MicroMark. A small square file will also do the job, though with a considerable amount of elbow grease.
 Much better. I did three more passes after this and took out more material and fixing the odd top angle and the corners. Came out nice and professional looking. This is the fan hole, by the way. A small 40mm fan will mount in there with a fan grill. Still need to find a grill, or make one.
When finished, I hit with some rally fine sandpaper (forgot the grit) to finish off the rough edges.
Now why make this hole so nice if it's just going to be covered
with a fan grill? Well, I wanted to try it on something that would be covered before having a go on at it on something that wouldn't be covered. Turned out I goofed the other hole anyway (see below), but it was still good practice. Once I have the grill worked out, all I need to do is drill a couple of small holes for the screws and lock the fan and grill in place.

So there I am, doing a pretty good job with the fence/edge guide method. Here's why I say use a template if you can. And why proper clamping is essential. See that nice weird shape there? That's where the whole CoCo slipped through the clamp because I was pressing down on the plunge router while it was running. Before I could get it shut off, the whole @#$@#ing thing cut a nice swath into the case.
So, I figured hey, let's see if we can do a shallow groove cut. Might as well... can't muck it up more than it already is. Ta-daa! A decorative groove! Ha ha! Ha... ahem. Actually, that was good experience, and now I know how to do it. But the experimenting made a horrible mess. Now, if I was smart, I would have use some putty to fill the error. Key word there is smart. At this point, the neighbors were coming out of their houses and looking over my way in a rather alarmed manner. Yeah, like they've never heard those words before. Okay, maybe not at the volume... :P So instead, I just cleaned it up, painted it and called it good.
The moral of the story here is, check your clamps carefully before you turn the tool on.
I know, I know.... Duh.
Extra Credit
 Another shot of the CoCo clamped down in the Workmate. Seriously, this thing rocks. I clamped it in there several different ways, and as far as I can tell, it should hold the case nice and tight no matter what you need to do to it.
If you hadn't noticed: I love clamps. I go to the hardware store and ponder clamps all the time. I have tons of clamps. I've got springy clamps, stretchy clamps, screwy clamps, strappy clamps, clamps with arms, clamps with bungies, clamps with clamps... if they make it, I can clamp it. And if I can't, I'll go ponder clamps until I can.
 Here's a couple of shots of the internal cuts. These were done with the Dremel tool and a cut off wheel designed for plastic and finished off with a light sanding bit. Nothing fancy and no a lot of care taken. It's not visible. The Color Computer is full of all sorts of molds, ridges, and such that make it tricky to get extra parts in there. Some of it is there to guide things. Other bits are in there as reinforcement for the case. Take care cutting those things out. Still other pieces don't seem to have any purpose at all. There's a round punch out, for example, in the upper left of the bottom of the case. What's that all about? I'm going to run the power through it, but still wonder what it was originally for. Anyhow, this cut was so the light bar will fit in properly.
 This is where the power transformer use to sit. Makes a nice place to store extra bits like the light bar's transformer. The box was a little long, however, so I had to cut away some of the ridge that held the power supply. Same technique as above. The only caution I'd give is to, as always, use a light touch and make multiple passes. Press down and, at 10,000 rpm, the bit will melt right through the case!
To Review
To sum up, as far as making holes in your CoCo's case goes, it's not terribly difficult. The things to consider:
The CoCo's case is about an 1/8" thick.
The plastic is pretty dense, but melts easy. It's not particularly brittle and will give a bit. Too much pressure WILL crack it, but you have a little play to work with.
Will anyone see the cut? Does it need to be presentable? If no, then whack away it and don't worry too much about finish. An accurate measure and cutting the piece out safely are the only real concerns.
If it does need to have that "manufactuered" look, my recommendations are as follows:
1. A sharp, heavy duty hobby knife will do the job. Use a straight edge.
2. A rotary tool works particularly well.
3. Use a template, if possible.
4. If you can't use a template, use some sort of guide. You won't get good results freehand.
5. I don't recommend the freehand and then putty and sand it method (like on the top of case hole in this project). Great results, but time consuming and messy.
6. Don't rush. Do keep your favorite plastic putty handy for repairs.
7. Regardless of method, make small, shallow cuts to remove material. Trying to get it all at once tends to make the plastic melt and bunch up. Cleaning it out requires multiple passes with the tool that are not nearly as accurate.
8. You can make ridges and remold the case with heat or high speed. Set for shallow depth, use a guide, and take you time.
In the end, I'm probably making more mods to the case than are necessary. For example, no reason why the fan can't be mounted directly on top. Drawing hot air out is just as effective since the CoCo is vented on the bottom as well. Or blow air from the bottom up, which would work just as well. Once I got my head set on a side blowing fan, though, I had to try it.
I could also mount the switch for the light bar in the planned base unit as. (The base unit is phase two of this project and will house the PC power supply, floppy drives, hard drive, VGA converter and anything else I can think to cram in there. The cables will run into the back of the CoCo and be bound together with shiny braided silver cable sleeves.) The switch is mounted in a PC slot style bracket, after all. But, no I had to have it mounted inside the CoCo, of course. heh.
But part of the point of this project is to learn more about molding and cutting plastic, in particular the CoCo 3's case for future projects. As far as working with the CoCo's case, I've got a pretty good idea now what can be done. And now an excellent excuse to buy a scroll saw. :D
The CoCo 3's case doesn't leave a lot of room for modification. However, with a little patience and creativity, you can certain remold it into your liking. It's pretty easy to work with and you can get some nice results with a little practice.
Now to the fun part... painting and decorating! :)
Angel's Luck,
Capt
There's several methods to go about this:
Option 1. Go at it with a hobby knife. See also, Brian's post on the Model III/CoCo Repak blog. (Yeah, like I'm one to talk.) This will work, but it's slow going sometimes. If you try it, use a straight edge, wear nice leather gloves, and use a a VERY sharp knife. One of those thicker, heavier styles works best. Make shallow cuts, over and over and over, ad naseum.
Option 2. Use a hot knife. Never tried this, but should work pretty good on the CoCo's case. It melts real easy. :)
Option 3. Dremel!!!!
Being an unabashed fan, of course I went with option 3. Here's some shots (click 'em for the big 'uns) and thoughts on my various successes and failures with this method.
Setting Up
Standard safety disclaimer/notice. :)
 I love this freakin' thing! This is the Black & Decker Workmate portable work bench and clampy thingie. (Don't quote me on the exact wording there. I threw away the box.) It is exceptionally light, so you can lug it anywhere, yet surprisingly sturdy and stable and it can hold up to 350 lbs. I've used it about a bajillion times since I picked it up at ACE hardware a month ago. The front board there moves on screw rods that shift it forward and back by use of the crank handles. Each end moves independently so that the whole thing can clamp strange angles (like the CoCo's molded case). Four movable blocks add additional blocking, fencing and jigging options. I'd love to have one about twice this size for even bigger projects (Take a look at the different models here. I'm thinking the 425 is definitely making the Christmas wish list.) This size, however, is perfect for hobby projects like this. Here I've got the CoCo clamped between the two clamping plates with a fence set against the blocks. The arse-end of the CoCo snuggles up against the fence, which gives the router a nice smooth edge to run against.
 Here's a closer shot, sans router, after making the horizontal (to the bottom edge of the case) cuts. Note the nice straight cuts versus the rough vertical cuts. There's several ways to go about this task. I started with a free hand routing to clear the material away and then followed that with several passes using the edge guide. What I recommend, should you want to cut holes in your case, is to make a template. To do so would require a band or scroll saw, which alas I am without. (Never needed one before.) Make it out of 1/8" plywood. As we'll see below, a template would give much more control and prevent massive doofus moves like the several I managed, even with the edge guide attached. Grrr... ahem. In this shot you can see the angle of the back of the case, thus the necessity of the fence (see below).
 The Dremel Router accessories is a lovely tool. The Dremel tool goes in the middle and screws down. A router bit is mounted in the chuck and you're pretty much good to go. The rail system underneath is for the edge and circle guides. This a plunge router and the right handle tightens it at depth. It won't replace a proper fixed or plunge router for, say, building a dresser or kitchen cabinets, but for small intricate work it does the job brilliantly.
The fence is there is to give the edge guide something to run against. The CoCo's arse is angled a couple of degrees, so you can't just run the edge guide along the back of the case, unless you want to recreate that angle, of course. You can, however, run it along the bottom for horizontal cuts. A small 1/4"X1/4" strip of wood would work better, but that random piece shown is all I had handy.
The Cutting Part (or, The Part with all the Cussing)

Wear safety goggles. Little bits of super heated plastic swirlies tend to go flying all over the place while routing the material out. I use a giant pair of goggles from a bad 50s sci-fi movie called Attack of the Fuzzy Headed Goggle Guy From Alpha Prime. You can get those fancy "Cheaters" that look like regular sunglasses and are probably more fashionable. Unfortunately, they aren't designed for us poor schmucks that haven't upgraded to contacts or laser eye surgery. You really have to get in close to see where you're cutting. As always with a rotary tool, a light tough is the best way to go. Routing with it is the same as any other application: Let the tool do most of the work. It's the speed not the pressure.
 Here's a close up of the tool in action. Thoughts? Go slow and light. Keep light pressure against fence to hold the guide against it. Several times I caught myself pulling the tool off the fence. A second block clamped behind the tool might help, if possible. Run the tool in the direction of rotation. Doing so produces a smoother finish and a lot less chance the thing will jump on you. Take out material a little at a time. I found it best to take out about a 1/16" at time. An 1/8" worked as well, but the result required several passes. The fewer passes the better.
The round bit will produce round corners, of course. I like that look. Pretty neato. To get squared off corners, use a smaller bit or one designed to produce that effect. There are about 9.8 billion (roughly) Dremel routing bits available from various suppliers, like MicroMark. A small square file will also do the job, though with a considerable amount of elbow grease.
 Much better. I did three more passes after this and took out more material and fixing the odd top angle and the corners. Came out nice and professional looking. This is the fan hole, by the way. A small 40mm fan will mount in there with a fan grill. Still need to find a grill, or make one.
When finished, I hit with some rally fine sandpaper (forgot the grit) to finish off the rough edges.
Now why make this hole so nice if it's just going to be covered
with a fan grill? Well, I wanted to try it on something that would be covered before having a go on at it on something that wouldn't be covered. Turned out I goofed the other hole anyway (see below), but it was still good practice. Once I have the grill worked out, all I need to do is drill a couple of small holes for the screws and lock the fan and grill in place.

So there I am, doing a pretty good job with the fence/edge guide method. Here's why I say use a template if you can. And why proper clamping is essential. See that nice weird shape there? That's where the whole CoCo slipped through the clamp because I was pressing down on the plunge router while it was running. Before I could get it shut off, the whole @#$@#ing thing cut a nice swath into the case.
So, I figured hey, let's see if we can do a shallow groove cut. Might as well... can't muck it up more than it already is. Ta-daa! A decorative groove! Ha ha! Ha... ahem. Actually, that was good experience, and now I know how to do it. But the experimenting made a horrible mess. Now, if I was smart, I would have use some putty to fill the error. Key word there is smart. At this point, the neighbors were coming out of their houses and looking over my way in a rather alarmed manner. Yeah, like they've never heard those words before. Okay, maybe not at the volume... :P So instead, I just cleaned it up, painted it and called it good.
The moral of the story here is, check your clamps carefully before you turn the tool on.
I know, I know.... Duh.
Extra Credit
 Another shot of the CoCo clamped down in the Workmate. Seriously, this thing rocks. I clamped it in there several different ways, and as far as I can tell, it should hold the case nice and tight no matter what you need to do to it.
If you hadn't noticed: I love clamps. I go to the hardware store and ponder clamps all the time. I have tons of clamps. I've got springy clamps, stretchy clamps, screwy clamps, strappy clamps, clamps with arms, clamps with bungies, clamps with clamps... if they make it, I can clamp it. And if I can't, I'll go ponder clamps until I can.
 Here's a couple of shots of the internal cuts. These were done with the Dremel tool and a cut off wheel designed for plastic and finished off with a light sanding bit. Nothing fancy and no a lot of care taken. It's not visible. The Color Computer is full of all sorts of molds, ridges, and such that make it tricky to get extra parts in there. Some of it is there to guide things. Other bits are in there as reinforcement for the case. Take care cutting those things out. Still other pieces don't seem to have any purpose at all. There's a round punch out, for example, in the upper left of the bottom of the case. What's that all about? I'm going to run the power through it, but still wonder what it was originally for. Anyhow, this cut was so the light bar will fit in properly.
 This is where the power transformer use to sit. Makes a nice place to store extra bits like the light bar's transformer. The box was a little long, however, so I had to cut away some of the ridge that held the power supply. Same technique as above. The only caution I'd give is to, as always, use a light touch and make multiple passes. Press down and, at 10,000 rpm, the bit will melt right through the case!
To Review
To sum up, as far as making holes in your CoCo's case goes, it's not terribly difficult. The things to consider:
The CoCo's case is about an 1/8" thick.
The plastic is pretty dense, but melts easy. It's not particularly brittle and will give a bit. Too much pressure WILL crack it, but you have a little play to work with.
Will anyone see the cut? Does it need to be presentable? If no, then whack away it and don't worry too much about finish. An accurate measure and cutting the piece out safely are the only real concerns.
If it does need to have that "manufactuered" look, my recommendations are as follows:
1. A sharp, heavy duty hobby knife will do the job. Use a straight edge.
2. A rotary tool works particularly well.
3. Use a template, if possible.
4. If you can't use a template, use some sort of guide. You won't get good results freehand.
5. I don't recommend the freehand and then putty and sand it method (like on the top of case hole in this project). Great results, but time consuming and messy.
6. Don't rush. Do keep your favorite plastic putty handy for repairs.
7. Regardless of method, make small, shallow cuts to remove material. Trying to get it all at once tends to make the plastic melt and bunch up. Cleaning it out requires multiple passes with the tool that are not nearly as accurate.
8. You can make ridges and remold the case with heat or high speed. Set for shallow depth, use a guide, and take you time.
In the end, I'm probably making more mods to the case than are necessary. For example, no reason why the fan can't be mounted directly on top. Drawing hot air out is just as effective since the CoCo is vented on the bottom as well. Or blow air from the bottom up, which would work just as well. Once I got my head set on a side blowing fan, though, I had to try it.
I could also mount the switch for the light bar in the planned base unit as. (The base unit is phase two of this project and will house the PC power supply, floppy drives, hard drive, VGA converter and anything else I can think to cram in there. The cables will run into the back of the CoCo and be bound together with shiny braided silver cable sleeves.) The switch is mounted in a PC slot style bracket, after all. But, no I had to have it mounted inside the CoCo, of course. heh.
But part of the point of this project is to learn more about molding and cutting plastic, in particular the CoCo 3's case for future projects. As far as working with the CoCo's case, I've got a pretty good idea now what can be done. And now an excellent excuse to buy a scroll saw. :D
The CoCo 3's case doesn't leave a lot of room for modification. However, with a little patience and creativity, you can certain remold it into your liking. It's pretty easy to work with and you can get some nice results with a little practice.
Now to the fun part... painting and decorating! :)
Angel's Luck,
Capt
Wednesday, March 21, 2007
Glow In The Dark CoCo

I haven't done much pimping on the CoCo mod all winter, so since it is the first full day of Spring, I figured I would at least get organized and clean up a bit. The Evil Lab was a complete mess, of course. Spring cleaning is always such a joy... the left over Christmas boxes piled high, the accumulated dirt and leaves from the fall/winter, the mouse droppings. Gak!
While I was out there slaving away (and setting traps), though, I hooked up the light bar I'll be using in the mod and fired it up. Just duct taped it in there to see how it fits. A few challenges remain, including cutting a few holes in the side to accomidate the switch for the light bar, one in the back for the molex connector for the mainboard, a hole to run additional power to the case (for fan and light), and one on the side for the fan. When that's done I can paint the top and then slap it all together and see how it works.
Anyhow, at least it's back underway. I remember when this was going to be a project for a couple of hours over a weekend. You'd think I'd know better by now... sheesh! I just thought it was cool the way the green light bleeds out the vents. The bar has kind of a liquid motion thang going on, so it's funky as it oscillates in waves like some kind of green, radio active slime is flowing through the case. Neat!

Angel's Luck,
Capt
Tuesday, March 06, 2007
Flat Screen Bliss
My New Year's resolution was to try to post something to one of the CoCo blogs daily. So far... not so much. So, I'm giving the big fat finger to New Year's resolutions and making a St. Pat's resolution not to make any more of the silly things. So there...
As far as CoCoing goes, I've been mostly spending my CoCo time on the actual CoCo. My "learning" is bouncing all over the place at the moment, so nothing productive per se. But you've gotta have that play time to learn, right? Right. :)
Since Brian is over on his blog showing off his shiny flat panel running Roy's VGA adapter, I figured I should do the same, specially since he managed to get the 6309 installed and I fumbled mine. Dammit. :P (Actually, if you haven't looked at Brian's blog, stop reading here and go over there to see something REALLY cool. You can come back and read this nonsense later. Seriously. Go!) I finally broke down and dropped the cash on a flat panel. I opted for a cheap, but nice, Magnavox 15MF400T/37 LCD television. On sale a Wally-World, it's a pretty good deal with all the inputs it accepts. Not the best screen ever, but perfectly acceptable for casual TV watching, retro system hook-ups and, of course, CoCoing!
The biggest selling point of this TV is that it has a 1024x768 resolution and a SVGA hook up. Makes a handy, quick and dirty PC screen (the thing is light and easy to move around) and works brilliantly with Roy's CoCo VGA adapter.
Here's the current CoCo setup:

As you can see, the picture is nice and sharp. No lines or artifacts on the green and black background screens, though I did pick out the vertical lines on reds and grays. Not particularly noticeable and, to be honest, the image is so damn sharp you won't care! Truly the way to CoCo these days. Games play beautifully. Sinistaar (yeah, still playing that freaking game) looks amazing. Sound is mediocre at best. If I'm going to do some serious TV watching, or play music with the CoCo, I'll need to upgrade the sound for certain.
Quick run through the picture: Ramona, the 512K CoCo 3. The Magnovox (obviously) sitting atop a giant DVD/VCR combo unit (also a Maganovox). Gradma has a VHS, so I have to make tapes of the little ones by hooking the camcorder up to this beast. The CoCo can go straight out to A/V, so I'm gonna use the CoCo to make title screens, credits and that sort of thing. Pretty cool, eh? :) Roy's adapter is the beige box sitting on top of the disk drives with the little green light on it.
I also hooked up Hawksoft's S-Video adapter. I know, I'm not done fully testing it yet, so a review is still forthcoming. It works great with this setup. The TV in S-Video mode has trouble locking on, so the screen is all wonky when it first fires up. Hitting reset on the CoCo causes the TV to reset as well and it usually can lock with a beautiful and centered picture right away, though a couple of times I needed to reset twice. On this particularly screen, the S-Video adapter is WAY better than RF, much better than A/V, and better than an RGB monitor. It's not quite as crisp as the VGA adapter. (Again, as tested on this particular TV... your mileage may vary.) I've found the S-Video adapter to be most handy on the big screen TV for game playing. It would make a great solution for regular use as well if you have a TV with S-Video but no VGA.
The downside to the VGA adapter is no sound. There's a plug on the back of the box to add a speaker. All I have handy at the moment are some craptacular PC speakers I picked up at a show for 5 bucks. I laughed, I cried, I kissed my five bucks goodbye. Serious suckage. If anyone has any suggestions for a small, self powered mono speaker with good (and loud) sound that works with Roy's VGA adaptor, let me know. And where to get it. :)
Ahem... okay, I've rambled on more than intended. Here's a shot of the current CoCo mess, er, desk. Look at all those damn wires. I tend to ignore them when I'm actually in there, but the camera doesn't lie. Now I see what my wife sees. I see CoCos. She see's wires and boxes all over the place. heh! That's my Sega Genesis 32X sitting there next to the CoCo. Kick ass game system. Highly recommended if you like retro games. Alas, it feeds into the TV with the RF coax and the set won't lock to center the image. The *overly descriptive expletive deleted* that didn't put tuning and vert/horz controls on TVs these days needs to be ass punched. Automatic centering my left buttocks. Geez. So, I'm awaiting new cables for the Sega. Haven't tried the Atari's yet, but they're next. They both hook up via the RF as well... so I'm not hopeful. More damn cables to buy. But the CoCo rocks. And that's all that really matters. Thank you Roy! :D

Angel's Luck,
Capt.
As far as CoCoing goes, I've been mostly spending my CoCo time on the actual CoCo. My "learning" is bouncing all over the place at the moment, so nothing productive per se. But you've gotta have that play time to learn, right? Right. :)
Since Brian is over on his blog showing off his shiny flat panel running Roy's VGA adapter, I figured I should do the same, specially since he managed to get the 6309 installed and I fumbled mine. Dammit. :P (Actually, if you haven't looked at Brian's blog, stop reading here and go over there to see something REALLY cool. You can come back and read this nonsense later. Seriously. Go!) I finally broke down and dropped the cash on a flat panel. I opted for a cheap, but nice, Magnavox 15MF400T/37 LCD television. On sale a Wally-World, it's a pretty good deal with all the inputs it accepts. Not the best screen ever, but perfectly acceptable for casual TV watching, retro system hook-ups and, of course, CoCoing!
The biggest selling point of this TV is that it has a 1024x768 resolution and a SVGA hook up. Makes a handy, quick and dirty PC screen (the thing is light and easy to move around) and works brilliantly with Roy's CoCo VGA adapter.
Here's the current CoCo setup:

As you can see, the picture is nice and sharp. No lines or artifacts on the green and black background screens, though I did pick out the vertical lines on reds and grays. Not particularly noticeable and, to be honest, the image is so damn sharp you won't care! Truly the way to CoCo these days. Games play beautifully. Sinistaar (yeah, still playing that freaking game) looks amazing. Sound is mediocre at best. If I'm going to do some serious TV watching, or play music with the CoCo, I'll need to upgrade the sound for certain.
Quick run through the picture: Ramona, the 512K CoCo 3. The Magnovox (obviously) sitting atop a giant DVD/VCR combo unit (also a Maganovox). Gradma has a VHS, so I have to make tapes of the little ones by hooking the camcorder up to this beast. The CoCo can go straight out to A/V, so I'm gonna use the CoCo to make title screens, credits and that sort of thing. Pretty cool, eh? :) Roy's adapter is the beige box sitting on top of the disk drives with the little green light on it.
I also hooked up Hawksoft's S-Video adapter. I know, I'm not done fully testing it yet, so a review is still forthcoming. It works great with this setup. The TV in S-Video mode has trouble locking on, so the screen is all wonky when it first fires up. Hitting reset on the CoCo causes the TV to reset as well and it usually can lock with a beautiful and centered picture right away, though a couple of times I needed to reset twice. On this particularly screen, the S-Video adapter is WAY better than RF, much better than A/V, and better than an RGB monitor. It's not quite as crisp as the VGA adapter. (Again, as tested on this particular TV... your mileage may vary.) I've found the S-Video adapter to be most handy on the big screen TV for game playing. It would make a great solution for regular use as well if you have a TV with S-Video but no VGA.
The downside to the VGA adapter is no sound. There's a plug on the back of the box to add a speaker. All I have handy at the moment are some craptacular PC speakers I picked up at a show for 5 bucks. I laughed, I cried, I kissed my five bucks goodbye. Serious suckage. If anyone has any suggestions for a small, self powered mono speaker with good (and loud) sound that works with Roy's VGA adaptor, let me know. And where to get it. :)
Ahem... okay, I've rambled on more than intended. Here's a shot of the current CoCo mess, er, desk. Look at all those damn wires. I tend to ignore them when I'm actually in there, but the camera doesn't lie. Now I see what my wife sees. I see CoCos. She see's wires and boxes all over the place. heh! That's my Sega Genesis 32X sitting there next to the CoCo. Kick ass game system. Highly recommended if you like retro games. Alas, it feeds into the TV with the RF coax and the set won't lock to center the image. The *overly descriptive expletive deleted* that didn't put tuning and vert/horz controls on TVs these days needs to be ass punched. Automatic centering my left buttocks. Geez. So, I'm awaiting new cables for the Sega. Haven't tried the Atari's yet, but they're next. They both hook up via the RF as well... so I'm not hopeful. More damn cables to buy. But the CoCo rocks. And that's all that really matters. Thank you Roy! :D

Angel's Luck,
Capt.
Sunday, January 14, 2007
Pimp My CoCo: Cloud-9 512K SIMM Upgrade
If you're not running at least 512K on your CoCo 3, then just do it. Now. :)
As I've mentioned before, I'm a bit of an idiot-savant when it comes to technical things. Sans the savant part. While I can grasp technical aspects and theory of a device quickly, I have two very big problems that interfere with my ability to execute technical solutions. First, I can't hold numbers in my head. I don't know why. Never have. Can't even remember my own phone number until I've dialed frequently for over a year. Seriously. And second, sitting still for more than 15 minutes is pretty much beyond me. That might have something to do with the copious amounts of coffee I drink. hmmm...
Regardless, I absolutely love technology, mucking about with stuff, knowing how something works, and building things. Sometimes my two big faults are actually pluses. I can't remember numbers well, so I write everything down. So I always have a trail and a plan to follow if I need to go back over something. (I carry a rather packed full and royally messy Dell Pocket PC for a second brain.) I also tend to throw myself into active tasks with abandon and I never ever quit. Might take months, or years, to learn something or complete a project, but it will get done.
So what's this have to do with a memory upgrade for the CoCo? A lot. Making a couple hundred solder connections is something that would take me a long time to do. I'd be up and running around more often than sitting still and getting it done. But installing a memory upgrade on the CoCo is dirt simple. Even someone like me, with little patience at all, can get it done. It's a 15-minute job. 20 minutes if you're slow about it. Perfect for jacked up Starbucks junkies like me. And if I can do it, it's a given that anyone can.
The benefits of performing this upgrade are huge. NitrOS-9 runs better, CoCo Max 3 is easier to use, and the games are WAY cooler. So, even if you're just running your CoCo as a retro game console, upgrading to at least 512K opens up a whole new world of stuff to do with it. If you're building a modern CoCo, it's a bare minimum!
I was going to write an article for the Hut describing how to perform the upgrade, with pictures and everything, but there's no need. I selected the Cloud-9 Tech 512K SIMM upgrade and the included instructions are simple and complete. Follow them step by step and you're done. Easy peasy. So instead of a lengthy article on the web site, here's a run down to demonstrate how easy it is and what to expect, and hopefully to encourage more CoCoists out there to do the deed.
 Here's a shot (click 'em to enlarge) of the Cloud-9 512K SIMM Upgrade package. It's a single satellite board with two 120ns SIMMs plugged into the sockets (also available without SIMMs if you prefer to install your own). It is oriented vertically and plugs into the CoCo 3's white memory connectors located to the left and below the installed memory. Other 512K packages I've seen are oriented horizontally, so if you've got mods inside your CoCo case, make sure everything will fit properly. The package also includes a manual (2 pages) and a CoCo 5 1/4" floppy disk with the memory test program on it.
 Prep and Tools: You'll need a Phillips head screw driver for opening the CoCo case and a pair of micro-clippers. Highly recommended is a IC extractor tool (see below) for pulling the old memory out. You'll also want an anti-static wrist strap. Memory modules tend to be exceedinly sensitive to static. The cheapo one shown here I picked up from Jameco. Make sure it's clipped to something metal and grounded.
UNPLUG EVERYTHING FROM THE COCO AND THE COCO FROM THE ELECTRICITY. :) Unass the CoCo 3's case by removing the screws from the bottom, flip it over, take the top off and pull the keyboard up and down slightly. You don't need to unhook it, but the Cloud-9 memory board's lip has to sit right next to it and it's hard to get to it with the keyboard on the its posts. Just nudge the keyboard down and out of the way a bit.
 Extract the original memory chips carefully. There's a better than average chance that, since they've been in there for over 20 years, they are a bit tight. Very gently pry them out of there. The chip extractor I'm using there is a professional model I pick up at Cyberguys. You can get the kind that clamp onto the chip and pull it up all at once. I like this one because I get more control. My experience with the other kind has been mixed. This is probably the most difficult part of the operation, but only because you need to go slow and careful. Just be gentle so you don't break a socket or bend something.
 Here's I've gotten one of the memory chips out. These should be stored in an anti-static bag, tube or foam to use later, should the need arise. Like I said, this takes the most time. Maybe five minutes being nice and careful. There's not a lot of danger of damaging the CoCo here, but it could be done if you scratch something or pop a solder joint. Gently....
 Once the old memory is out, you snip out two capacitors, C66 and C65 as labeled on the CoCo's motherboard. Some doofus soldered C65 on my CoCo right flush against the board (they're suppose to be raised slightly), so the clippers couldn't get hold of the leads to snip. If this happens, VERY gently wiggle the capacitor back and forth until it breaks off.
 Next, line up the pins on the Cloud-9 board with the sockets on the CoCo's mother board. They're hard to miss, the nice bright white one's to the left and below the original memory. This is a VERY tight fit, so don't force it. Keep pressing firmly until they slide in, constantly checking the pin alignment. If you bend a pin, back off, pull the assembly out and use a pair of micro-pliers to gently bend it back into position. Try again.
 Here's a shot of the upgrade installed and ready to roll. The keyboard fits right back on. This is the Korean built model, so it just sits up on the posts nice and snug. Put the CoCo back together and we're good to go!
 After everything is back together and plugged in, run the memory test utility on the included floppy. I let it run about 50 times. I also let the CoCo run a graphic demo for about an hour and half. No problems at all and no noticeable increase in heat. Looks good and good to go! :)
That's it. Seriously, 15 to 20 minutes and basic mechanical skills are all you need to do this upgrade. It's cheap and it'll complete change and expand the functionality of your CoCo. The extra memory opens up a whole new world to explore on your CoCo and when it's this easy to do it, there's not a lot of excuse. Do it! :)
Angel's Luck,
Capt.
As I've mentioned before, I'm a bit of an idiot-savant when it comes to technical things. Sans the savant part. While I can grasp technical aspects and theory of a device quickly, I have two very big problems that interfere with my ability to execute technical solutions. First, I can't hold numbers in my head. I don't know why. Never have. Can't even remember my own phone number until I've dialed frequently for over a year. Seriously. And second, sitting still for more than 15 minutes is pretty much beyond me. That might have something to do with the copious amounts of coffee I drink. hmmm...
Regardless, I absolutely love technology, mucking about with stuff, knowing how something works, and building things. Sometimes my two big faults are actually pluses. I can't remember numbers well, so I write everything down. So I always have a trail and a plan to follow if I need to go back over something. (I carry a rather packed full and royally messy Dell Pocket PC for a second brain.) I also tend to throw myself into active tasks with abandon and I never ever quit. Might take months, or years, to learn something or complete a project, but it will get done.
So what's this have to do with a memory upgrade for the CoCo? A lot. Making a couple hundred solder connections is something that would take me a long time to do. I'd be up and running around more often than sitting still and getting it done. But installing a memory upgrade on the CoCo is dirt simple. Even someone like me, with little patience at all, can get it done. It's a 15-minute job. 20 minutes if you're slow about it. Perfect for jacked up Starbucks junkies like me. And if I can do it, it's a given that anyone can.
The benefits of performing this upgrade are huge. NitrOS-9 runs better, CoCo Max 3 is easier to use, and the games are WAY cooler. So, even if you're just running your CoCo as a retro game console, upgrading to at least 512K opens up a whole new world of stuff to do with it. If you're building a modern CoCo, it's a bare minimum!
I was going to write an article for the Hut describing how to perform the upgrade, with pictures and everything, but there's no need. I selected the Cloud-9 Tech 512K SIMM upgrade and the included instructions are simple and complete. Follow them step by step and you're done. Easy peasy. So instead of a lengthy article on the web site, here's a run down to demonstrate how easy it is and what to expect, and hopefully to encourage more CoCoists out there to do the deed.
 Here's a shot (click 'em to enlarge) of the Cloud-9 512K SIMM Upgrade package. It's a single satellite board with two 120ns SIMMs plugged into the sockets (also available without SIMMs if you prefer to install your own). It is oriented vertically and plugs into the CoCo 3's white memory connectors located to the left and below the installed memory. Other 512K packages I've seen are oriented horizontally, so if you've got mods inside your CoCo case, make sure everything will fit properly. The package also includes a manual (2 pages) and a CoCo 5 1/4" floppy disk with the memory test program on it.
 Prep and Tools: You'll need a Phillips head screw driver for opening the CoCo case and a pair of micro-clippers. Highly recommended is a IC extractor tool (see below) for pulling the old memory out. You'll also want an anti-static wrist strap. Memory modules tend to be exceedinly sensitive to static. The cheapo one shown here I picked up from Jameco. Make sure it's clipped to something metal and grounded.
UNPLUG EVERYTHING FROM THE COCO AND THE COCO FROM THE ELECTRICITY. :) Unass the CoCo 3's case by removing the screws from the bottom, flip it over, take the top off and pull the keyboard up and down slightly. You don't need to unhook it, but the Cloud-9 memory board's lip has to sit right next to it and it's hard to get to it with the keyboard on the its posts. Just nudge the keyboard down and out of the way a bit.
 Extract the original memory chips carefully. There's a better than average chance that, since they've been in there for over 20 years, they are a bit tight. Very gently pry them out of there. The chip extractor I'm using there is a professional model I pick up at Cyberguys. You can get the kind that clamp onto the chip and pull it up all at once. I like this one because I get more control. My experience with the other kind has been mixed. This is probably the most difficult part of the operation, but only because you need to go slow and careful. Just be gentle so you don't break a socket or bend something.
 Here's I've gotten one of the memory chips out. These should be stored in an anti-static bag, tube or foam to use later, should the need arise. Like I said, this takes the most time. Maybe five minutes being nice and careful. There's not a lot of danger of damaging the CoCo here, but it could be done if you scratch something or pop a solder joint. Gently....
 Once the old memory is out, you snip out two capacitors, C66 and C65 as labeled on the CoCo's motherboard. Some doofus soldered C65 on my CoCo right flush against the board (they're suppose to be raised slightly), so the clippers couldn't get hold of the leads to snip. If this happens, VERY gently wiggle the capacitor back and forth until it breaks off.
 Next, line up the pins on the Cloud-9 board with the sockets on the CoCo's mother board. They're hard to miss, the nice bright white one's to the left and below the original memory. This is a VERY tight fit, so don't force it. Keep pressing firmly until they slide in, constantly checking the pin alignment. If you bend a pin, back off, pull the assembly out and use a pair of micro-pliers to gently bend it back into position. Try again.
 Here's a shot of the upgrade installed and ready to roll. The keyboard fits right back on. This is the Korean built model, so it just sits up on the posts nice and snug. Put the CoCo back together and we're good to go!
 After everything is back together and plugged in, run the memory test utility on the included floppy. I let it run about 50 times. I also let the CoCo run a graphic demo for about an hour and half. No problems at all and no noticeable increase in heat. Looks good and good to go! :)
That's it. Seriously, 15 to 20 minutes and basic mechanical skills are all you need to do this upgrade. It's cheap and it'll complete change and expand the functionality of your CoCo. The extra memory opens up a whole new world to explore on your CoCo and when it's this easy to do it, there's not a lot of excuse. Do it! :)
Angel's Luck,
Capt.
Pimp My CoCo: DriveWire!
Awhile back I ordered up a DriveWire kit and a 512K SIMM upgrade from Cloud-9. Unfortunately, I flat ran out of time to install them before the holidays. Well, couple of days ago I got the time. And the truth is, I did have the time before the holidays, I just thought I didn't. Why? Because both are so freakin' easy that even a technological doob like me can do it. :)
Walking the DriveWire!
DriveWire was the more challenging of the two products. It's super easy to install. Just install the server software on the PC that come on 3 1/2" disk (be sure to hook up your 3 1/2" floppy if you don't have one on the PC... heh). Shut everything off. Then plug the rectangular serial end of the cable into the PC and the round CoCo serial end of the cable into the CoCo's bitbanger. After turning everything on, you run a wizard program on your CoCo (disk included) that builds a custom copy of HDB-DOS to use with the DriveWire.
Once HDB-DOS is up and running, your PC is now your CoCo's beeotch! You can use the PC like a hard drive, save and load programs, and copy and backup anything on the CoCo. The CoCo giving commands to the PC is the way it should be anyhow. Bwahahaha!
This all works as advertised with a few caveats, provisos, fine prints, et al. Ahem. The manual for the DriveWire system is well written, but misses a few bits that might useful for beginners (or idiots, like me, that haven't messed with a serial port and Windows hardware profiles in years). You WILL want to download the PDF for HDB-DOS. The DriveWire manual doesn't give a lot of examples on how to actually accomplish some tasks, but the HDB-DOS manual is quite complete.
The first snafu I hit was that I kept getting I/O errors when accessing the PC from the CoCo. Pissed me off tremendously because I was following the directions precisely. Well, not exactly precisely. I forgot that the PC sets its serial interface to 9600 bps by default. So, you need to reset the port to 57600 bps for the CoCo 3 hookup. Everything else should be fine (8-N-1).
That worked well and I was able to save and load programs from the PC. But BACKUP, DSKINI and COPY wouldn't work. They continued to give I/O errors and/or lock up the server completely. After much gnashing of the teeth, I broke down and emailed Cloud-9 for help.
Boisy of Cloud-9 wrote back and suggested I download the newer version of the server. This new version has a nicer interface and is more stable. After installing it (just copy the .exe file over the old one, leave everything else the same), everything started working just right. It wasn't long ago I recommended always checking for a new version before writing for support. Do as I say, not as I do. :P Thanks to Boisy, of course, for the help and the patient understanding. :)
So, how does it work?
Fantastic, that's how! If you want to add a hard drive to your CoCo, and your PC is next to your CoCo, this may be one of the best and cheapest ways to go about it. This isn't drag and drop, mind you, but it is pretty simple.
The server gives four virtual drive slots to play with. You access these by typing DRIVE#n, where n is 0-3. Each slot is filled with a .dsk image on your PC. Insert a blank .dsk image in one of the slots and you can save to, load from, and format up to 255 floppy disks per drive. You can also turn selected disks on or off, but only from 0 to n, where n is the last disk you want off. So:
DRIVE OFF 2 turns off disks 0,1, and 2, or DRIVE OFF 0 turns of disk 1, etc. DRIVE OFF with no number designation just complete turns off access to the hard drives. DRIVE ON turns them back on, of course.
When a selected disk is off, the corresponding floppy is on. So if you type DRIVE OFF 0 the hard drive disk 0 (DRIVE 0 DISK 0) is off and the real floppy disk 0 hooked up to your CoCo is on. This is useful for copying files back and forth with the BACKUP or COPY commands.
Just remember that the DRIVE command a) switches which .dsk image is being access (0-3) from the server (ie. DRIVE#0) and b) when issued with the OFF/ON switch, selects which virtual floppy is on or off (DRIVE#0, DRIVE OFF 0, would turn off access to the virstual disk 0 on virtual drive 0 and turn on the real floppy drive 0).
As an example, to copy a disk from the CoCo to the PC:
Step 1. Mount a blank .dsk image in Drive 0 of the server on your PC (you can make one with MESS).
Step 2. Type DRIVE#0 to switch to the virtual drive 0 (this is the default).
Step 3. Type DRIVE OFF 0 to turn off virtual disk 0 on drive 0 and turn on floppy drive 0 connected to your CoCo.
Step 4. Insert your floppy into the CoCo's floppy disk drive 0 and type BACKUP 0 TO 1
The DriveWire and HDB-DOS will then transfer the contents of the real floppy to the virtual disk 1 in the drive 0 slot. It is then helpful (if you want to share around the .dsk image) to type:
Step 5. DRIVE ON to turn off the real floppy drive and activate all the disks in Drive 0 of the virtual drive.
Step 6. BACKUP 1 TO 0 to copy the contents of (virtual) disk 1 to disk 0. That just makes sure what you're copying is, by default, on the disk 0, which is where most people would look for it first and make sure it'll work in an emulator, for example.
Reverse the BACKUP command procedure to copy from the PC to a blank CoCo floppy disk. Took some getting my head around the conceptual thing that's working here when copying from hard drive to floppy drive, but once I got it, I was copying stuff back and forth with ease.
Of course, the main use for the DriveWire is to load and save programs and data on your PC directly to and from the CoCo. For this task, DriveWire is brilliant. No real special commands are needed. Virtual Drive 0, Disk 0 is your default drive. Switching is as easy as addressing the right disk when you need it. All of which is clearly laid out in the HDB-DOS manual.
Like I said, if all you want to do is add mass storage to your CoCo, DriveWire is ideal. The price can't be beat and it's a slick, easy solution.
Angel's Luck,
Capt
Walking the DriveWire!
DriveWire was the more challenging of the two products. It's super easy to install. Just install the server software on the PC that come on 3 1/2" disk (be sure to hook up your 3 1/2" floppy if you don't have one on the PC... heh). Shut everything off. Then plug the rectangular serial end of the cable into the PC and the round CoCo serial end of the cable into the CoCo's bitbanger. After turning everything on, you run a wizard program on your CoCo (disk included) that builds a custom copy of HDB-DOS to use with the DriveWire.
Once HDB-DOS is up and running, your PC is now your CoCo's beeotch! You can use the PC like a hard drive, save and load programs, and copy and backup anything on the CoCo. The CoCo giving commands to the PC is the way it should be anyhow. Bwahahaha!
This all works as advertised with a few caveats, provisos, fine prints, et al. Ahem. The manual for the DriveWire system is well written, but misses a few bits that might useful for beginners (or idiots, like me, that haven't messed with a serial port and Windows hardware profiles in years). You WILL want to download the PDF for HDB-DOS. The DriveWire manual doesn't give a lot of examples on how to actually accomplish some tasks, but the HDB-DOS manual is quite complete.
The first snafu I hit was that I kept getting I/O errors when accessing the PC from the CoCo. Pissed me off tremendously because I was following the directions precisely. Well, not exactly precisely. I forgot that the PC sets its serial interface to 9600 bps by default. So, you need to reset the port to 57600 bps for the CoCo 3 hookup. Everything else should be fine (8-N-1).
That worked well and I was able to save and load programs from the PC. But BACKUP, DSKINI and COPY wouldn't work. They continued to give I/O errors and/or lock up the server completely. After much gnashing of the teeth, I broke down and emailed Cloud-9 for help.
Boisy of Cloud-9 wrote back and suggested I download the newer version of the server. This new version has a nicer interface and is more stable. After installing it (just copy the .exe file over the old one, leave everything else the same), everything started working just right. It wasn't long ago I recommended always checking for a new version before writing for support. Do as I say, not as I do. :P Thanks to Boisy, of course, for the help and the patient understanding. :)
So, how does it work?
Fantastic, that's how! If you want to add a hard drive to your CoCo, and your PC is next to your CoCo, this may be one of the best and cheapest ways to go about it. This isn't drag and drop, mind you, but it is pretty simple.
The server gives four virtual drive slots to play with. You access these by typing DRIVE#n, where n is 0-3. Each slot is filled with a .dsk image on your PC. Insert a blank .dsk image in one of the slots and you can save to, load from, and format up to 255 floppy disks per drive. You can also turn selected disks on or off, but only from 0 to n, where n is the last disk you want off. So:
DRIVE OFF 2 turns off disks 0,1, and 2, or DRIVE OFF 0 turns of disk 1, etc. DRIVE OFF with no number designation just complete turns off access to the hard drives. DRIVE ON turns them back on, of course.
When a selected disk is off, the corresponding floppy is on. So if you type DRIVE OFF 0 the hard drive disk 0 (DRIVE 0 DISK 0) is off and the real floppy disk 0 hooked up to your CoCo is on. This is useful for copying files back and forth with the BACKUP or COPY commands.
Just remember that the DRIVE command a) switches which .dsk image is being access (0-3) from the server (ie. DRIVE#0) and b) when issued with the OFF/ON switch, selects which virtual floppy is on or off (DRIVE#0, DRIVE OFF 0, would turn off access to the virstual disk 0 on virtual drive 0 and turn on the real floppy drive 0).
As an example, to copy a disk from the CoCo to the PC:
Step 1. Mount a blank .dsk image in Drive 0 of the server on your PC (you can make one with MESS).
Step 2. Type DRIVE#0 to switch to the virtual drive 0 (this is the default).
Step 3. Type DRIVE OFF 0 to turn off virtual disk 0 on drive 0 and turn on floppy drive 0 connected to your CoCo.
Step 4. Insert your floppy into the CoCo's floppy disk drive 0 and type BACKUP 0 TO 1
The DriveWire and HDB-DOS will then transfer the contents of the real floppy to the virtual disk 1 in the drive 0 slot. It is then helpful (if you want to share around the .dsk image) to type:
Step 5. DRIVE ON to turn off the real floppy drive and activate all the disks in Drive 0 of the virtual drive.
Step 6. BACKUP 1 TO 0 to copy the contents of (virtual) disk 1 to disk 0. That just makes sure what you're copying is, by default, on the disk 0, which is where most people would look for it first and make sure it'll work in an emulator, for example.
Reverse the BACKUP command procedure to copy from the PC to a blank CoCo floppy disk. Took some getting my head around the conceptual thing that's working here when copying from hard drive to floppy drive, but once I got it, I was copying stuff back and forth with ease.
Of course, the main use for the DriveWire is to load and save programs and data on your PC directly to and from the CoCo. For this task, DriveWire is brilliant. No real special commands are needed. Virtual Drive 0, Disk 0 is your default drive. Switching is as easy as addressing the right disk when you need it. All of which is clearly laid out in the HDB-DOS manual.
Like I said, if all you want to do is add mass storage to your CoCo, DriveWire is ideal. The price can't be beat and it's a slick, easy solution.
Angel's Luck,
Capt
Saturday, November 04, 2006
Pimp My CoCo: Horray! A little progress...
Finally got an hour or so to work on the CoCo again. Hooray for our side. So, since it's been going slow, figured I'd post an update. Sorry, no blood, gore, or burned body parts this time. I'll try harder... :P
(Click 'em for the bigguns)
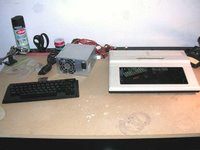 Okay, after a bit of clean up, here's what we've got so far. Top half of the case is about done. Just needs some sanding (see below) a good scrubbing and paint. The keyboard was pretty easy and looks downright wicked. Solid black. Real men don't need letters on their keys. Grunt, grunt, grunt. heh... Actually, at some point we'll do decals on them. Probably a dark, hard to see grey. Yeah.
Still studying on the power suppply. No idea how this is going to work. The one sitting there I got on sale at newegg.com and it doesn't have one of those little switches on the back. Not sure how that works. I'm assuming I'll have to locate the lines that hook up to the power button (via the mainboard) on a PC and wire a switch to it. I do have this cool retro metal SPST flip switch that would go nicely. Still, my track record with eletricity, particularly anything that plugs into the wall, is spotty... at best.
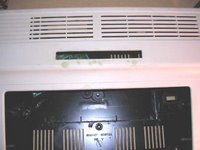 The mainboard will be different one than the one I'm working on. I figure I'll have another go at socketing it for upgrade at some point, but for now, I really want to get the machine up and running with all the goodies installed.
The fan is out, for the moment, but it IS going in. A single fan relocated to the left hand side and blowing across the board. Since I've run out of time for the top windows, I'll just leave the grill. I still have another case, so we'll do the big top fan on that one in the Spring. All ready dreaming the paint scheme for that one (two tone, this time) but... let's not get ahead of ourselves... any further ahead, that is.
There's a shot of "casebadge" window, by the way. I still haven't figured out how to put the plexiglass in there without making a mess with glue, but I've got a couple of ideas. Directly beneath that will be a wave light bar in green. Makes it look like some evil green liquid is running through the case (I've used the blue and red versions before on PCs and they're freakin' awesome). Plus a couple of other surprises to make up for dropping a few of the other original plans. ;)
 This is the best shot I could get of the keyboard. Heavily edited, but that's pretty close to what it looks like. Though not quite as shiney under normal lighting. Have to note that when I take pictures of the finished machine. No flash. Use big lights.
I really like the way this one is shaping up. True it may be Spring before it's completely finished, though part of that is fundage. Something about buying gifts for the holiday, or something. Sheesh! What greater gift could there be than a hot new CoCo! Kids love 'em! Sorta....
 Okay, so tips. One, as the thermometer shows, it's getting pretty darn close to the cutoff point for model work in the outside lab. Paint and glue start getting freaky at about 60F and worthless below 50F. That's the high today, though this week we're s'pose to stay right around there, so I'll be craming in as much as I can.
The Krylon Fusion paint, at this temp (and negligible humidity), took about an hour to set up. That's opposed to 15 minutes normally. Milliput is also acting much slower, though when filling those holes I gouged in the case, I did place it under a lamp to speed it up a bit. I know I go on about temperature and humidity a lot, but... well, I paint a lot. A clean spot and the right weather is pretty much essential for a perfect paint job.
Also, get some of those smaller, but really deep, C-clamps and a nice 12" metal straight edge. The clamp heads shouldn't be more than 3/8ths, with a jam opening at least 2" and about 2"-3" depth. I cut the hole a little bit bigger than the original case badge, at 5"x1/2". Some of the oversized sanding pads for the Dremel tool are handy, too, which makes it easier to get in there (without routing holes in the case by accident like I did). The case is 1/8th of an inch thick. The CoCo 3's front is curved and clamping a straightedge on to sand in a straight line is a bitch. The right clamps will make it much easier.
 While I'm at it, thought I'd take a mini-tour of the lab. Well, not so much because it's a mess, but...
Every Spring I clean this thing out and it's spotless and beautifully organized. And by fall there's crap all over the place. Looks like day five of a geek convention (but not as smelly, thank God). So I tried to clean up a bit today, but didn't get too far.
Good power is essential, but household power is just so-so. Actually, where I live, it's been rock solid. No brownouts and only a couple of blackouts during really bad storms. And then only for a couple of minutes. This box is a deluxe industrial breaker that'll stop just about anything. I hate it when things catch on fire, so best to get the best. :D I find all sorts of crap when I'm out and about and it kind of accumulates on the walls. Hmmm... looking at the picture, I forgot to reset that one for the end of daylight savings. Doah. The plaque was given to me by my grandmother, I didn't buy that myself. Sheesh.
 Ah, the Evil Lab Men's Room. (Side door to the garage.) Hey, when you gotta go...
The sign I picked up in New Orleans awhile back. Never hurts to warn visitors of the perils they may face.
Recent aquisitions include a giant pirate flag and a Pirates of the Carribean display from the store. Have to hang those soon.
 Big pile o' CoCos. There's an Atari 800XL in there as well. Good machine. It's no CoCo, mind you, but some cool games for it. And no, none of the collectible stuff is in this pile. Collectible stuff goes in big rubber bins and is stored indoors. :)
Let's see, there's a busted grey multipak. That 26-3022 disk drive doesn't seem to want to spin up. Ah, and the Tano Dragon is in there. No power supply for it, though, so I've never even fired it up. Have to figure that out at some point.
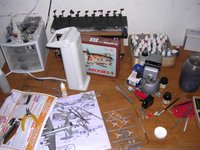 Part of the model/miniature work shop. What a mess. The B-17 model (The Bit O' Lace) goes in the bottom of a PC case I'm working on. Seriously. A whole B-17 theme going on that one, including a round see-through panel on one side and a big nose art pin-up on the other. Should be fun looking when it's done.
All those paints have to go inside before winter. And I see a nice batch of Games Workshop Space Marines that need finishing off. That vice in the center, by the way, is the ingenius and can't-live-without Panavise. For working on just about anything fairly small. Holds miniatures, models and circuit boards, and you can twist and turn it to any position. Literally. Truely one of the most necessary tools I have.
I'll take a bigger shot of the lab and a better tour in the spring when it's actually presentable. :)
Angel's Luck,
Capt.
(Click 'em for the bigguns)
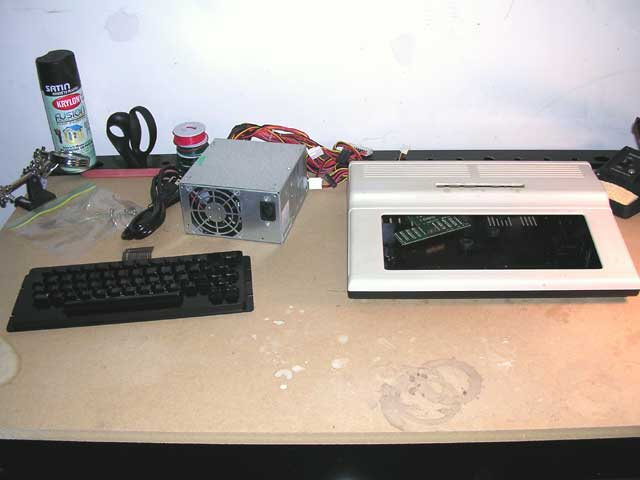 Okay, after a bit of clean up, here's what we've got so far. Top half of the case is about done. Just needs some sanding (see below) a good scrubbing and paint. The keyboard was pretty easy and looks downright wicked. Solid black. Real men don't need letters on their keys. Grunt, grunt, grunt. heh... Actually, at some point we'll do decals on them. Probably a dark, hard to see grey. Yeah.
Still studying on the power suppply. No idea how this is going to work. The one sitting there I got on sale at newegg.com and it doesn't have one of those little switches on the back. Not sure how that works. I'm assuming I'll have to locate the lines that hook up to the power button (via the mainboard) on a PC and wire a switch to it. I do have this cool retro metal SPST flip switch that would go nicely. Still, my track record with eletricity, particularly anything that plugs into the wall, is spotty... at best.
 The mainboard will be different one than the one I'm working on. I figure I'll have another go at socketing it for upgrade at some point, but for now, I really want to get the machine up and running with all the goodies installed.
The fan is out, for the moment, but it IS going in. A single fan relocated to the left hand side and blowing across the board. Since I've run out of time for the top windows, I'll just leave the grill. I still have another case, so we'll do the big top fan on that one in the Spring. All ready dreaming the paint scheme for that one (two tone, this time) but... let's not get ahead of ourselves... any further ahead, that is.
There's a shot of "casebadge" window, by the way. I still haven't figured out how to put the plexiglass in there without making a mess with glue, but I've got a couple of ideas. Directly beneath that will be a wave light bar in green. Makes it look like some evil green liquid is running through the case (I've used the blue and red versions before on PCs and they're freakin' awesome). Plus a couple of other surprises to make up for dropping a few of the other original plans. ;)
 This is the best shot I could get of the keyboard. Heavily edited, but that's pretty close to what it looks like. Though not quite as shiney under normal lighting. Have to note that when I take pictures of the finished machine. No flash. Use big lights.
I really like the way this one is shaping up. True it may be Spring before it's completely finished, though part of that is fundage. Something about buying gifts for the holiday, or something. Sheesh! What greater gift could there be than a hot new CoCo! Kids love 'em! Sorta....
 Okay, so tips. One, as the thermometer shows, it's getting pretty darn close to the cutoff point for model work in the outside lab. Paint and glue start getting freaky at about 60F and worthless below 50F. That's the high today, though this week we're s'pose to stay right around there, so I'll be craming in as much as I can.
The Krylon Fusion paint, at this temp (and negligible humidity), took about an hour to set up. That's opposed to 15 minutes normally. Milliput is also acting much slower, though when filling those holes I gouged in the case, I did place it under a lamp to speed it up a bit. I know I go on about temperature and humidity a lot, but... well, I paint a lot. A clean spot and the right weather is pretty much essential for a perfect paint job.
Also, get some of those smaller, but really deep, C-clamps and a nice 12" metal straight edge. The clamp heads shouldn't be more than 3/8ths, with a jam opening at least 2" and about 2"-3" depth. I cut the hole a little bit bigger than the original case badge, at 5"x1/2". Some of the oversized sanding pads for the Dremel tool are handy, too, which makes it easier to get in there (without routing holes in the case by accident like I did). The case is 1/8th of an inch thick. The CoCo 3's front is curved and clamping a straightedge on to sand in a straight line is a bitch. The right clamps will make it much easier.
 While I'm at it, thought I'd take a mini-tour of the lab. Well, not so much because it's a mess, but...
Every Spring I clean this thing out and it's spotless and beautifully organized. And by fall there's crap all over the place. Looks like day five of a geek convention (but not as smelly, thank God). So I tried to clean up a bit today, but didn't get too far.
Good power is essential, but household power is just so-so. Actually, where I live, it's been rock solid. No brownouts and only a couple of blackouts during really bad storms. And then only for a couple of minutes. This box is a deluxe industrial breaker that'll stop just about anything. I hate it when things catch on fire, so best to get the best. :D I find all sorts of crap when I'm out and about and it kind of accumulates on the walls. Hmmm... looking at the picture, I forgot to reset that one for the end of daylight savings. Doah. The plaque was given to me by my grandmother, I didn't buy that myself. Sheesh.
 Ah, the Evil Lab Men's Room. (Side door to the garage.) Hey, when you gotta go...
The sign I picked up in New Orleans awhile back. Never hurts to warn visitors of the perils they may face.
Recent aquisitions include a giant pirate flag and a Pirates of the Carribean display from the store. Have to hang those soon.
 Big pile o' CoCos. There's an Atari 800XL in there as well. Good machine. It's no CoCo, mind you, but some cool games for it. And no, none of the collectible stuff is in this pile. Collectible stuff goes in big rubber bins and is stored indoors. :)
Let's see, there's a busted grey multipak. That 26-3022 disk drive doesn't seem to want to spin up. Ah, and the Tano Dragon is in there. No power supply for it, though, so I've never even fired it up. Have to figure that out at some point.
 Part of the model/miniature work shop. What a mess. The B-17 model (The Bit O' Lace) goes in the bottom of a PC case I'm working on. Seriously. A whole B-17 theme going on that one, including a round see-through panel on one side and a big nose art pin-up on the other. Should be fun looking when it's done.
All those paints have to go inside before winter. And I see a nice batch of Games Workshop Space Marines that need finishing off. That vice in the center, by the way, is the ingenius and can't-live-without Panavise. For working on just about anything fairly small. Holds miniatures, models and circuit boards, and you can twist and turn it to any position. Literally. Truely one of the most necessary tools I have.
I'll take a bigger shot of the lab and a better tour in the spring when it's actually presentable. :)
Angel's Luck,
Capt.
Subscribe to:
Posts (Atom)